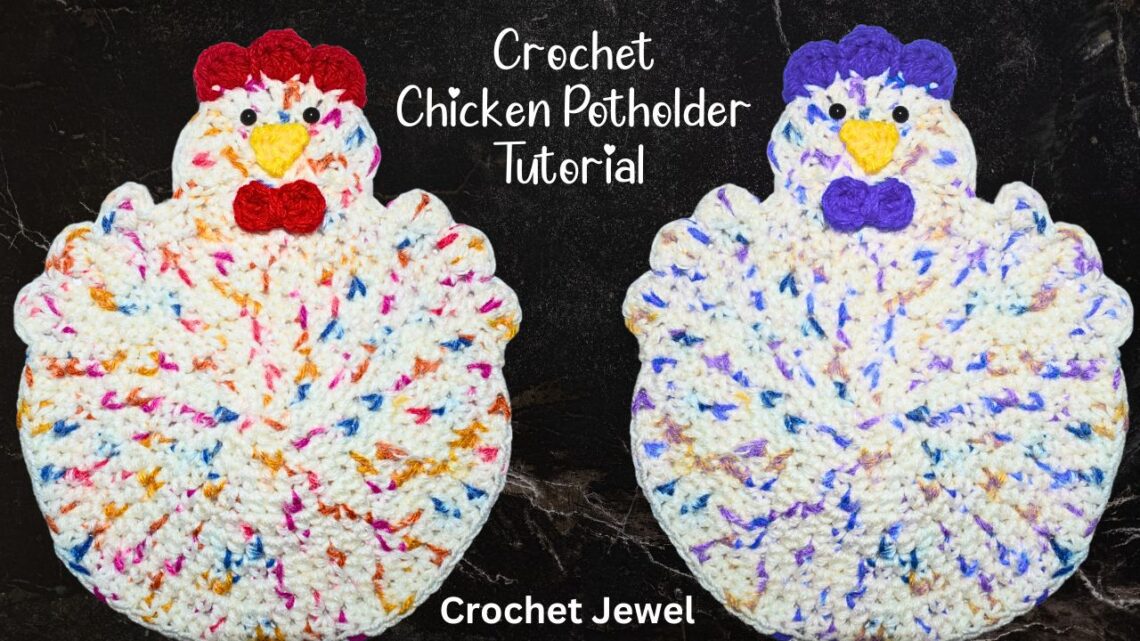
Crochet Chicken Potholder: Perfect for Chicken Lovers

Crochet Chicken Potholder
If you’re a crochet enthusiast and a fan of farm animals, you’ll love making this charming chicken potholder. Using cotton yarn and a variety of colors, this project is not only a delightful way to add a bit of whimsy to your kitchen but also a great gift idea for chicken lovers. In this guide, we’ll walk you through the steps to create a unique chicken potholder featuring a broody hen design. Whether you’re a seasoned crocheter or just starting out, this project will help you develop your skills while making something both functional and fun.
To get started, you’ll need a few materials: cotton yarn in various colors (such as brown, yellow, and red), a size G (4.5 mm) crochet hook, a tapestry needle, and stitch markers. The project begins with making two identical chicken bodies using single crochet stitches. Start by creating a magic circle or a chain 2 with your chosen yarn and follow the chicken potholder pattern to form flat circles for the body. As you work, use a stitch counter to keep track of your rows and ensure symmetry.
This post contains affiliate links. If you purchase through these links, I may earn a modest commission at no extra cost. Please review my privacy policy for more details.
This pattern is copyrighted by Amy Lehman. Please do not copy or duplicate this pattern. You are welcome to link back to my pattern, but do NOT post the pattern on your website. Thank you for respecting my work!
✨ We hope you enjoyed these photos! If so, please consider sharing them on Pinterest by clicking the Pin Button on each image. Your support helps us connect with more people and spread creativity. Thank you so much! 💖
Abbreviations:
dc=double crochet
ch=chain
sc=single crochet
sl st=slip stitch
hdc=half double crochet
2sctog= 2 single crochet together decrease
Materials:
Click the Links for Your Materials
All Colors of Yarn Click Here
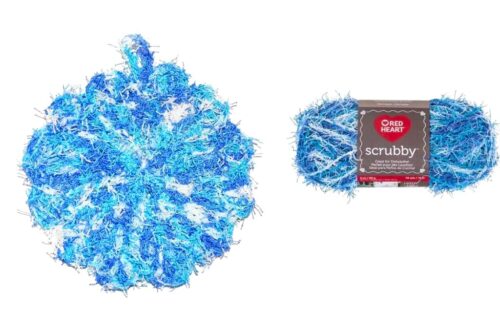
Fleck Yarn
- Googly eyes
- Crochet hook
- Tapestry needle
- Stitch marker
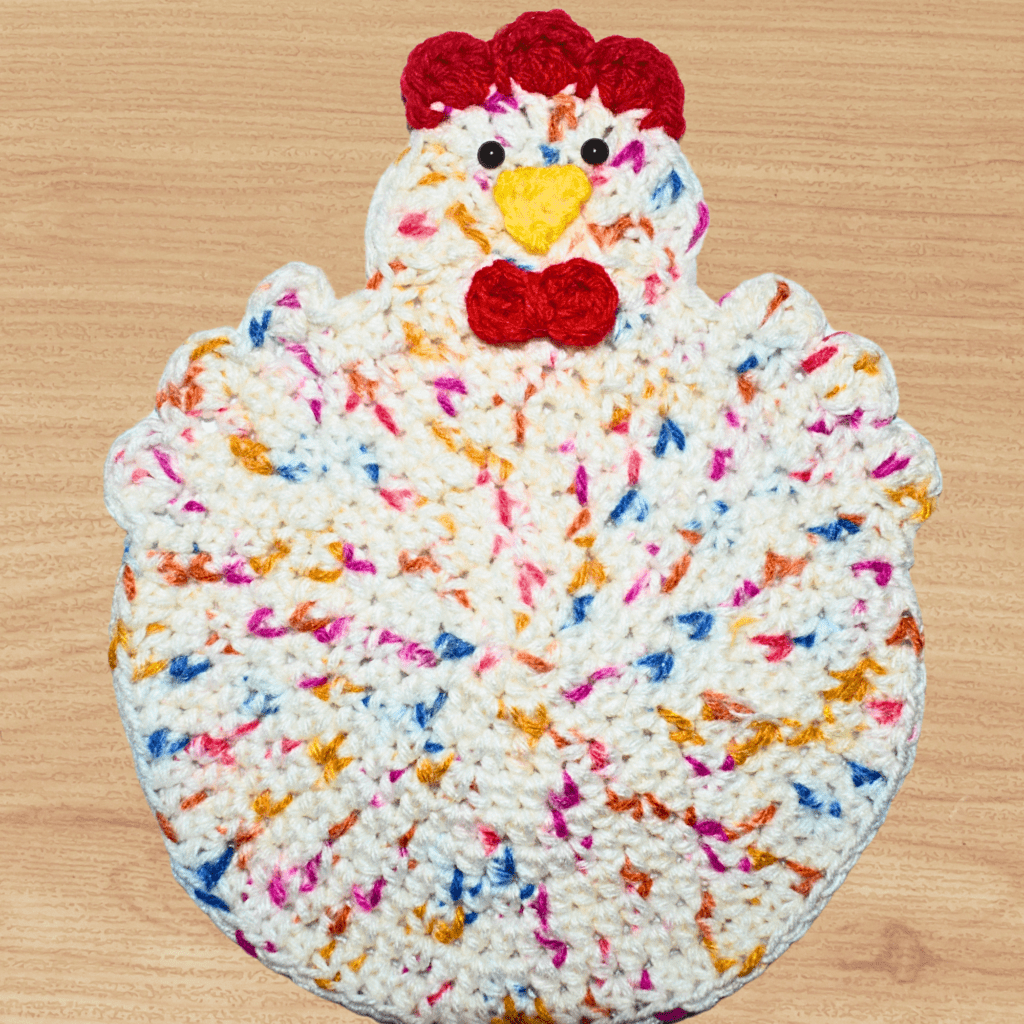
Measures 8.5 inches tall and 6.5 inche wide
G, F, and E Hook
I used multi colored red heart yarn
G Hook for the body of the Chicken
Rnd 1: ch 2, work 8 hdc in the 2nd chain from the hook, sl st — 8 hdc
Rnd 2: 2 hdc in each st around, work in continual rounds — 16 hdc
Rnd 3: *1 hdc, 2 hdc in the next stitch, *Repeat around — 24 hdc
Rnd 4: *1 hdc in next 2 hdc, 2 hdc in the next stitch, *Repeat around — 32 hdc
Rnd 5: *1 hdc in next 3 hdc, 2 hdc in the next stitch, *Repeat around — 40 hdc
Rnd 6: *1 hdc in next 4 hdc, 2 hdc in the next stitch, *Repeat around — 48 hdc
Rnd 7: *1 hdc in next 5 hdc, 2 hdc in the next stitch, *Repeat around — 56 hdc
Rnd 8: *1 hdc in next 6 hdc, 2 hdc in the next stitch, *Repeat around — 64 hdc
Rnd 9: *1 hdc in next 7 hdc, 2 hdc in the next stitch, *Repeat around — 72 hdc
Rnd 10: *1 hdc in next 8 hdc, 2 hdc in the next stitch, *Repeat around — 80 hdc
Head
Continue on with the Head, sl st
Row 1: (All in the same stitch, sl st, ch 2, 5 dc) skip 2, sl st in the next stitch. Turn — 6 dc
Row 2: 2 dc in each stitch, skip 2 sts, sl st in next st, Turn ‑12 dc
Row 3: dc, 2 dc in the next stitch, skip 2 sts, sl st in next st. Fasten off. Weave in your ends. — 18 dc
Wings
Conintue on from the Head, sl st in next 3 sts, *ch 2, 3 dc, sl st next 2 sts, 4 dc, sl st in next 2 sts, 4 dc, sl st. Fasten Off and Weave in your ends.
Repeat on the opposite side to make another set of wings, skip 3 stitches from the head, *Repeat
Header Topper
G hook, Red yarn
On the Head in the 5th stitch, sl st, *4 dc, sl st, *Repeat for two more times
Beak
E hook, Yellow yarn, ch 4, sc in 2nd chain, next 2 chs, turn, sc in next 2 sts, turn, 2sctog, Fasten off, Weave in your ends.
Bow
E hook, Red yarn, ch 3, 3 dc in the 3rd chain from the hook, ch 2, sl st, ch 2, 3 dc, ch 2, sl st, Fasten off. Take about half foot long of yarn and wrap it around the center. Then cut and tie the yarn in the back.
Eyes: Make dash lines above beak or hot glue small eyes on above the beak.
Assembly: Sew or hot glue gun the beak under the eyes and the bow under the beak.
The main parts of the chicken include the breast area, top of the body, and the curved bottom. Begin by crocheting the breast of the chicken with brown yarn and then move on to the top of the body with yellow yarn for a vibrant look. Incorporate black yarn for the eyes and beak, and don’t forget to use a slip stitch to close any gaps.
Once the main parts are completed, join the chicken bodies together using a series of single crochet stitches and slip stitches. Pay attention to the scallops of the bottom to add a decorative touch and ensure a snug fit. The final steps involve finishing with a shell row and securing any yarn tails with a tapestry needle.

Click Here for More Crochet Amigurmi Patterns
Creating a crochet chicken potholder is a rewarding and enjoyable project that combines creativity with practicality. The use of cotton yarn ensures greater stability and durability, making it perfect for kitchen use. By following the pattern and paying attention to each detail, you’ll end up with a delightful and functional piece that’s sure to be a hit. Whether you’re making it for yourself or as a gift, this potholder is a great way to showcase your love for farm animals and crochet. Happy crocheting, and don’t forget to share your finished project and photos with fellow crafters!
To Find All My Crochet Jewel Patterns, Click Here

Click Here for My Ravelry Patterns


You May Also Like
A Step-by-Step Guide to Crocheting a Grocery Bag Holder

Create a Stylish Crochet Towel Holder: Step-by-Step Tutorial