Learn How to Crochet a Basket Weave Washcloth Tutorial
How to Crochet a Basket Weave Washcloth
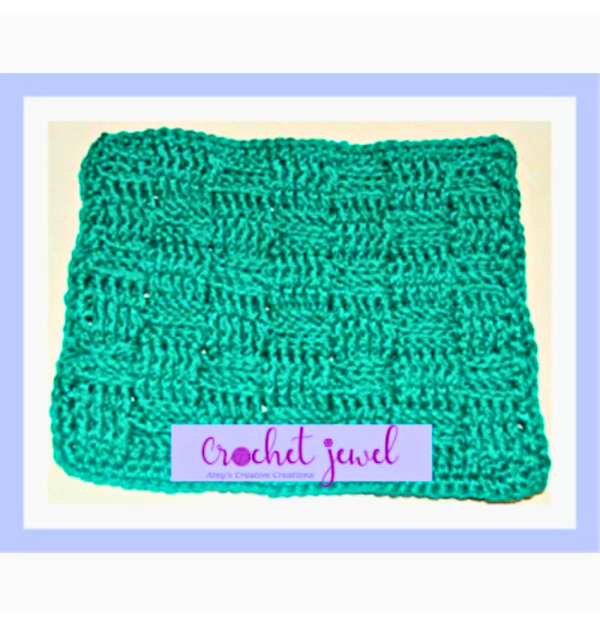
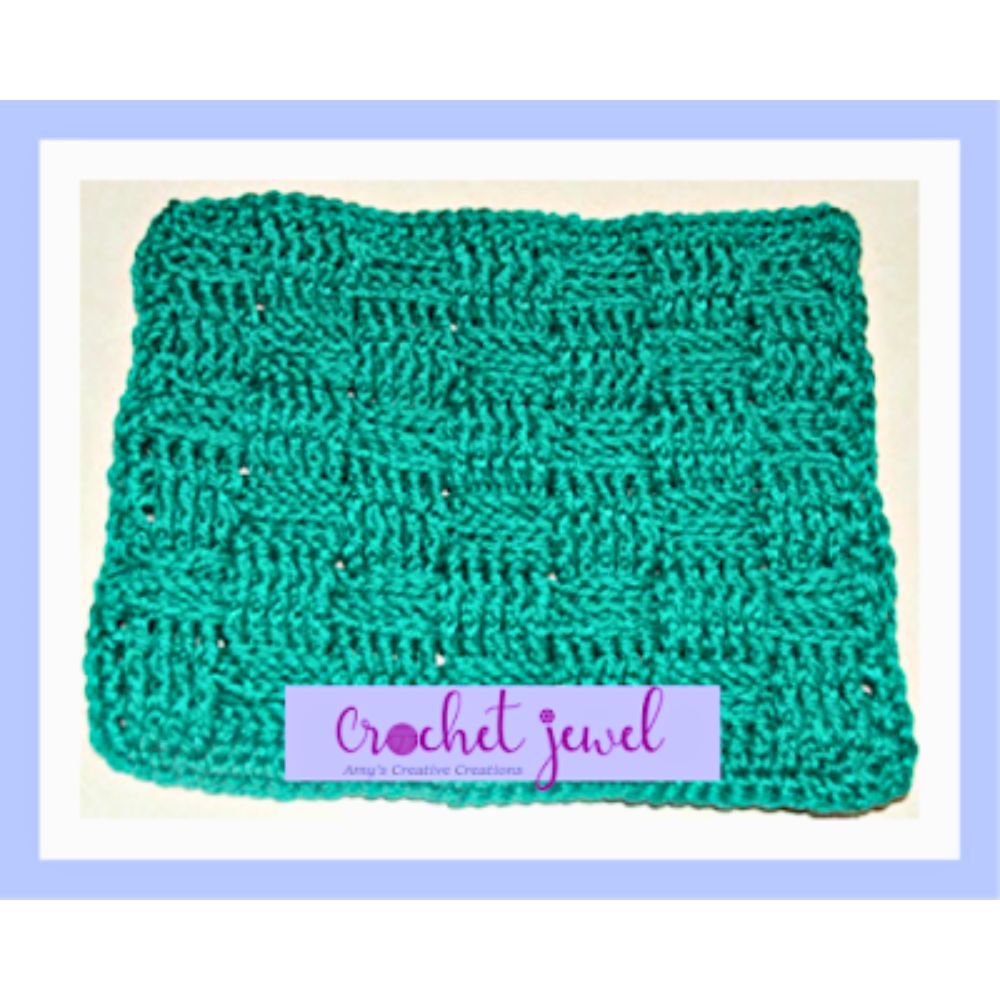
Elevate your bathtime experience with the cozy and luxurious Crochet Basket Weave Washcloth! Perfect for pampering yourself or gifting to loved ones, this washcloth combines functionality with beauty, adding a touch of elegance to your daily routine.
The basket weave stitch pattern creates a textured and durable fabric that is pleasing to the eye and provides excellent scrubbing power. Whether washing your face, gently exfoliating your skin, or adding a decorative touch to your bathroom, this washcloth is both practical and stylish.
You’ll find affiliate links within this post. If you decide to purchase through these links, I may earn a modest commission at no extra cost. Additionally, please review my privacy policy for more details.
✨ We hope you enjoyed these photos! If so, please consider sharing them on Pinterest by clicking the Pin Button on each image. Your support helps us connect with more people and spread creativity. Thank you so much! 💖
- To start this crochet project, you’ll need basic supplies, including worsted-weight cotton yarn, a size H (5.0 mm) crochet hook, and a yarn needle.
- The washcloth features a lovely basket weave stitch pattern that provides great texture, making it an excellent choice for scrubbing and softness.
- This pattern is perfect for beginner crocheters. You’ll begin with a foundation chain and then work the first stitch using a single crochet.
- The pattern will guide you through creating the textured basket weave using slip stitch and double crochet stitches. We’ll explain the back loop, turning chain, and other important aspects simply.
Click the Links for Your Materials
H Hook
Yarn needle
sc=single crochet
sl st=slip stitch
ch=chain
fpdc=front post double crochet
bpdc=back post double crochet
Row 1: Dc in the 4th chain from the hook, dc in each chain across, ‑25 dc
Row 2: chain 2, fpdc in the first 5 dc, bpdc in the next 5 dc, fpdc in the next 5, bpdc in the next 5, fpdc in the last 5 dc, Turn
Row 3: chain 2, bpdc in the first 5 dc, fpdc in the next 5 dc, bpdc in the next 5, fpdc in the next 5, bpdc in the last 5 dc, Turn
Row 4: chain 2, fpdc in the first 5 dc, bpdc in the next 5 dc, fpdc in the next 5, bpdc in the next 5, fpdc in the last 5 dc, Turn
Now those first rows 2–4 will create a checkered square effect. Now to create new squares you will need start this next pattern, and so forth.
Row 5: chain 2, fpdc in the first 5 dc, bpdc in the next 5 dc, fpdc in the next 5, bpdc in the next 5, fpdc in the last 5 dc, Turn
Row 6: chain 2, bpdc in the first 5 dc, fpdc in the next 5 dc, bpdc in the next 5, fpdc in the next 5, bpdc in the last 5 dc, Turn
Row 7: chain 2, fpdc in the first 5 dc, bpdc in the next 5 dc, fpdc in the next 5, bpdc in the next 5, fpdc in the last 5 dc, Turn
Now you finished the 2nd rows of checkered squares, now you will continue on to create more.
Row 8: chain 2, fpdc in the first 5 dc, bpdc in the next 5 dc, fpdc in the next 5, bpdc in the next 5, fpdc in the last 5 dc, Turn
Row 9: chain 2, bpdc in the first 5 dc, fpdc in the next 5 dc, bpdc in the next 5, fpdc in the next 5, bpdc in the last 5 dc, Turn
Row 10: chain 2, fpdc in the first 5 dc, bpdc in the next 5 dc, fpdc in the next 5, bpdc in the next 5, fpdc in the last 5 dc, Turn
More Squares finished.
Row 11: chain 2, fpdc in the first 5 dc, bpdc in the next 5 dc, fpdc in the next 5, bpdc in the next 5, fpdc in the last 5 dc, Turn
Row 12: chain 2, bpdc in the first 5 dc, fpdc in the next 5 dc, bpdc in the next 5, fpdc in the next 5, bpdc in the last 5 dc, Turn
Row 13: chain 2, fpdc in the first 5 dc, bpdc in the next 5 dc, fpdc in the next 5, bpdc in the next 5, fpdc in the last 5 dc, Turn
More Squares finished.
Row 14: chain 2, fpdc in the first 5 dc, bpdc in the next 5 dc, fpdc in the next 5, bpdc in the next 5, fpdc in the last 5 dc, Turn
Row 15: chain 2, bpdc in the first 5 dc, fpdc in the next 5 dc, bpdc in the next 5, fpdc in the next 5, bpdc in the last 5 dc, Turn
Row 16: chain 2, fpdc in the first 5 dc, bpdc in the next 5 dc, fpdc in the next 5, bpdc in the next 5, fpdc in the last 5 dc, Turn
More Squares finished.
Row 17: chain 2, fpdc in the first 5 dc, bpdc in the next 5 dc, fpdc in the next 5, bpdc in the next 5, fpdc in the last 5 dc, Turn
Row 18: chain 2, bpdc in the first 5 dc, fpdc in the next 5 dc, bpdc in the next 5, fpdc in the next 5, bpdc in the last 5 dc, Turn
Row 19: chain 2, fpdc in the first 5 dc, bpdc in the next 5 dc, fpdc in the next 5, bpdc in the next 5, fpdc in the last 5 dc, Turn
You can create more squares with this pattern or fasten off. I did a single crochet around the border.
Print the Entry on the top of the page to print the pattern!
- This washcloth pattern includes the “moss stitch” or “lemon peel stitch” for added interest. It’s a quick project, making it a fantastic first crochet project for those looking to try new stitches.
- Throughout the article, you’ll find explanations and tips to help you master the technique. We’ve even included a guide on repeating rows for larger or smaller washcloths.
In conclusion, this free crochet washcloth pattern is an excellent way for beginner crocheters to learn basic stitches and create a functional and beautiful project. With different color options, you can personalize your washcloths to match your kitchen or make them great gifts for friends and family.
To Find All My Crochet Jewel Patterns, Click Here
Click Here for My Ravelry Patterns
Crochet Hats for Beginners Book For Sale — Click Here
Crochet For Beginners Book for Sale — Click Here


