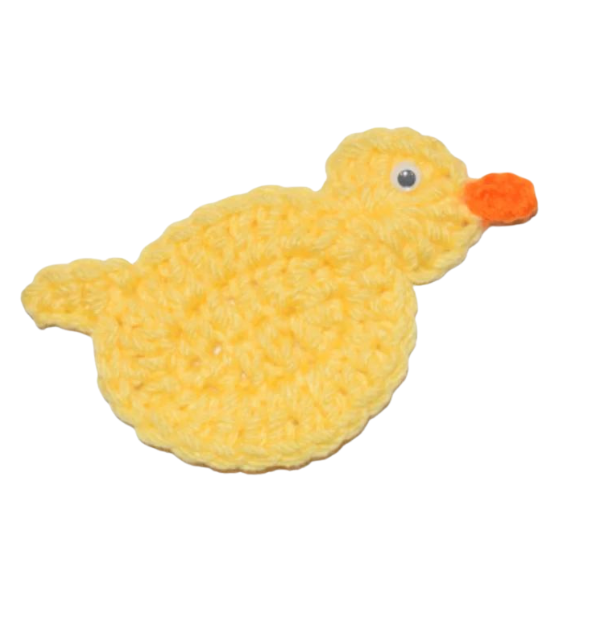
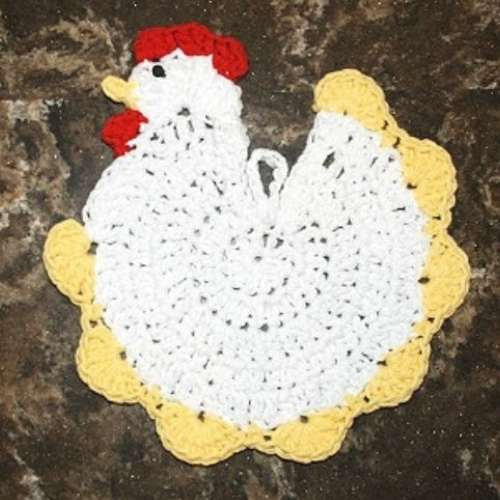
How to Crochet an Easy Chicken Applique Tutorial
by Amy Lehman | November 17, 2023 5:04 am
How to Crochet a Chicken Applique
Welcome to the delightful world of crochet, where we’ll embark on an enchanting journey to create a charming crochet bird applique—specifically, an adorable chicken! This step-by-step tutorial is designed for crocheters of all skill levels, from beginners to seasoned crafters. With clear instructions and helpful tips, you’ll soon find yourself immersed in the joy of crafting your very own crochet bird applique.
To begin, gather basic supplies, including a crochet hook (size in mm), worsted weight yarn in your primary color, safety eyes for that lifelike touch, and a long tail for easier access. We’ll kick off our project with the magic ring, a technique that sets the foundation for our little bird’s body. The magic circle ensures a seamless start, allowing you to control the tightness of your stitches.
You’ll find affiliate links within this post. If you decide to purchase through these links, I may earn a modest commission at no extra cost. Additionally, please review my privacy policy[1] for more details.
✨ We hope you enjoyed these photos! If so, please consider sharing them on Pinterest by clicking the Pin Button on each image. Your support helps us connect with more people and spread creativity. Thank you so much! 💖
Click the Links for Your Materials
All Colors of Yarn Click Here[2]
Orange Medium Worsted Yarn
- Crochet hook
- Tapestry needle
- Stitch marker
Abbreviations:
ch=chain
sc=single crochet
sl st=slip stitch
dc=double crochet
Rnd 1: ch 6, sc in the second chain from the hook, hdc in the next chain, dc in the next three stitches, 5 dc in the last chain, Working on the opposite side
Print the entry at the top of the page to print the pattern!
Moving on, engage your crochet skills by incorporating stitches such as double crochet (dc), single crochet (sc), slip stitch (sl st), and treble crochet, creating the intricate details that bring your crochet chicken to life. Watch as your project takes shape with each stitch, and don’t forget to utilize stitch markers to keep track of essential points in your pattern.
Click Here for the Chicken Potholder Pattern
For the finishing touches, add facial features, such as safety eyes and a charming beak, to infuse personality into your creation. Experiment with different yarn colors to achieve a vibrant and playful look for your chicken applique. Whether you’re a beginner crocheter or an experienced hand, the detailed instructions and video tutorial provided will quickly guide you through the process.
Delve into the crochet world with our captivating tutorial on crafting a charming crochet bird applique featuring a delightful little bird. With step-by-step instructions and a helpful video tutorial, even beginners can confidently embark on this crochet project. Armed with a crochet hook of a specified size, worsted weight yarn in your chosen color palette, and safety eyes for that lifelike gaze, you’ll initiate the magic ring technique to set the stage for your crochet masterpiece. As you progress, utilize essential stitches like slip stitch (sl st), and double crochet, ensuring your small bird takes shape seamlessly. Accentuate your creation with safety eyes and facial features, making your finished item come alive with personality. This free pattern opens the door to a world of creativity, allowing you to experiment with different colors and sizes to achieve a new look for your crochet bird applique. Happy crocheting!
Congratulations on completing your crochet chicken applique! We hope this pattern has brought joy to your crafting journey. Feel free to explore our collection of crochet bird patterns for more inspiration. If you enjoyed this project, share your finished item on social media and encourage others to join the fun. Happy crocheting!
To Find All My Crochet Jewel Patterns, Click Here

Click Here for My Ravelry Patterns


Crochet Hats for Beginners Book For Sale — Click Here

Crochet For Beginners Book for Sale — Click Here
- privacy policy: https://amysdiyfrugallife.com/privacy-policy/
- All Colors of Yarn Click Here: https://amzn.to/3C32rNX
- [Image]: https://www.ravelry.com/people/amray767
- [Image]: https://www.awin1.com/cread.php?awinmid=6220&awinaffid=470125&platform=dl&ued=https%3A%2F%2Fwww.etsy.com%2Fshop%2FAmyCreativeCreations%3Fref%3Dseller-platform-mcnav
- [Image]: https://amzn.to/2ILFrGN
- [Image]: https://amzn.to/2HVIis6
Source URL: https://amysdiyfrugallife.com/how-to-crochet-a-chicken-applique-tutorial/


