Crochet an Easy Doily Coaster: Step-by-Step Tutorial
by Amy | October 16, 2023 11:21 pm
How to Crochet a Doily Coaster
Crocheting doily coasters elevate your table setting with a touch of vintage elegance. Whether you’re hosting a tea party, setting the table for a special occasion, or adding a charming accent to your home decor, crochet doily coasters are a beautiful and practical way to protect your surfaces while adding a touch of handmade charm.
In this guide, we’ll explore how to crochet a doily coaster step by step, from selecting the perfect yarn colors to mastering the intricate stitches and techniques needed to create these delicate yet durable accessories. Whether you’re a seasoned crocheter or a beginner looking for a fun and rewarding project, this pattern is designed to be accessible and enjoyable for crafters of all skill levels.
Within this post, you’ll find affiliate links. If you decide to purchase through these links, I may earn a modest commission at no extra cost. Additionally, please review my privacy policy[1] for more details.
✨ We hope you enjoyed these photos! If so, please consider sharing them on Pinterest by clicking the Pin Button on each image. Your support helps us connect with more people and spread creativity. Thank you so much! 💖
When starting your doily coaster project, you’ll need a few essential supplies, including cotton yarn in various colors. Cotton yarn is an ideal choice as it’s both practical and versatile. To create this delightful set of coasters, you’ll also want to use worsted-weight yarn. The patterns in this guide use basic stitches, which are perfect for beginner crocheters and those looking for a simple crochet coaster pattern. Crocheting a magic ring is a great way to begin your coaster, ensuring a tight and neat center. As you work through the rounds, remember to use a stitch marker to keep track of your stitches.
Click the Links for Your Materials
All Colors of Yarn Click Here[2]
- Crochet hook
- Tapestry needle
- Stitch marker
Abbreviations:
ch=chain
sc=single crochet
sl st=slip stitch
dc=double crochet
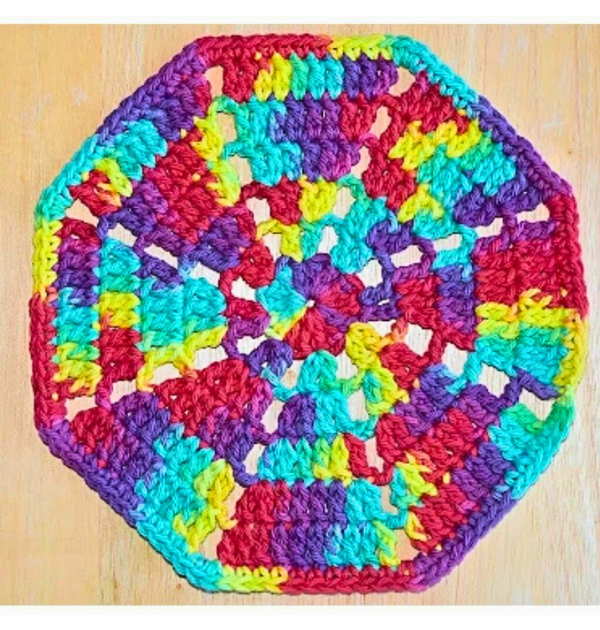
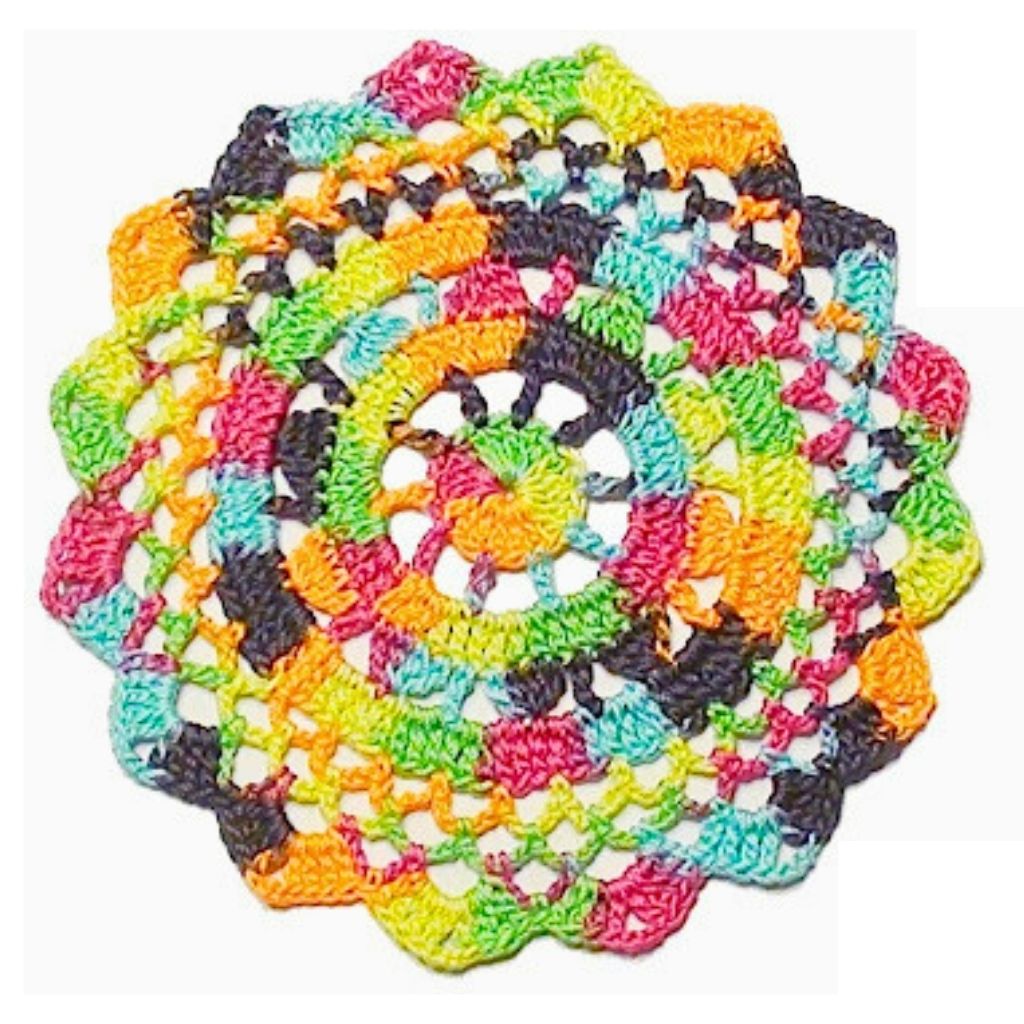
This Coaster planter measures about 8 inches when finished. I used cotton yarn and an I hook. You can always make this more prominent with a larger hook size, or you can make it smaller by stopping a few rounds or using a smaller hook size. This pattern can be used for a coaster or planter, depending on how big you make it. In this crochet doily coaster tutorial, we’ll show you how to make a coaster from start to finish! This coaster tutorial is perfect for anyone looking to learn how to make a crochet doily coaster. We’ll walk you through the entire process, from beginning to end, and teach you everything you need to know to create a beautiful coaster in no time! So watch this tutorial and learn how to make a crochet doily coaster in no time!
Rnd 1: In the Magic Circle, Chain 3, work 15 dc in the ring. ‑16 dc
Rnd 2: Ch 3, work dc in the same stitch, skip dc, ch 2, *work 2 dc in the next dc, skip 2 dc, ch 2, *Repeat around, sl st on top of the ch 3 to join.
Rnd 3: Ch 3, work dc in the same stitch, work 2 dc in the next dc, *ch 2, work 2 dc in the next dc twice, *Repeat around, sl st on top of the ch 3 to join.
Rnd 4: Ch 3, work dc in the same stitch, dc in the next two dc, work 2 dc in the next dc, *ch 2, work 2 dc in the next dc, dc in the next two dc, work 2 dc in the next dc. *Repeat around, sl st to join.
Rnd 5: Ch 3, work dc in the same stitch, dc in the next four dc, work 2 dc in the next dc, *ch 2, work 2 dc in the next dc, dc in the next four dc, work 2 dc in the next dc, *Repeat around, sl st to join.
Rnd 6: Ch 3, work dc in the same stitch, dc in the next six dc, work 2 dc in the next dc, *ch 2, work 2 dc in the next dc, dc in the next six dc, work 2 dc in the next dc, *Repeat around, sl st to join.
Print the entry at the top of the page to print the pattern!
For more experienced people, you’ll appreciate how easy crochet coasters are to create. They make for a quick crochet project and are great for using leftover yarn, particularly if you want to experiment with different color and contrast combinations. A set of round coasters is an excellent choice, but feel free to get creative with square coaster designs if you’re seeking a unique look. Working in the back of the coaster can create a different texture, and by changing yarn colors, you can craft a set of fun coasters that reflect your personality and style.
Furthermore, crochet coasters are not only a practical addition to your coffee table, protecting it from spills and heat, but they also serve as charming decor pieces. The personalized touch of handmade coasters adds a unique and heartwarming feel to your home. You can let your creativity shine by mixing and matching colors, working with small amounts of yarn, and repeating rows in different ways to achieve various looks. These delightful coasters also allow you to practice the best crochet stitches for beginners and those seeking new and enjoyable projects. With these crochet coasters, you can effortlessly create eye-catching decor that serves a functional purpose and showcases your crafting talents.
In conclusion, crocheting doily coasters is a fantastic way to put your crochet skills to use. From beginner-friendly patterns to more advanced designs, there are various options available. The best part is that these coasters are a perfect project for personal use and make great gifts. So, why not explore the world of crochet coasters and enjoy an easy and satisfying crafting experience? You can choose your favorite cotton yarn, select colors, and experiment with various crochet techniques. And remember, whether you’re a crochet beginner or an advanced crocheter, these step-by-step patterns and guided video tutorials will help you create the perfect coasters for your home decor and beyond. Enjoy your crochet journey, and happy crocheting!
To Find All My Crochet Jewel Patterns, Click Here

Click Here for My Ravelry Patterns


Crochet Hats for Beginners Book For Sale — Click Here

Crochet For Beginners Book for Sale — Click Here
- privacy policy: https://amysdiyfrugallife.com/privacy-policy/
- All Colors of Yarn Click Here: https://amzn.to/3C32rNX
- [Image]: https://amysdiyfrugallife.com/how-to-crochet-a-beautiful-flower-doily-pattern-tutorial/
- [Image]: https://www.ravelry.com/people/amray767
- [Image]: https://www.awin1.com/cread.php?awinmid=6220&awinaffid=470125&platform=dl&ued=https%3A%2F%2Fwww.etsy.com%2Fshop%2FAmyCreativeCreations%3Fref%3Dseller-platform-mcnav
- [Image]: https://amzn.to/2ILFrGN
- [Image]: https://amzn.to/2HVIis6
Source URL: https://amysdiyfrugallife.com/how-to-crochet-doily-coaster-pattern-tutorial/


 [3]
[3]