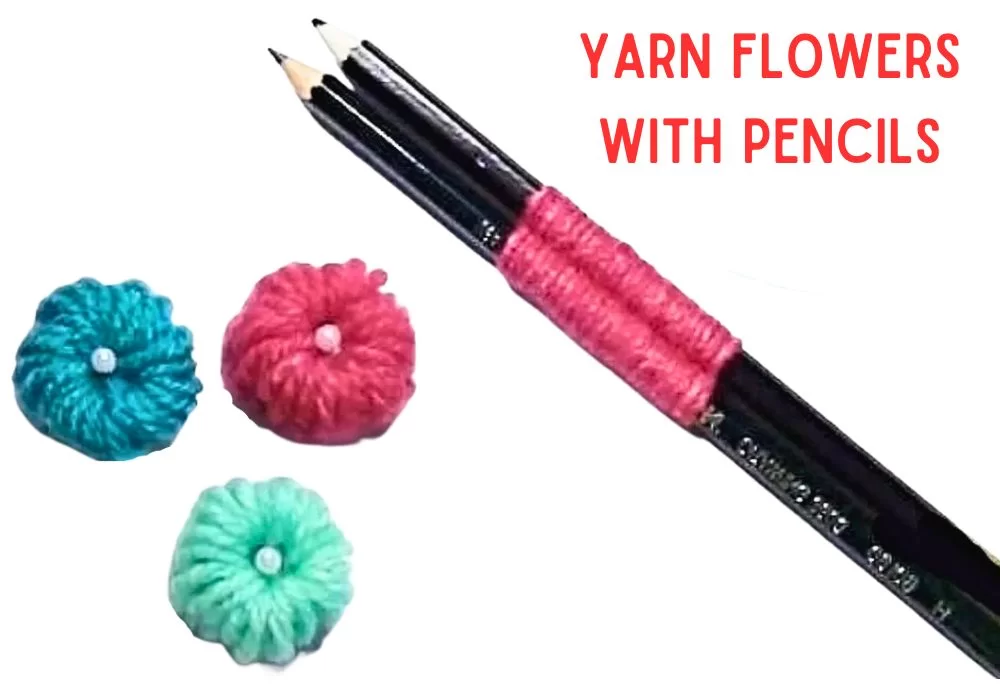
How to Make a Hand Embroidery DIY Yarn Pencil Flower Hack
by Amy Lehman | November 10, 2023 4:36 am
DIY Yarn Pencil Flower Hack
Are you looking for a creative way to add a touch of whimsy and color to your space? Look no further than the DIY yarn pencil flower hack! This simple yet ingenious crafting technique transforms ordinary pencils into charming floral decorations using yarn and a few basic supplies. Whether you’re sprucing up your workspace, adding a pop of color to a special event, or looking for a fun and budget-friendly craft project, this yarn pencil flower hack will surely delight you.
In this guide, we’ll explore how to create these adorable yarn pencil flowers step by step, from selecting the perfect yarn colors to mastering the wrapping technique that brings these blooms to life. With just a few pencils, some colorful yarn, and some creativity, you can craft a bouquet of charming flowers that will brighten up any room or occasion.
Within this post, you’ll find affiliate links. If you decide to purchase through these links, I may earn a modest commission at no extra cost. Additionally, please review my privacy policy[1] for more details.
*Getting Started:*
- Gather your favorite yarn colors and a tapestry needle to kick off this project.
- Explore different yarn weights and types to experiment with the size and texture of your flowers.
Use different colors to add a vibrant touch to each petal and explore different patterns for a personalized touch.
- Vary the number of petals to create flowers of different sizes, from small and delicate to large and impressive.
✨ We hope you enjoyed these photos! If so, please consider sharing them on Pinterest by clicking the Pin Button on each image. Your support helps us connect with more people and spread creativity. Thank you so much! 💖
How to Watch Videos in Slow Motion — if the video is too fast!
How to Crochet For Beginners Playlist — Click Here[2]
Click the Links for Your Materials
All Colors of Yarn Click Here[3]
- Crochet hook
- Tapestry needle
- Stitch marker
You’ll need two pencils and some yarn to create this yarn flower. If you’d like, you can enhance it by adding pearls at the end using a yarn needle. Let’s begin by focusing on both pencils.
Start by taking a yarn length slightly longer than your pencil. Wrap it around the top of your pencil and tie it twice. This portion of the yarn will secure the flower at the end. Ensure that the knot is tight. Repeat this process at the very bottom of both pencils. You can use any type or size of pencil; for instance, a colored pencil will result in a smaller flower. If your yarn is thinner, like a size three, it will contribute to a smaller-sized flower. Repeat the process for both pencils.
Next, take another length of yarn with a tail of about six to seven inches. Position the yarn in the center and wrap it around both pencils, weaving it in and out. Continue this weaving pattern, counting approximately fifty repetitions, translating to 25 strands of yarn on each pencil.
Once you’ve reached the desired amount, take the two starting strands of yarn and tie them tightly together twice. Proceed to cut that yarn. Trim the tops and bottoms of the yarn strands, then tie them together as tightly as possible.
Carefully remove the yarn strands from the pencils and twist them into a circle. Keep working on it until it resembles a small, circular puff flower. The basic structure is now complete.
To add a finishing touch, consider inserting any jewelry at the center. In this example, a pearl is used.
Your beautiful yarn flower is now finished. Thank you for watching, and please subscribe for more creative tutorials.
Print the entry at the top of the page to print the pattern!
- privacy policy: https://amysdiyfrugallife.com/privacy-policy/
- How to Crochet For Beginners Playlist — Click Here: https://www.youtube.com/playlist?list=PLDU4IrQAuYqrUtVH0UWJUUdqljBIUV4ZD
- All Colors of Yarn Click Here: https://amzn.to/3C32rNX
- [Image]: https://www.ravelry.com/people/amray767
- [Image]: https://www.awin1.com/cread.php?awinmid=6220&awinaffid=470125&platform=dl&ued=https%3A%2F%2Fwww.etsy.com%2Fshop%2FAmyCreativeCreations%3Fref%3Dseller-platform-mcnav
- [Image]: https://amzn.to/2ILFrGN
- [Image]: https://amzn.to/2HVIis6
Source URL: https://amysdiyfrugallife.com/how-to-make-a-hand-embroidery-diy-yarn-pencil-flower-hack/

