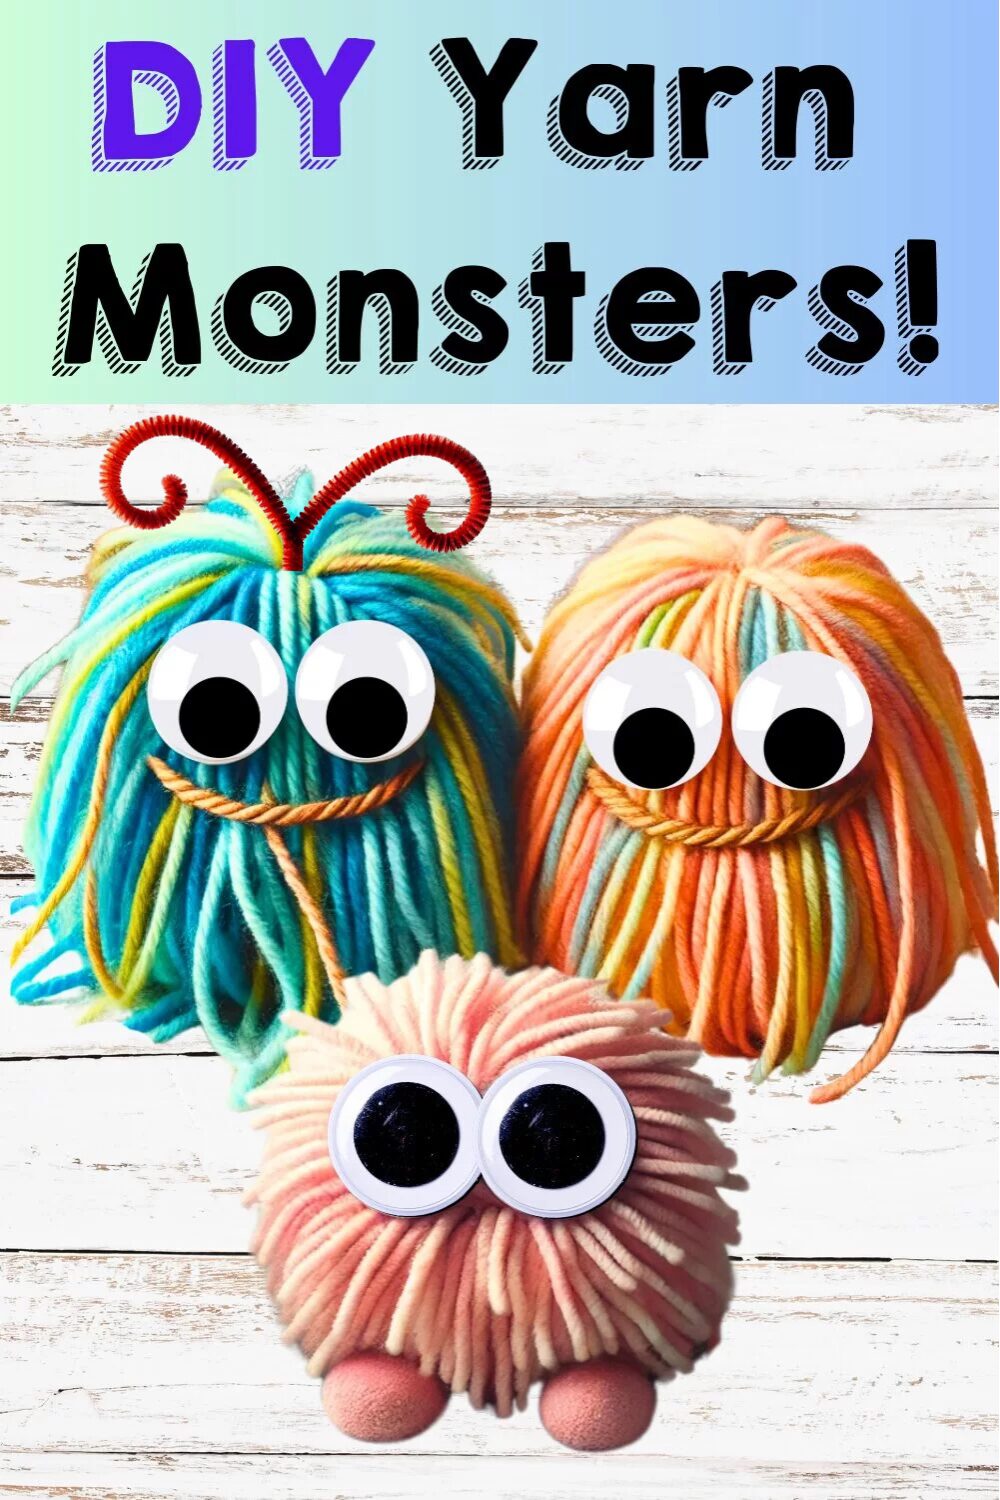
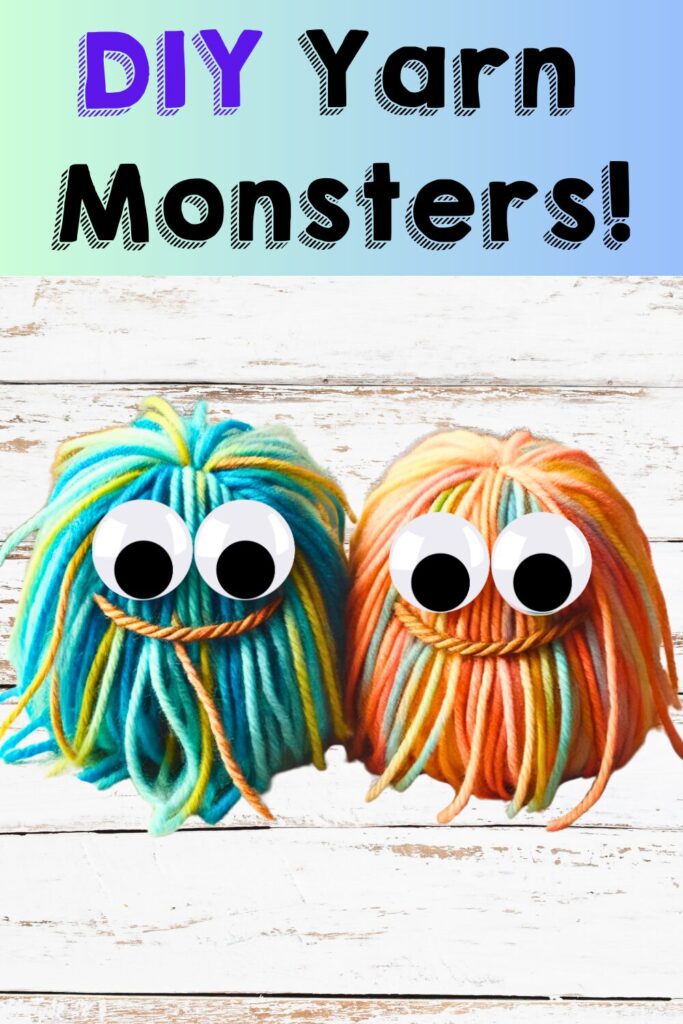
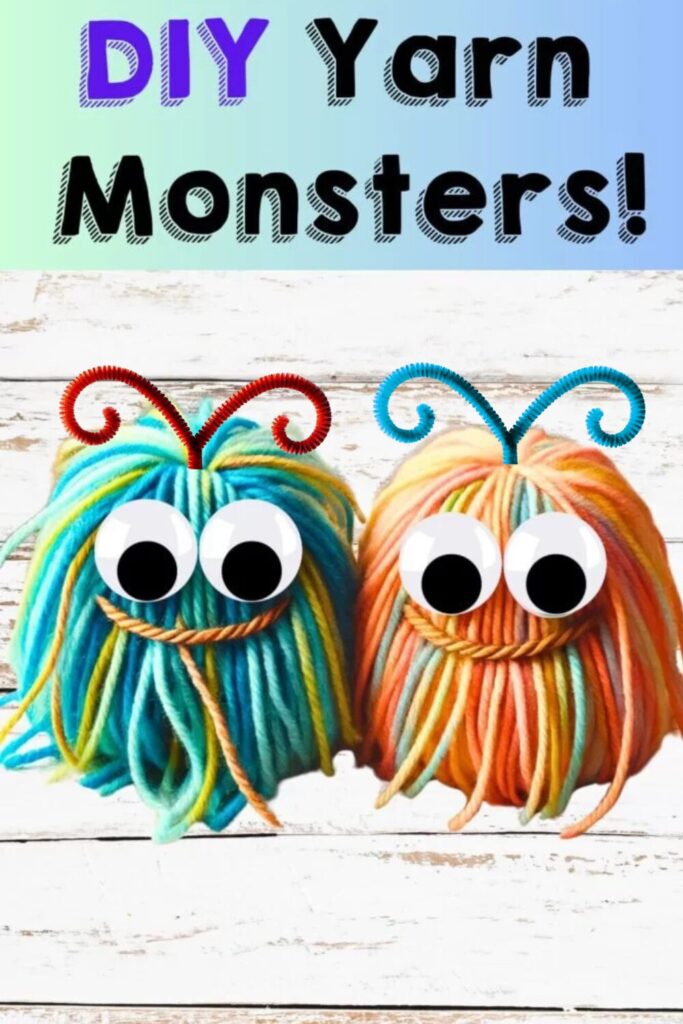
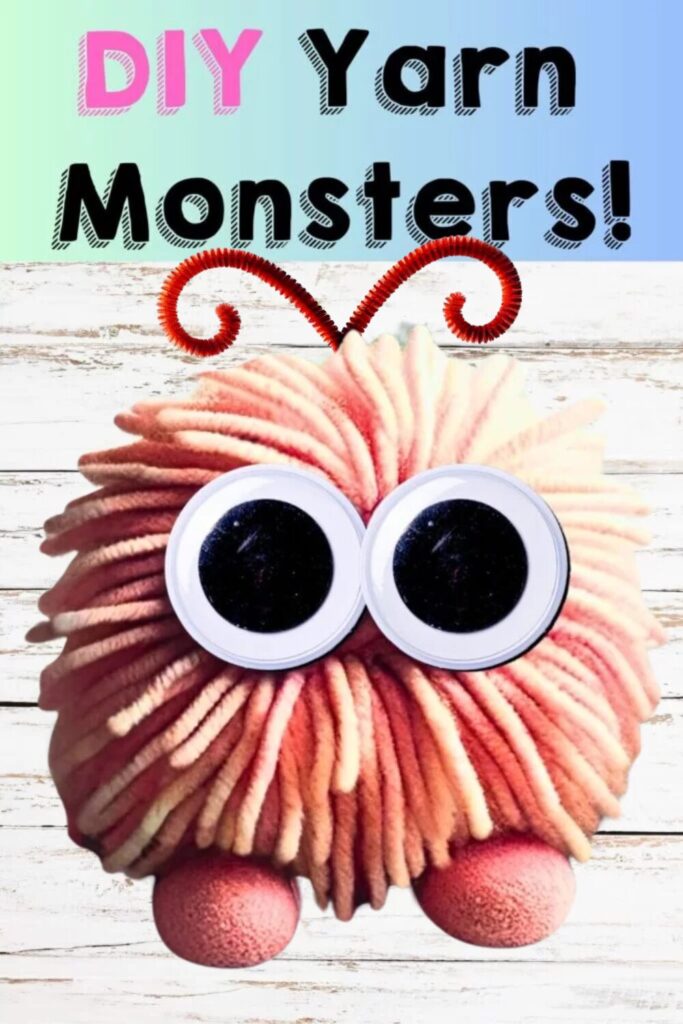
DIY Yarn Monsters: Easy Guide for Short & Long Fluffy Creatures!

How to Make DIY Yarn Monsters
DIY yarn monsters are an exciting and creative craft project perfect for children and adults alike. These adorable creatures are made from various materials, such as fluffy yarn, pom-poms, and googly eyes, and can be customized to reflect your unique style. Whether you’re creating a pom-pom monster or a yarn-covered toilet roll, these monster crafts provide hours of fun and a great opportunity for pretend play. In this guide, we will walk you through step-by-step instructions to create your own DIY yarn monsters, using simple materials like acrylic yarn, craft glue, and even a hot glue gun.
To begin your DIY yarn monsters, gather your materials. You’ll need acrylic yarn in various colors, pom-poms, googly eyes, a piece of cardboard or a cereal box, pipe cleaners, glue dots, and a hot glue gun. Start by cutting short pieces of yarn and wrapping them around your cardboard or cereal box to create a fluffy base. Once you have your desired size, secure the end of the yarn with a piece of craft glue or hot glue. You can also use cotton yarn to create different textures and styles for your monster head. Next, add a fun monster’s mouth using red paper, or even cut out small shapes from brown paper for more character.
Within this post, you’ll find affiliate links. If you decide to purchase through these links, I may earn a modest commission at no extra cost. Additionally, please review my privacy policy for more details.
Click the Social Icons to Stay Connected
![]()
![]()
![]()
![]()
![]()
![]()
![]()
![]()

✨ We hope you enjoyed these photos! If so, please consider sharing them on Pinterest by clicking the Pin Button on each image. Your support helps us connect with more people and spread creativity. Thank you so much! 💖
Materials Needed:
- Colorful yarn (long or short strands)
- Large googly eyes
- Scissors
- Pipe cleaners or small foam balls (for feet, optional)
- Craft glue or a hot glue gun
- A piece of cardboard or a fork (for wrapping yarn)
Step-by-Step Instructions
-
Small Yarn Monster: A piece of cardboard around 6x6 inches to 8x8 inches should work well for smaller monsters, especially if you’re creating a compact, simpler design.
-
Medium Yarn Monster: A 10x10 inch or 12x12 inch piece of cardboard is usually enough if you’re aiming for a more detailed or larger design.
-
Large Yarn Monster: If you’re making a larger yarn monster, you may want a piece of cardboard around 14x14 inches or larger, depending on how big you plan to make your creation.
Step 1: Gather Materials
- Choose your yarn color and googly eyes.
- Decide if you want a long-haired shaggy monster or a short-haired fuzzy monster.

Step 2: Create the Yarn Pom-Pom Body
For Short Yarn Monsters:
- Wrap the yarn around a fork or smaller cardboard (for small monsters) or a piece of cardboard (for larger monsters) about 50–100 times depending on fluffiness.
- Carefully slide the wrapped yarn off and tie a tight knot around the middle with a separate piece of yarn.
- Cut through the loops on both sides and fluff the yarn to form a pom-pom.
- For Long Yarn Monsters


Wrap the Yarn: Start by wrapping yarn around a piece of cardboard several times. The more times you wrap, the fluffier your monster will be!
Cut the Yarn: Once you’ve wrapped the yarn, use scissors to cut along the top edge of the cardboard to create loops.
Secure the Yarn: Gather all the yarn loops and fold them in half. Take a separate piece of yarn and tie it tightly around the folded loops at the top to hold everything together. This will create the “hair” for your monster. Flip the yarn over, and the yarn will fall into place, resembling messy hair.
Trim the Yarn: Trim the yarn ends to give your monster a neat and even look.
Add Eyes and Feet: Glue on googly eyes to give your monster personality, and add feet at the bottom to complete your creation!
Add Antennas Optional Take the two ends of the pipe cleaner at the top of the monster’s head and curl them into spirals. You can trim them as needed for the perfect length and shape. These spirals will become your monster’s fun antennas!
Optional Additions For extra flair, you can add arms, extra antennas, or even pipe cleaner legs. You can also experiment with different yarn textures or colors to make each monster even more special. The possibilities are endless, and there’s no right or wrong way to create these adorable creatures.
These long yarn monsters are a delightful craft that’s perfect for kids and adults alike. They’re easy to make, fun to personalize, and can be displayed in your home as a cute decoration. Plus, makingthese monsters is a great way to work on fine motor skills and creativity. Whether for Halloween or just for fun, these yarn monsters will bring joy to any space. So grab your yarn and pipe cleaners, and let your imagination run wild as you create your own unique yarn monsters today!
How to Make the Feet for DIY Yarn Monsters
Option 1: Foam Balls
- Get small craft foam balls (you can find them at craft stores or online).
- Cut them in half if they are too large, so they sit flat.
- Glue them to the bottom of the yarn monster using hot glue or strong craft glue.
Option 2: Felt Balls
- Take small felt balls (you can buy them or make them by rolling wool felt).
- Use hot glue to attach two felt balls at the bottom.
- Hold in place until the glue sets.
Option 3: Pipe Cleaner Feet (Alternative)
- Cut pipe cleaners into small pieces.
- Bend them into tiny loops or feet shapes. Take the pipe cleaner through the yarn monster’s head, bringing both ends together at the top of the head. Tie them securely, then twist the ends into antenna shapes.
- Glue them under the yarn monster to create little legs.
- For short monsters, trim the yarn to make them look rounder and fluffier.
- For long monsters, separate strands to create a fun, wild look.
- Adjust the placement of eyes and mouth to give them different expressions.
- Use them as decorations, toys, or a fun DIY gift.
- Mix and match different colors and styles for variety
Smile: To create a smile, cut a 2‑inch piece of yarn and use hot glue to attach it to the monster’s face. Alternatively, thread the yarn inside the monster, tie it securely, and glue it in place for extra hold.
For the monster’s face, use wiggly googly eyes and pom-pom trimmings for extra fluff. A popsicle stick or pipe cleaner can be added to give your monster arms or antennas, adding even more personality. If you like, you can attach a small piece of cardboard for the monster’s body or use a toilet roll as a base for a fun monster figure. The possibilities are endless! Don’t forget to let the little ones engage in the pretend play aspects, allowing them to give their monsters names and personalities, adding an imaginative twist to your crafting session.
For a simple and quick project, you can make a “lil love monster” for Halloween crafts or a fun gift. These DIY yarn monsters can also be an amazing source of inspiration for early years learning activities, helping children develop their fine motor skills. If you want to get really creative, you can even make larger yarn monsters using pom-pom monsters as heads and attach them to a cardboard or a piece of brown paper for a playful backdrop.
DIY yarn monsters are a fantastic way to unleash creativity, have fun, and craft something adorable that kids (and big kids!) will love. Whether it’s using pipe cleaners, pom-poms, or fluffy yarn, you can make your monsters as unique as your imagination allows. The step-by-step instructions and the video tutorial included in this guide will make crafting these yarn monsters simple and enjoyable for everyone. Plus, if you’re looking for more inspiration, don’t hesitate to check out affiliate links for additional materials or similar monster crafts. Enjoy the process, and be sure to clean up any pom-pom trimmings for a neat finish!
Click Here for Crochet Easter Bunny Patterns


Crochet Hats for Beginners Book For Sale — Click Here


You May Also Like

Create Memories with 10 Fun Easter Bunny Craft Ideas for Kids
How to Make a Handmade Ribbon Bows with Your Fingers Tutorial