How to Crochet a Pencil Holder Pattern Tutorial
How to Crochet a Pencil Holder!
Are you a crochet beginner looking for a fun project? Welcome to our free crochet pattern tutorial on creating a crochet pencil holder, a perfect size for all your school supplies. We’ll guide you through the process using single crochets and the magic ring technique. Get ready to make a stylish and functional addition to your desk!
To start this crochet project, you’ll need some yarn. We recommend using yellow and pink yarn for a fun way to add color to your school season. Grab your H crochet hook and make a magic ring. If you’re unsure how to do this, don’t worry; we have a video tutorial on our YouTube channel that can help you.
This post contains affiliate links. If you purchase through these links, I may earn a modest commission at no extra cost. Please review my privacy policy for more details.
Use a stitch marker to keep track of your first stitch. Continue working in single crochet stitches, making sure to crochet in the back loop for a nice texture.
As you crochet, consider adding a color change for a more exciting design. You can create fun colored pencil cases and even experiment with granny squares for a unique touch.
For a perfect size, aim for a total of 2nd ch stitches and the correct number of rows. For a neat finish, make sure your final row has a straight edge.
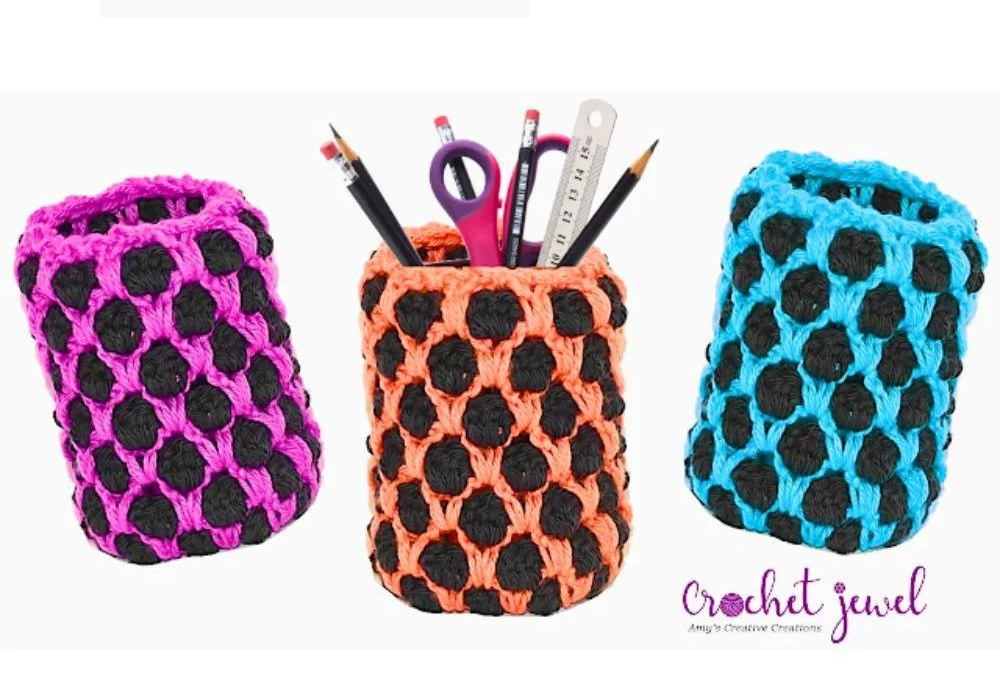
This pencil holder is great for pencils and crochet hooks. I used an H hook. Use a smaller hook to make it smaller, but try to follow this pattern. If you need more assistance, please watch the video uploaded below. It measures about 3 inches across on the bottom and, 4.5 inches in height, and 12 inches around. This crochet pencil holder is perfect for all your pencils and pens. Are your pens and pencils always getting lost in the clutter? Crochet a pencil organizer that will keep your pens and pencils organized and easily accessible. This holder is easy to make and easily customized to fit your needs.
ch=chain
dc=double crochet
sl st=slip stitch
Rnd 3: Ch 3, work dc in the same stitch, work 2dc in each stitch around, the last stitch gets 3 dc, sl st on top of chain 3 -33 dc
Rnd 5: Ch 1, now take old color that is looped up and sl st, ch 2 in between the 3dc, work dc in the same space, skip 3 dc, *work dc, ch 1, dc, in between the 3dc, *Repeat around, sl st on top of chain 3
Rnd 6: Ch 1, pull up your yarn, work with your other color of yarn, pull your other color of yarn through the ch 1, ch 2, work 2dc in the chain 1 space, *work 3dc in the next ch 1 space, *Repeat around, sl st on top of chain 3
Rnd 7: Ch 1, now take the old color that is looped up and sl st, ch 2 in between the 3dc, work dc in the same space, skip 3 dc, *work dc, ch 1, dc, in between the 3dc, *Repeat around, sl st on top of chain 3
Repeat alternate with Rnd 6 and Rnd 7 until the desired height.
In the end, work sc around the top after the round 7 round, sl st in beg stitch, fasten off, and weave in ends. I hope you enjoy this crochet pencil holder!
Print the entry at the top of the page to print the pattern!
Let’s move on to the second panel, just like the first. When you finish both panels, it’s time to sew them together. You can use a tapestry needle and yarn strands of your choice, making sure to secure any loose ends.
Attach a smaller button on the front panel for the button closure and create a button loop on the back. This adds a great touch to your crochet pencil pouch.
Congratulations, you’ve created a fun and practical crochet pencil holder. This free pattern is an excellent pattern for crocheters of all skill levels. Whether you’re a beginner crocheter or a seasoned pro, this project is a fantastic way to showcase your skills. And the best part is that you can make it for personal use or as an excellent gift for friends and family. Feel free to share your creation on social media, and remember that if you purchase any supplies through our affiliate links, it helps support our website at no additional cost. We hope you enjoyed this tutorial and are now well-equipped to crochet your pencil holder. Happy crocheting!
To Find All My Crochet Jewel Patterns, Click Here

Click Here for My Ravelry Patterns


You May Also Like
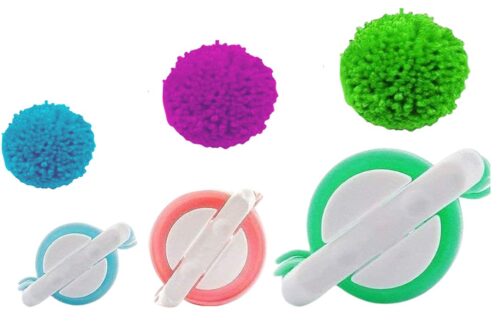
Crafting Cozy: How to Make Perfect Pom Poms
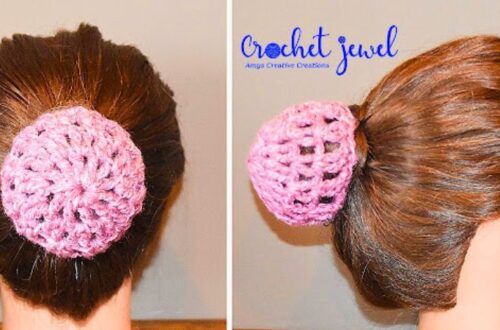
Crochet a Stylish Hair Bun Cover: Step-by-Step Tutorial