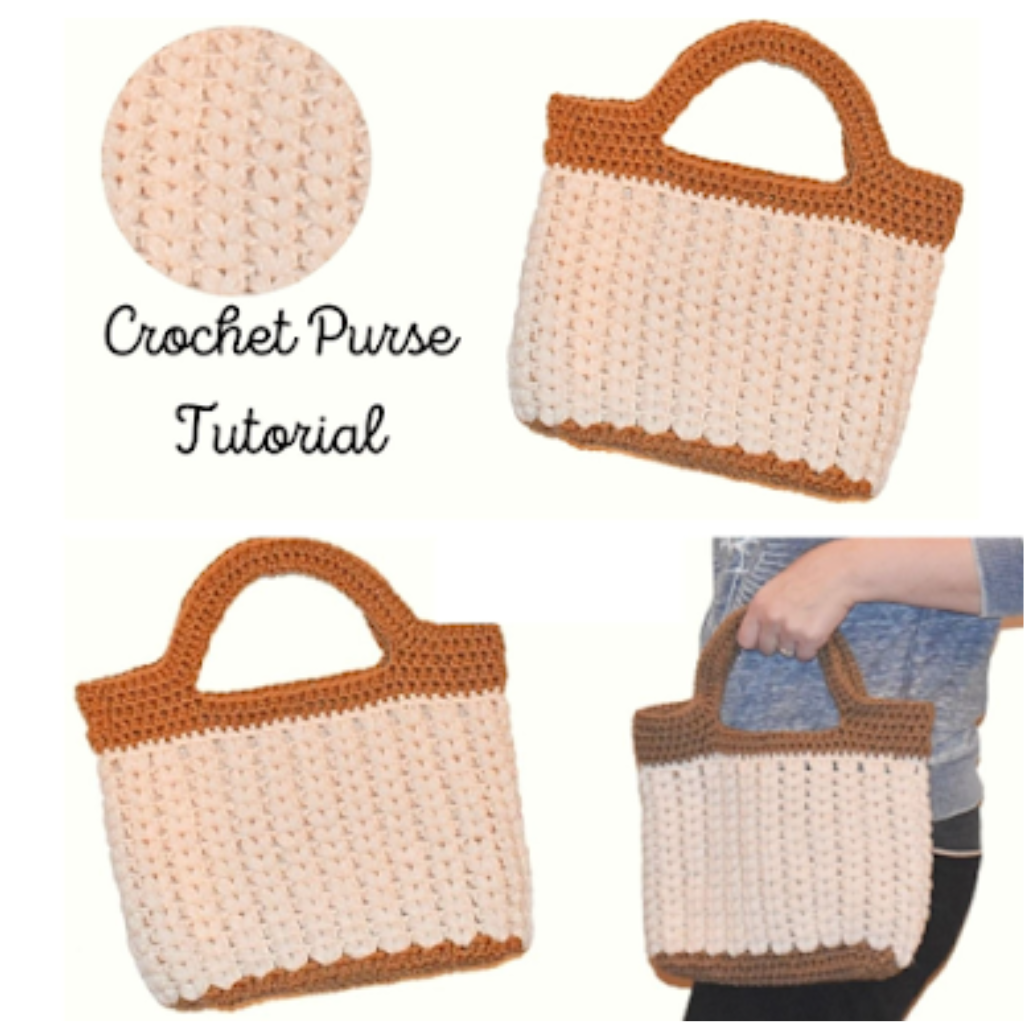
How to Crochet a Fashionable Tote Bag Purse Tutorial
How to Crochet a Tote Bag
Crochet bags have become a popular and versatile accessory, offering various styles and patterns for multiple purposes. Whether you’re interested in market bags, purses, or tote bags, the crochet world provides endless possibilities. In this guide, we’ll explore the art of crafting crochet bags, focusing on free patterns, essential techniques, and unique designs that cater to different preferences and skill levels.
One critical element in creating crochet bags is the choice of yarn. Cotton yarn is often favored for its durability and suitability for market bags, while acrylic yarns offer a broader spectrum of colors for more vibrant and eye-catching designs. Double crochet stitches, single crochet stitches, and even t‑shirt yarn can contribute to your crochet bag project’s beautiful texture and structure.
You’ll find affiliate links within this post. If you decide to purchase through these links, I may earn a modest commission at no extra cost. Additionally, please review my privacy policy for more details.
✨ We hope you enjoyed these photos! If so, please consider sharing them on Pinterest by clicking the Pin Button on each image. Your support helps us connect with more people and spread creativity. Thank you so much! 💖
When delving into crochet purses, consider incorporating various styles, such as the boho bag or the classic granny square bag. Experiment with different shapes, including round, square, or even a traditional rectangular design, tailoring each bag to its intended use, whether for everyday wear, a special gift, or a farmers market excursion.
Click the Links for Your Materials
All Colors of Yarn Click Here
- Crochet hook
- Tapestry needle
- Stitch marker
Abbreviations:
ch=chain
sc=single crochet
sl st=slip stitch
hdc=half double crochet
I used an I hook. You can go up or down a hook size.
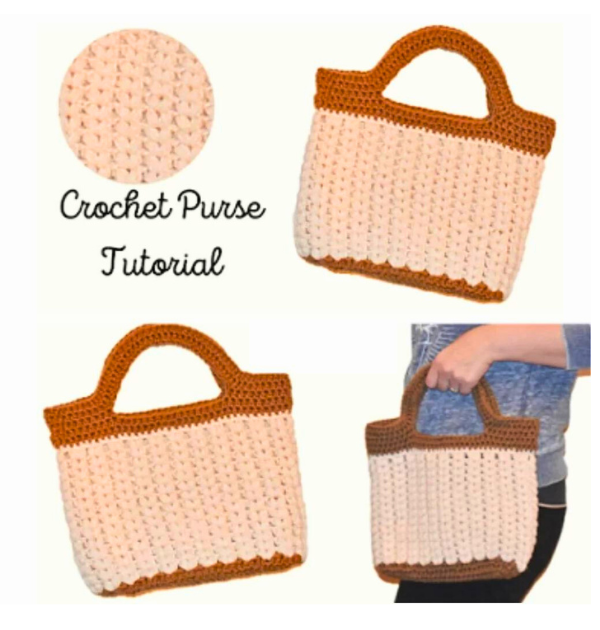
The base of the purse measures 10 inches across and 2. 5 inches in width.
The length is 10 and 13 inches, with the handle from top to bottom.
I used Caron Cakes Cream and brown medium worsted yarn for the base and handle. I love how this easy crochet tote bag for beginners turned out!
Abbreviation: Ch=chain Sl st=slip stitch Hdc=half double crochet
Rnd 1: Chain 25 plus 2 chains, hdc in the 2 nd chain from the hook, hdc in each chain to the end, work 5 in the last chain. Hdc in the next 23 stitches, work 4 hdc in the last stitch. Sl sti n the chain 3.
Rnd 2: Ch 2, work 3 hdc in the same stitch, work a hdc in the next 24 stitches, work 2 hdc in the next 6 stitches, hdc in the next 21 stitches, 2 hdc in the next 5 stitches. Sl st in the chain 3.
Rnd 3: You can stop at Rnd 2 for increasing or you add this round to make your base bigger. (the dimensions are only for rnd 2 not rnd 3.) The dimension for the added round: 3 in in width and 11 in in length for the base. You can keep going on with Rnd 3 for bigger base if you like. Then add Rnd 4, then add your puff stitches. Ch 2, work 3 hdc in the same stitch, hdc in the next 28 stitches, in the next 9 stitches, work 2 hdc, 1 hdc, 2 hdc, 1 hdc, 2 hdc, 1 hdc, 2 hdc, 1 hdc, 2 hdc, Hdc in the next 27 stitches, in the next 5 stitches, 2 hdc, 1 hdc, 2 hdc, 1 hdc, 2 hdc.
Rnd 4: Ch 2, hdc in the same stitch, hdc in each stitch around. Sl st in the chain 3 to join.
Rnd 5: sl st with cream yarn off to the side of the base, Ch 2, *yarn over and draw up loop 3 times, ch 1, yarn over and draw up loop 3 times, ch 1, skip two stitches, *Repeat around, end with sl st in the chain 2,
Rnd 6: sl st into the chain 1, ch 2, *yarn over and draw up loop 3 times, ch 1, yarn over and draw up loop 3 times, ch 1, *Repeat a puff stitich in each chain 1 space of the previous puff stitch, so the puff stitches stack on top of each other. end with sl st in the chain 2, Repeat for desired length. I did 10 rounds.
Rnd 7: Sl st into the chain 1 space, *sc in the puff stitch ch 1, work 2 sch in the next ch 1, *Repeat round, Sl st on the chain 3 to join. Fasten off and Weave in your ends.
Rnds 8–9: sl st with brown yarn on the side, ch 1, hdc in each stitch around, sl st in the chain 1, Repeat for two rounds.
Rnd 9: on the side, hdc in the next 11 stitches, use a stitch marker, chain 30, skip 15 stitches, hdc in the next 21 stitches, skip 15 stitches, hdc in the next 8 stitches, sl st
Rnd 10: ch 2, hdc in the same stitch as ch 2, hdc in the next 12 stitches, In the handle, hdc in each chain across, hdc in the next 20 stitches, hdc in the next 30 chains from the handle, hdc in the next 7 stitches, sl st
Rnd 11: ch 2, hdc in the same stitch as ch 2, hdc in each stitch across. Sl st. Fasten off and Weave in your ends. I hope you enjoyed this easy crochet tote bag for beginners!
Print the entry at the top of the page to print the pattern!
To add a personal touch, explore unique crochet handbag patterns that match your favorite colors or follow the latest trends in bright and bold hues. With video tutorials, you can quickly master new techniques and stitches, enhancing your crochet skills and expanding your repertoire of bag patterns.
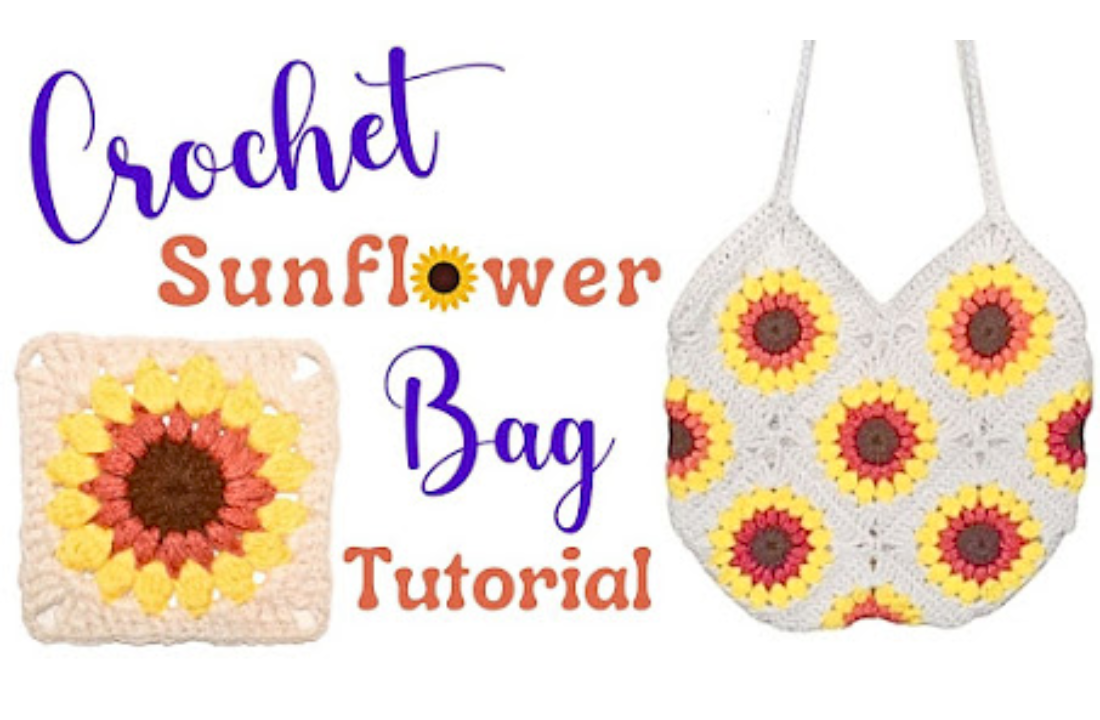
Click Here for the Sunflower Bag Pattern
For those looking to create a crochet tote bag, pay attention to the body of the bag, incorporating shoulder straps for added convenience. Tuck locks and other closures offer functionality and style, ensuring your crochet tote is visually appealing and practical for carrying your essentials.
Crochet bags come in many styles and designs, offering crafters a versatile and creative outlet. With their practicality and eco-friendly appeal, market bags have recently gained popularity. Whether you’re a beginner or an experienced crocheter, free patterns, including crochet patterns, open up a world of possibilities. Utilizing cotton yarn for its durability and acrylic yarns for a vibrant color palette, you can experiment with double crochet stitches and other basic crochet stitches to create beach bags, tote bags, or even crochet purses that cater to your taste and everyday use.
For those who prefer a bohemian touch, exploring the world of crochet handbag patterns or trying out a boho bag design can create beautiful patterns that make a special gift or a unique addition to your bag collection. T t‑shirt yarn introduces a novel texture, while video tutorials can guide you through new techniques, making the process enjoyable for crafters of all skill levels. Whether it’s a cute pattern for a small bag or a large tote for summer days, the possibilities are endless, and the journey into crochet bags promises a delightful fusion of style and functionality.
Attention to detail is critical to crafting the perfect accessory in crochet bags. Each piece carries its unique charm, from the classic granny square design to the modern crochet bag patterns. As you explore different styles and techniques, consider the importance of the body of the bag, ensuring it aligns with your style and the intended use. Whether you’re aiming for a square bag for the grocery store or a round-shaped crochet tote for summer outings, the choice of yarn, hook size, and stitch markers contributes to a beautiful texture. Adding shoulder straps or a convenient tuck lock can elevate your creation, making it a visually appealing and practical accessory. With an abundance of free crochet bag patterns, this craft allows you to effortlessly express your creativity, producing stylish, functional bags that cater to various occasions and preferences.
In conclusion, crochet bags provide an excellent avenue for expressing creativity, offering many patterns, styles, and techniques to explore. Whether you’re a seasoned crocheter or a beginner, the world of crochet bags welcomes you to create beautiful, functional pieces that suit your style. Don’t hesitate to experiment with different yarns, stitches, and designs, and enjoy the satisfaction of crafting your unique crochet bag.
To Find All My Crochet Jewel Patterns, Click Here
Click Here for My Ravelry Patterns
Crochet Hats for Beginners Book For Sale — Click Here
Crochet For Beginners Book for Sale — Click Here


