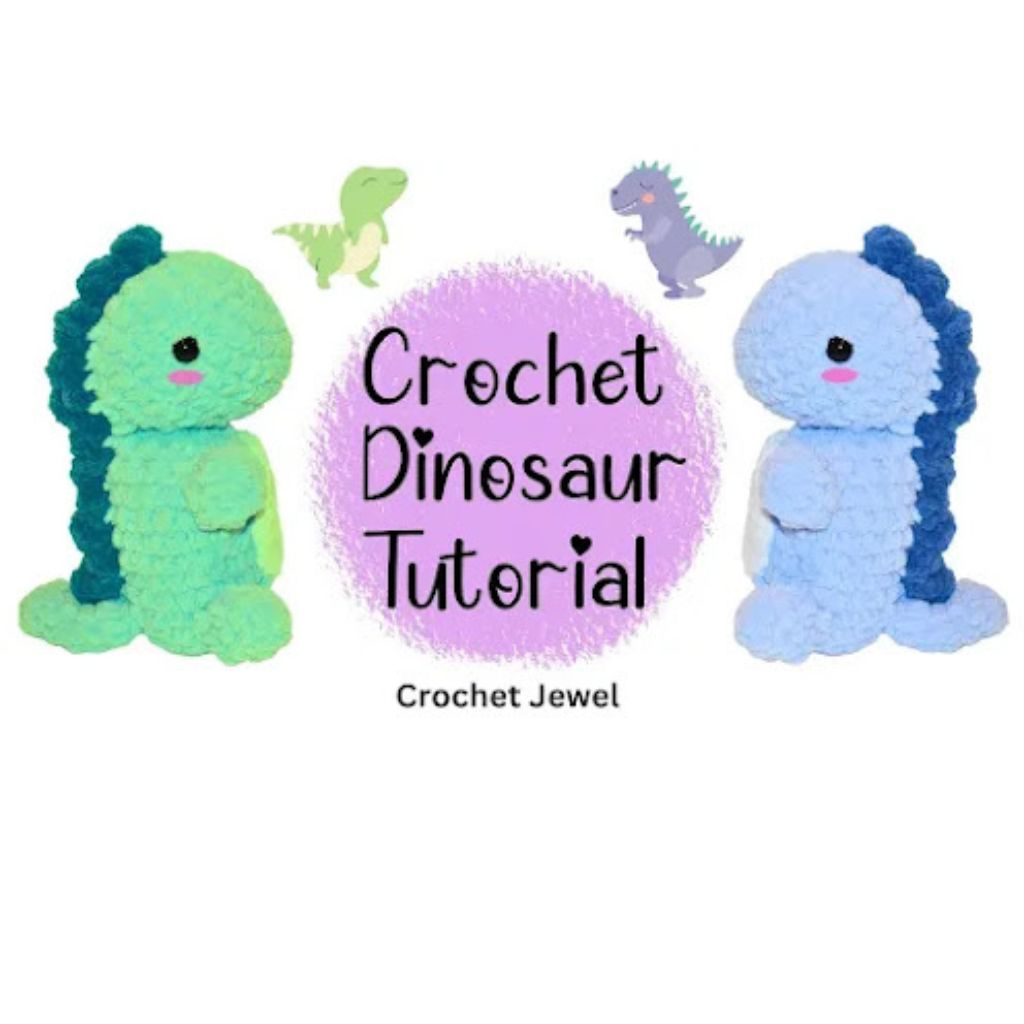
Crafting a Cute Crochet Dinosaur: A Step-by-Step Tutorial
How to Crochet a Dinosaur!
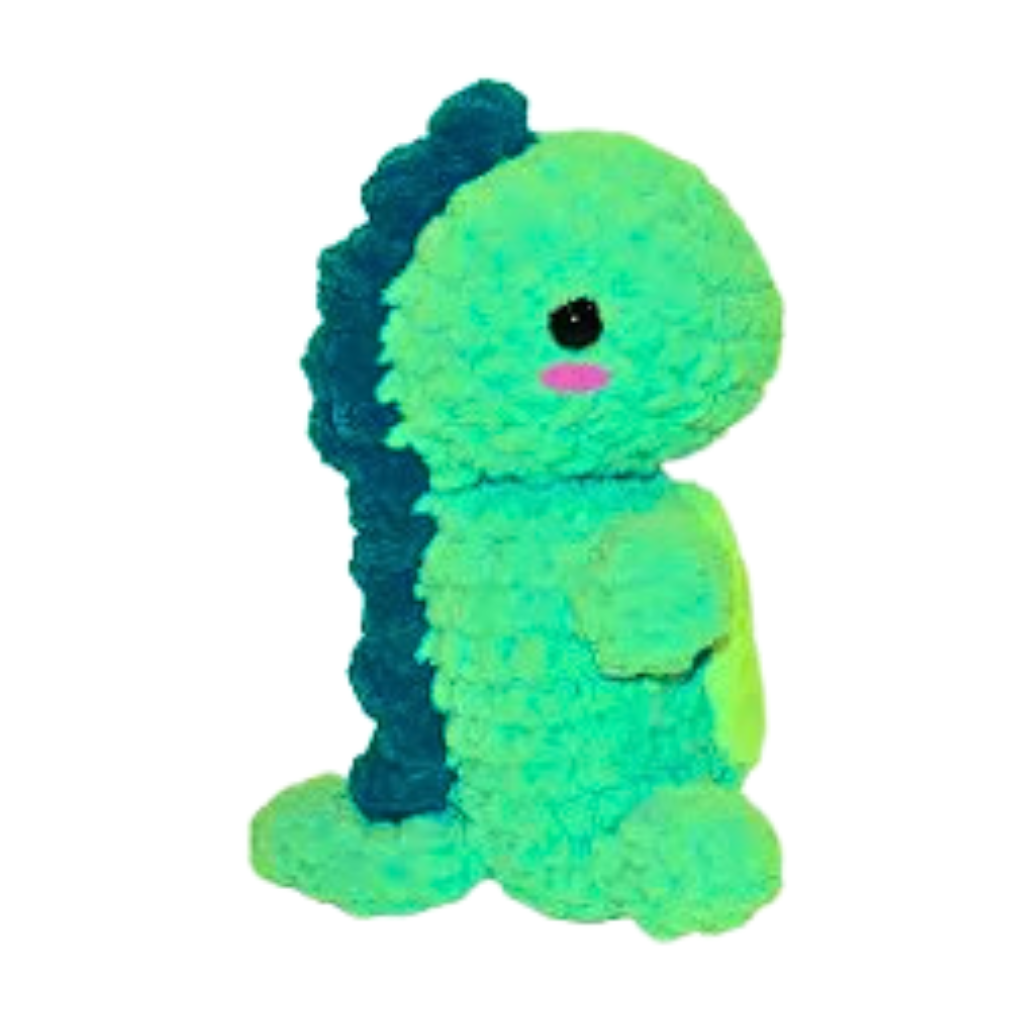
If you’re looking to embark on an adorable crochet project that will delight dinosaur lovers of all ages, you’ve come to the right place. This tutorial will guide you through crafting a cute dinosaur amigurumi plushie. Whether you’re a seasoned crocheter or a beginner, this project offers detailed instructions and step-by-step guidance, ensuring everyone can enjoy creating their perfect prehistoric companion. With the help of stitch markers, you’ll navigate the basic stitches required to bring your mini dinosaur to life. You’ll also learn about color changes, making this delightful pattern suitable for experimenting with different yarn colors.
This pattern is copyrighted by Amy Lehman. Please do not copy or duplicate this pattern. You are welcome to link back to my pattern, but do NOT post the pattern on your website. Thank you for respecting my work!
Within this post, you’ll find affiliate links. If you decide to purchase through these links, I may earn a modest commission at no extra cost. Additionally, please review my privacy policy for more details.
Click the Social Icons to Stay Connected
I crafted this adorable crochet dinosaur as a special surprise for my child, and her face lit up with delight upon receiving it. She cherishes it dearly and proudly added it to her growing crochet collection.
✨ We hope you enjoyed these photos! If so, please consider sharing them on Pinterest by clicking the Pin Button on each image. Your support helps us connect with more people and spread creativity. Thank you so much! 💖
One of the best parts about this project is that it’s an easy pattern designed with beginners in mind. It’s the perfect opportunity for first-time amigurumi crafters to explore the magic of crochet. If you’re new to amigurumi, you’ll find that using a magic circle will help create the plush toy’s head, a fundamental skill in this craft. As you progress, you’ll see that even small children can appreciate the finished results. You’ll have the tools to turn your basic crochet skills into adorable fan-favorite dinosaurs. The patterns included in this tutorial are diverse, from a mini Stevie to a backpack Bronto.
Size: 9 inches for the length
Supplies:
Click the Links for Your Materials
All Colors of Yarn Click Here
- Crochet hook
- Tapestry needle
- Stitch marker
I hook
Blue, Dark Blue, and White yarn
10 mm 2 eyes
Abbreviations:
ch=chain
dc=double crochet
hdc=half double crochet
sl st=slip stitch
Head: I hook for the entire pattern.
Rnd 1: In the Magic Circle, ch1, work 6 sc, sl st
Rnd 2: 2sc in each stitch around, ‑12 sc
Rnd 3: sc, 2 sc in the next stitch, ‑18 sc
Rnd 4: sc in the next two stitches, 2 sc in the next stitch, ‑24 sc
Rnd 5: sc in the next three stitches, 2 sc in the next stitch, ‑30 sc
Rnds 6–9: sc in each stitch around for 4 rounds, sl st in the last stitch on the last round, sl st
Insert the eyes on both sides. Go up about 6 rounds and attach the eyes on both sides.
Rnd 10: sc in the next two stitches, 2sctog decrease in the next two stitches, *Repeat around,
Rnd 11: sc in the next stitch, 2sctog decrease in the next two stitches, *Repeat around,
Fill with polyfil.
Rnd 12: 2sctog decrease in the next two stitches until it closes
Body
Rnd 1: In the Magic Circle, ch1, work 6 sc, sl st
Rnd 2: 2sc in each stitch around, ‑12 sc
Rnd 3: sc, 2 sc in the next stitch, ‑18 sc
Rnd 4: sc in the next two stitches, 2 sc in the next stitch, ‑24 sc
Rnds 5–11: sc in each stitch around for 7 rounds, sl st in the last stitch on the last round
Rnd 12: sc in the next two stitches, 2sctog decrease in the next two stitches, *Repeat around,
Rnd 13: sc in the next stitch, 2sctog decrease in the next two stitches, *Repeat around,
Fill with polyfil.
Rnd 14: 2sctog decrease in the next two stitches until it closes
Tail
Rnd 1: In the Magic Circle, ch1, work 4 sc, sl st
Rnd 2: 2sc in each stitch around, ‑8 sc
Rnd 3: sc, 2 sc in the next stitch, ‑12 sc
Rnds 4–5: sc in each each stitch around, twice, then end with a sl st
Legs Make 2
Rnd 1: In the Magic Circle, ch1, work 4 sc, sl st
Rnd 2: 2sc in each stitch around, sl st ‑8 sc
Rnds 3–4: sc in each stitch around twice, end with a sl st
Hands Make 2
Rnd 1: In the Magic Circle, ch1, work 4 sc, sl st
Rnd 2: 2sc in each stitch around, sl st ‑8 sc
Rnd 3: sc in each stitch around, sl st
Tummy
Rnd 1: In the Magic Circle, ch1, work 5 sc, sl st
Rnd 2: 2sc in each stitch around, ‑10 sc
Rnd 3: sc, 2 sc in the next stitch, ‑15 sc
Rnd 4: sc in the next two stitches, 2 sc in the next stitch, ‑20 sc
Spine
Chain 34
In 3rd chain, yarn over, *insert hook in the chain, yarn over and pull up loop, yarn over and pull through 2 loops, leave two loops on the hook, yarn over, *Repeat 2 more times, yarn over and pull through all 4 loops,
***Ch 1, Skip two chains, in 3rd chain, sl st,
Ch 2, yarn over, *insert hook in the chain, yarn over and pull up loop, yarn over and pull through 2 loops, leave two loops on the hook, yarn over, *Repeat 2 more times, yarn over and pull through all 4 loops,
***Repeat to the end, end with a sl st in the last chain. Fasten off.
With yarn and needle, Attach the Body and Head with yarn needle and yarn, weave in and out with yarn. When sewing, tilt the head a little on a slant so the eyes look like it’s on the side. (Best shown on the video)
With yarn and needle, Attach the tail on the bottom of the body, behind the head, with the eyes of the head facing in the front.
With yarn and needle, Attach the hands on both sides of the body.
With yarn and needle, Attach the spine on the back of the head, body, and tail. Start at the top center of the head and work your way down to the tail, sew on both sides of the spine to secure it.
Optional: You can add cheeks. Sew below the eyes with pink yarn a few times to create cheeks by sewing about 1 inch dash lines. Fasten off.
Sew on the tummy on the front of the body. Weave in all your ends.
Print the entry at the top of the page to print the pattern!
Click Here for Crochet Plushie Patterns
What sets this amigurumi dinosaur project apart is the versatility of the patterns provided. You can create a variety of adorable dinosaurs, from a mini Stevie to a backpack Bronto. With clear and detailed instructions, even beginners can make these delightful creatures. In addition to basic stitches, you’ll learn the art of color changes to give your dinosaurs a vibrant and playful appearance.
These cute dinosaur amigurumi are ideal to create a perfect gift. They make great additions to your amigurumi projects, and the patterns are easily accessible via our free crochet patterns. If you’re new to amigurumi, don’t worry; we have you covered with step-by-step instructions, making it an easy pattern suitable for all skill levels.
Crafting these plush toys is made easier with stitch markers to keep track of your work. One of the best features of this pattern is the magic circle, which allows you to start each piece in the round, giving your dinosaurs a seamless and polished look. Whether you’re an intermediate crocheter or new to the craft, the clear and concise instructions ensure your success.
It’s the perfect opportunity to try different colors and experiment with your favorite yarn brands. Once you’ve completed your mini dinosaur, these adorable creatures make great gifts for dinosaur lovers of all ages. Share your creations on social media to inspire other crocheters and to join a community of amigurumi enthusiasts in our Facebook group. Crafting these amigurumi dinosaurs will be a great addition to your crochet creations, leaving you with charming, handmade toys that are sure to become personal favorites. So, pick up your hook, explore new stitches, and let your creativity run wild with the countless color choices available.
There’s something for everyone, whether you’re drawn to tall dinos or prefer making more miniature crochet creations. Furthermore, using yarn in various weights and fiber content allows you to customize your amigurumi according to your preferred style and final goal. Whether you want to craft a child’s toy, a delightful addition to your physical item collection, or the ultimate finish to your amigurumi projects, this tutorial has it all. Join our Facebook group, where you can connect with fellow crocheters, exchange helpful tips, and explore the endless possibilities of amigurumi patterns. Our guidance makes choosing the best yarn and colors easier, ensuring your crochet creations are adorable. So, please pick up your crochet hook, get started, and bring these amigurumi dinosaurs to life!
I absolutely love Amazon for its unbeatable Crochet deals and amazing selection!—click here to discover your next great deal!
Amazon Prime: Unlock fast, free shipping, exclusive Prime Video shows, and more with Amazon Prime! Click here to start your 30-day free trial today!
Audible Plus: Access thousands of audiobooks and podcasts with Audible Plus! Click here for Audible Plus on Amazon!
Kindle: Discover millions of books with Kindle—read anywhere, anytime! Click here to buy on Amazon!
Amazon Prime Video: Enjoy unlimited streaming of top movies and TV shows with Amazon Prime Video! Click here to start watching!
Amazon Music: Stream millions of songs and playlists with Amazon Music! Click here to start listening!
To Find All My Crochet Jewel Patterns, Click Here
Click Here for My Ravelry Patterns
Crochet Hats for Beginners Book For Sale — Click Here
Crochet For Beginners Book for Sale — Click Here
Click Here fo Lion Brand Yarn and Free Patterns
I’m using Rakuten to get Cash Back at my favorite stores. Hate for you to miss out, so join now with my invite and you’ll get $30 after you spend $30.* Click Here for Cash Back


