Craft a Whimsical Bunny Rabbit: Easter Crochet Tutorial
How to Crochet a Bunny Rabbit
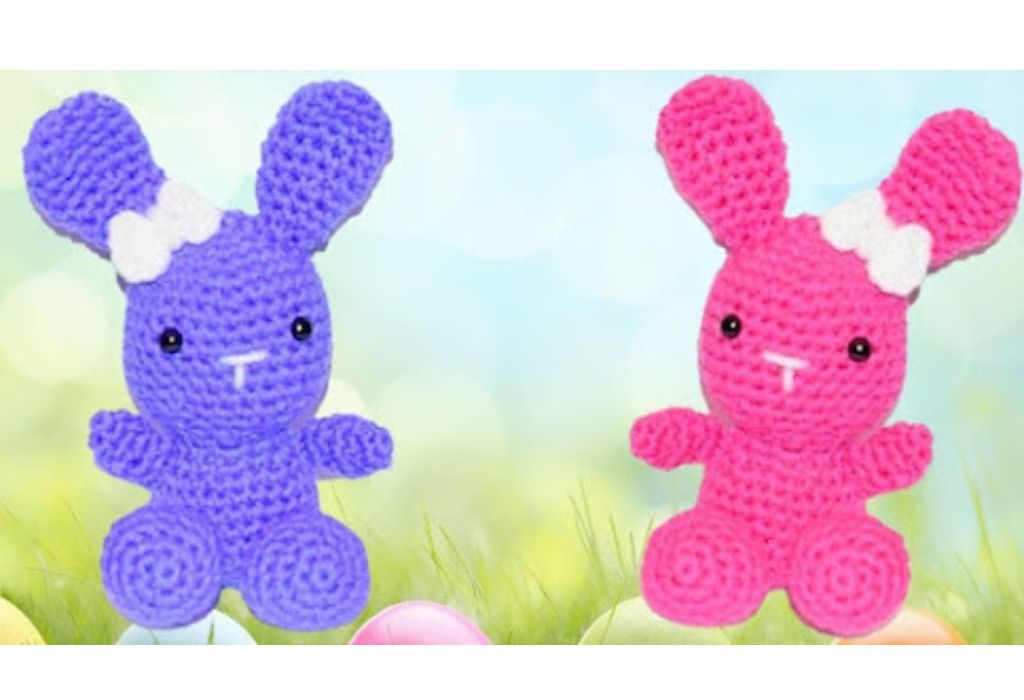
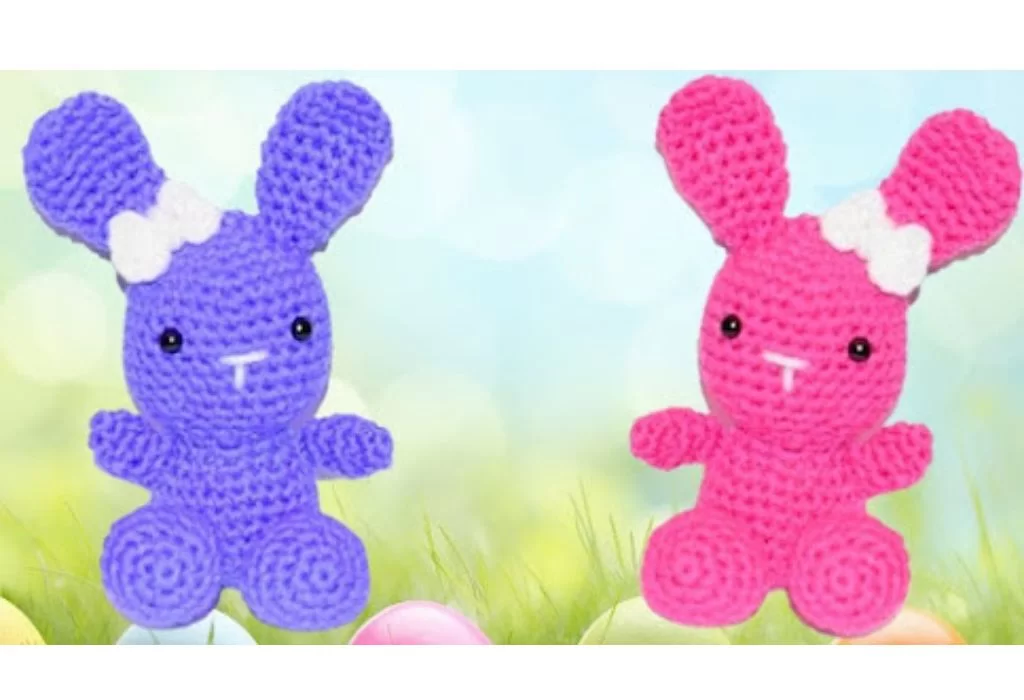
Crocheting an Easter Bunny Rabbit is a delightful craft and an excellent way to infuse some handmade charm into your Easter celebrations. This tutorial will guide you through creating an adorable crochet bunny with a long tail. Whether you’re an experienced crocheter or a beginner, this project is accessible, thanks to the free crochet bunny patterns and step-by-step instructions. This free crochet pattern is perfect for personal use and as a gift for Easter or any special occasion. So, gather your materials and embark on this crochet adventure.
You’ll find affiliate links within this post. If you decide to purchase through these links, I may earn a modest commission at no extra cost. Additionally, please review my privacy policy for more details.
**Magic Ring and Magic Circle**: To kick off your bunny project, you’ll learn how to start with a magic ring, also known as a magic circle, which is the foundation for creating the bunny’s head.
**Basic Crochet Stitches**: Understanding basic stitches like single crochet (sc) and slip stitch (sl st) is crucial for crafting your bunny.
**Creating Floppy Ears**: Work in the front loops to craft the bunny’s ears with an eye-catching touch.
**Bunny Head**: Use worsted-weight yarn and a G crochet hook to create the bunny’s head. Add safety eyes and a cute little nose to bring your bunny to life.
**Bunny Body**: Continue with the bunny’s body, incorporating stitch markers to keep track of your rounds.
I created this adorable crochet bunny with medium worsted yarn and a G hook. You can always make this bunny bigger with a larger hook and more rounds. This free easter bunny crochet pattern turned out so cute!
Learn how to crochet a bunny rabbit in this easy-to-follow guide. With this project, you can create a cute bunny rabbit to enjoy and use in your crochet projects! Crocheting a bunny rabbit is a fun and easy project you can start today. In this guide, you’ll learn how to crochet the rabbit’s body, the ears, and the tail.
✨ We hope you enjoyed these photos! If so, please consider sharing them on Pinterest by clicking the Pin Button on each image. Your support helps us connect with more people and spread creativity. Thank you so much! 💖
Click the Links for Your Materials
– Crochet hook
– Tapestry needle
– Stitch marker
Abbreviations
Ch=chain
Sl st=slip stitch
Dc=double crochet
Sc=single crochet
2sctog=2 single crochet together decrease; in the video, I did 2 invisible sc together decrease
G and F Hook and Medium Worsted yarn, Pink yarn
Stuffing Fiberfill, yarn needle, two eyes
Rnd 1: G hook, Magic Circle, work 6 sc, sl st into the beginning sc
Rnd 2: 2 sc in each stitch around, use a stitch marker- 12 sc
Rnd 3: *sc, 2sc in the next stitch, *Repeat around, – 18 sc
Rnd 4: *sc in the next two stitches, 2sc in the next stitch, *Repeat around, work in continual rounds no slip stitch -24 sc
Rnd 5: *sc in the next three stitches, 2sc in the next stitch, *Repeat around, -30 sc
Rnd 6: *sc in the next four stitches, 2sc in the next stitch, *Repeat around, -36 sc
Rnds 7-12: sc in each stitch around, – 36 sc (6 rounds of sc)
Rnd 13: *sc in the next four stitches, 2sctog decrease in the next stitch, *Repeat around
Rnd 14: *sc in the next three stitches, 2sctog decrease in the next stitch, *Repeat around
Rnd 15: *sc in the next two stitches, 2sctog decrease in the next stitch, *Repeat around, start stuffing the head with stuffing fiberfill. Place the Eyes into the head after you fill it, about 7-8 rows down about 7 – 8 inches apart.
Rnd 16: *sc, 2sctog decrease in the next stitch, *Repeat around; make sure you have about 12 or so stitches when this round is finished.
The Neck, continue on.
Rnd 17: *sc in the next two stitches, 2sc increase in the next stitch, *Repeat around
Rnd 18: *sc, 2sc in the next stitch, *Repeat around,
rnd 19: *sc in the next two stitches, 2sc in the next stitch, *Repeat around
Rnds 20-23: sc in each stitch around for 4 rounds
Rnd 24: *sc in the next two stitches, 2sctog decrease in the next stitch, *Repeat around,
Rnd 25: *sc in the next sc, 2sctog decrease in the next stitch, *Repeat around
Rnd 26: sc in each stitch around. Stuff with fiberfill
Rnd 27: *sc, 2sctog decrease, *Repeat around
Rnd 28: 2sctog decrease, until it closes, take your yarn needle and sew it up. Fasten off.
Legs, G hook, Make 2
Rnd 1: In the Magic Circle, work 6 sc, sl st
Rnd 2: 2 sc in each stitch around, use a stitch maker
Rnd 3: *sc, 2sc in the next stitch, *Repeat around, work in continual rounds
Rnds 4-6: sc in each stitch around, 3 rounds
Rnd 6: sc, 2sctog decrease, stuff with filling fiberfill.
Rnd 7: 2sctog six times to close, yarn the needle and sew it closed. Fasten off. Sew both legs on the button about 4 inches apart.
Arms, G hook, Make two
Rnd 1: In the Magic Circle, work 4 sc, sl st
Rnd 2: *sc, 2sc, *Repeat around
Rnd 3-4: sc in each stitch around, two rounds, Fasten off
Sew them on both sides on top of the body by the head.
Ears, Make 2
Rnd 1: In the Magic Circle, work 5 sc, sl st
Rnd 2: 2 sc in each stitch around,
Rnd 3: *sc, 2sc in the next stitch, *Repeat around,
Rnd 4: sc in the next two stitches, 2sc, *Repeat around
Rnds 5-7: sc around, 3 Rounds total
Rnd 8: sc in the next two stitches, 2sctog, *Repeat around
Rnds 9-10: sc around, 2 Rounds total
Rnd 10: sc, 2sctog, *Repeat around, Fasten off and Sew on the Ears on top of the head about 3 inches apart.
Nose:
Sew on a nose below the eyes in the center, with a some dash lines that look like a triangle.
Tail
In the Magic Circle, work 4 sc,
Rnd 2: sc, 2sc, Repeat around, -6 sc or you can use a hot glue gun and attach a cotton ball on the back.
Bow:
F hook
White yarn
In the Magic Circle, Ch 3, work 3 dc, ch 3, sl st, ch 3, 3 dc, ch 3, sl st, sl st in the center to complete pull in close. Wrap the center with your yarn about 5-6 times. Sew on the bottom of one of the ears. I hope you enjoy this free easter bunny crochet pattern!
Print the Entry on the top of the page to print the pattern!
Click Here for More Crochet Holiday Patterns
**Bunny Tail and Long Tail**: Finish your bunny by adding a yarn tail, a delightful feature for hanging or displaying your creation.
**Bunny Hat and Accessories**: Get creative and consider crafting a bunny hat or other accessories to personalize your crochet rabbit.
Creating your Easter Bunny Rabbit through this easy crochet pattern tutorial is fulfilling and enjoyable. The freedom to choose different colors and sizes allows you to make the perfect gift for Easter, baby showers, or to share with dear friends. Whether you’re documenting your process on a YouTube channel, sharing it on social media, or using affiliate links to support your crafting endeavors, this adorable amigurumi bunny can bring joy to many. The best part? You can make it without any additional cost and might even earn a small commission if you use affiliate links. So, pick up your crochet hook, yarn, and other materials and create a cute little bunny that will be a lovely addition to your Easter holidays or a thoughtful gift for bunny lovers.
To Find All My Crochet Jewel Patterns, Click Here

Click Here for My Ravelry Patterns


Crochet Hats for Beginners Book For Sale – Click Here

Crochet For Beginners Book for Sale – Click Here


You May Also Like
How to Crochet a Ghost: A Spooky DIY Guide

Free Crochet Gnome Pattern: Add Charm to Your Festive Season
