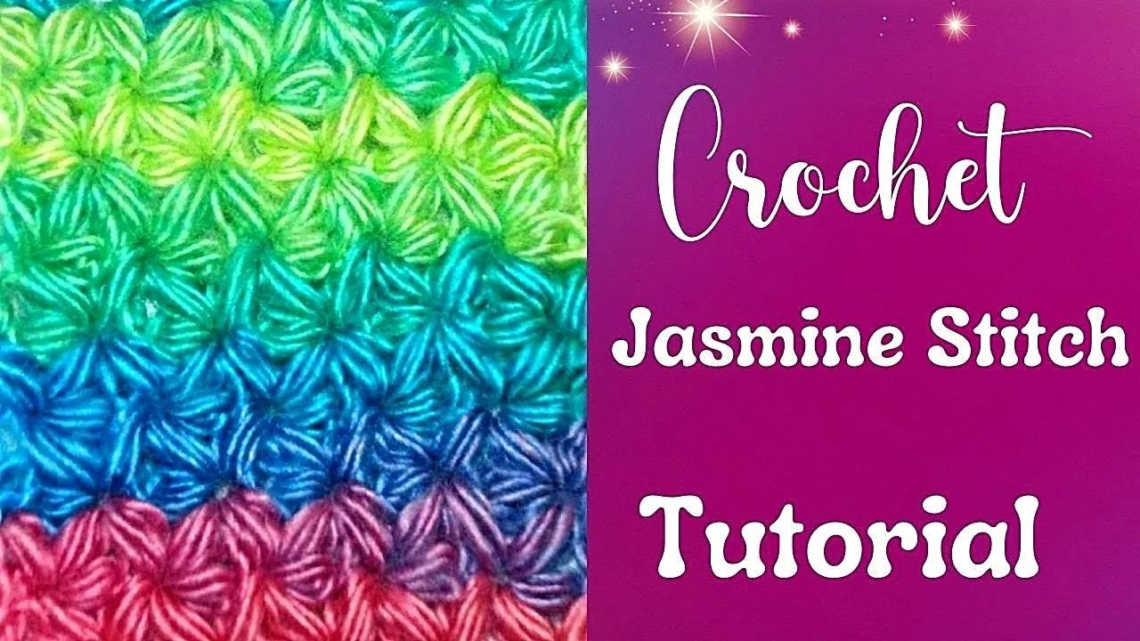
How to Crochet a Beautiful Jasmine Stitch Tutorial
How to Crochet a Jasmine Stitch
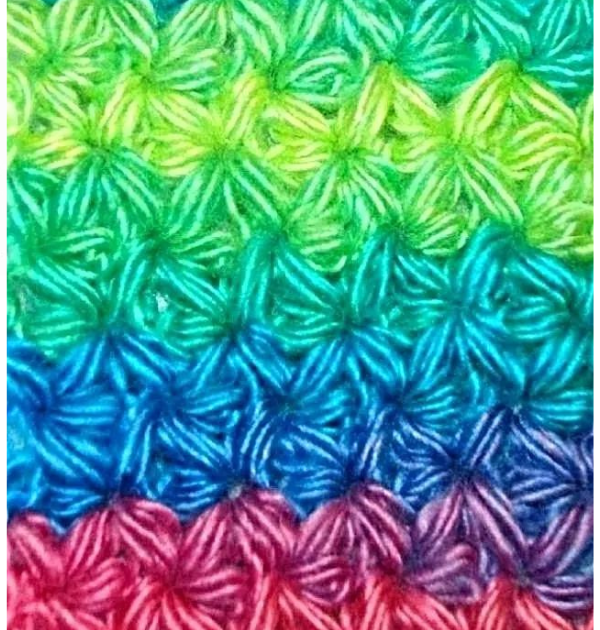
Welcome to the world of crochet, where the delicate intricacies of the jasmine stitch crochet technique await to transform your projects into works of art. In this tutorial, I will guide you through creating this stunning stitch using a baby green yarn for clarity and ease of demonstration. While the unforgettable Boutique candied yarn from Red Heart was initially used for its luxurious feel, the baby green yarn is more manageable, making it ideal for beginners and seasoned crocheters alike.
This post contains affiliate links. If you purchase through these links, I may earn a modest commission at no extra cost. Please review my privacy policy for more details.
✨ We hope you enjoyed these photos! If so, please consider sharing them on Pinterest by clicking the Pin Button on each image. Your support helps us connect with more people and spread creativity. Thank you so much! 💖
Let’s begin with a straightforward chain one as our base stitch in jasmine stitch crochet. Moving forward, we’ll delve into crafting the puff stitch, which serves as the cornerstone of the Jasmine Star Stitch. By wrapping the yarn over and delicately inserting our hook into the designated chain, we’ll systematically shape the puff stitch, wrapping the yarn over multiple times to achieve the desired fullness. This sequence will be reiterated, enabling us to fashion a row of evenly distributed puff stitches.
Click the Links for Your Materials
All Colors of Yarn Click Here
- Crochet hook
- Tapestry needle
- Stitch marker
Alright, let’s break down the instructions for crocheting the Jasmine Star Stitch step by step for the viewer:
**Materials Needed:**
- Yarn (such as Red Heart Unforgettable Boutique Candied Yarn or any other desired yarn)
- Crochet hook (recommended size: H hook)
- Scissors
**Instructions:**
1. **Starting Chain:**
- Make a slip knot onto the hook.
- Begin with a chain of one.
2. **First Puff Stitch:**
- Yarn over and pull up a loop, leaving about an inch of yarn tail.
- Yarn over, insert the hook into the first chain, and pull up a loop. Repeat this two more times, resulting in three loops on the hook.
- Yarn over and pull through all three loops.
- Chain one to complete the puff stitch.
3. **Repeat Puff Stitch:**
- Repeat the puff stitch sequence across the row. For example, if you want to demonstrate, repeat the puff stitch five more times, making six puff stitches.
4. **Open Puff Stitch:**
- After completing the desired number of puff stitches, work an open puff stitch by following the same puff stitch sequence without closing it. Instead, leave the loops on the hook.
5. **Creating Star Stitch:**
- To create the star stitch, locate the center of the previous puff stitch and insert the hook into the chain one space.
- Yarn over and pull up a loop. Repeat this twice in the same space, resulting in three loops on the hook.
- Yarn over and pull through all three loops on the hook, then chain one.
6. **Repeat Star Stitch:**
- Continue working star stitches across the row by working three puff stitches and then creating a star stitch in the center of each puff stitch from the previous row.
7. **Closing Puff Stitch:**
- At the end of the row, work a closing puff stitch by following the puff stitch sequence but with only two loops on the hook instead of three.
8. **Continuing Rows:**
- For each subsequent row, start with a closing puff stitch, then repeat the process of working puff stitches and creating star stitches across the row.
9. **Finishing:**
- Continue crocheting rows until you reach the desired length for your project, whether it’s a scarf, cowl, or blanket.
10. **Final Touches:**
- After completing your project, fasten off the yarn and weave in any loose ends using a yarn needle.
Remember to practice each step slowly and carefully, especially if you’re new to crocheting. With practice, you’ll become more comfortable with the Jasmine Star Stitch pattern and can create beautiful projects with it. Enjoy your crocheting journey!
We’ll move on to the intricate star stitch pattern once we’ve established the foundation row of puff stitches. This involves alternating between closed and open puff stitches, strategically placed to create the distinctive star-shaped motif. With each set of puff stitches, we’ll carefully pull through the loops, securing the stitches together to form the star pattern. The elegant Jasmine Star Stitch will gradually emerge through repetition and attention to detail.
As we progress through the rows, we’ll maintain consistency in our stitch placement, ensuring that each star motif is symmetrical and well-defined. The rhythm of the stitch becomes familiar, allowing for a smoother and more intuitive crocheting experience. With each completed row, the beauty of the Jasmine Star Stitch becomes increasingly apparent, showcasing its intricate design and delicate charm.
In conclusion, mastering the Jasmine Star Stitch opens up a world of creative possibilities in crochet. Whether you incorporate it into a scarf, a cowl, or a baby blanket, the elegance of this stitch is sure to elevate any project. With patience and practice, you’ll soon find yourself captivated by the graceful symmetry of the Jasmine Star Stitch, adding a touch of timeless beauty to your crochet repertoire. So, please pick up your hook and yarn, and let’s embark on a journey of creativity and craftsmanship with the enchanting Jasmine Star Stitch.
Click for a Chicken Potholder Pattern
To Find All My Crochet Jewel Patterns, Click Here
Click Here for My Ravelry Patterns
Crochet Hats for Beginners Book For Sale — Click Here
Crochet For Beginners Book for Sale — Click Here


