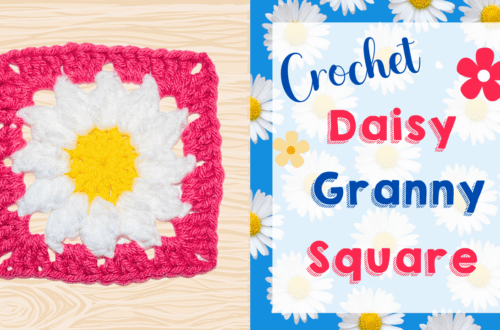
A Step-by-Step Guide to Crocheting a Flower Granny Square
How to Crochet a Flower Granny Square
Welcome to our comprehensive guide on creating crochet flower granny squares. Whether you’re an experienced crocheter or are trying it for the first time, this tutorial will take you through the step-by-step instructions to make stunning flower granny squares. These versatile squares can make beautiful afghans, baby blankets, table runners, or stylish square bags. In this tutorial, we’ll cover the basic crochet stitches, including the slip stitch (sl st), single crochet (sc), treble crochet (dc), and special stitches like the cluster stitch and popcorn stitches. You can follow a written pattern or watch a video tutorial for a visual guide. Before diving into the details, grab your favorite crochet hook, yarn, and yarn needle, and let’s begin this creative journey.
You’ll find affiliate links within this post. If you decide to purchase through these links, I may earn a modest commission at no extra cost. Additionally, please review my privacy policy for more details.
✨ We hope you enjoyed these photos! If so, please consider sharing them on Pinterest by clicking the Pin Button on each image. Your support helps us connect with more people and spread creativity. Thank you so much! 💖
**Materials You’ll Need**
– Yarn: Choose your preferred cotton, worsted weight, or scrap yarn.
– Crochet Hook: Use the hook size recommended for your chosen yarn.
– Yarn Needle: Essential for weaving in loose ends.
– Scissors: To trim excess yarn.
– Magic Ring: Learn how to create a magic ring for a neat start to your squares.
**Starting Your Square**
– Make a slip knot and insert your hook to begin.
– Create a magic ring, a great way to start granny squares with a tight center.
– Work your first chain, and you’re ready to start your first round.
**Basic Stitches**
– The slip stitch (sl st) and single crochet (sc) are essential for creating the foundation of your granny square.
– Learn the treble crochet (dc) for taller stitches, which is ideal for building the square’s corners.
**Color Play**
– Get creative by using different colors for your squares. Mix and match to create stunning flower motifs.
– Incorporate new colors at the appropriate times to achieve a beautiful pattern.
Please provide a link to my blog if you want to share my content. However, I kindly request that you refrain from copying and posting my patterns on your website. You are welcome to sell any items you create using my patterns, but please refrain from selling the patterns themselves, as they are offered for free. Thank you for your understanding and support!
Crochet granny squares are a great way to use up extra yarn and are perfect for adding a splash of color to any project. We’ll walk you through the entire tutorial, from beginning to end, so that you can make this beautiful crochet square quickly!
Supplies:
Click the Links for Your Materials
– Crochet hook
– Tapestry needle
– Stitch marker
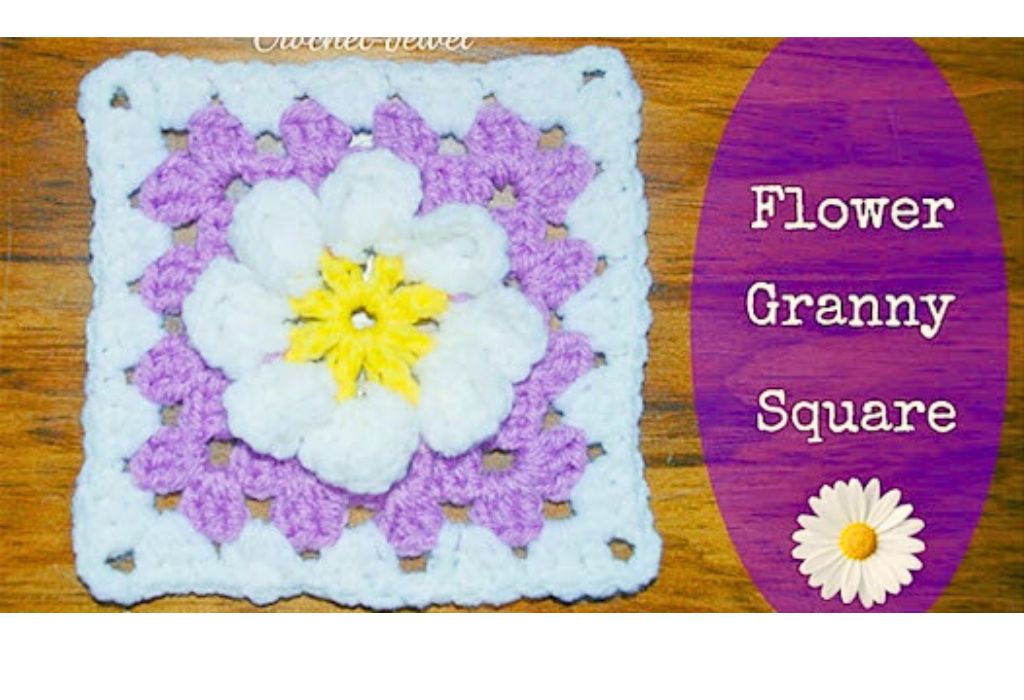
Yellow, White, and Purple yarn
sc=single crochet
G hook
You can keep increasing each round for the Granny Square if you want it bigger.
Print the Entry on the top of the page to print the pattern!
Click Here for Crochet Coaster Patterns
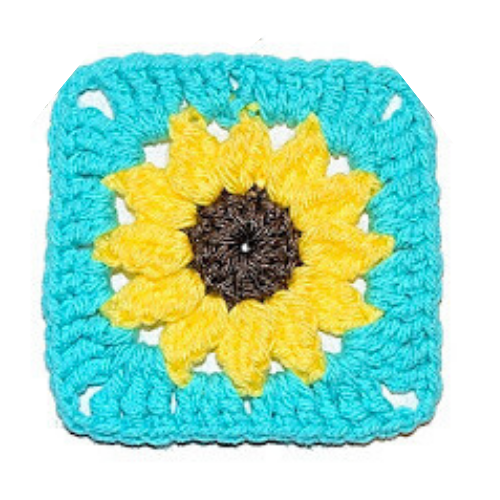
Click Here for a Sunflower Coaster
**Written and Video Patterns**
– Choose a written pattern or a video tutorial, depending on your learning preference.
**Finishing Touches**
– Weave in loose ends using a yarn needle for a clean look.
– Learn the whip stitch and how to join squares for larger projects like square blankets and table runners.
In conclusion, mastering the art of crocheting flower granny squares opens up a world of creative possibilities. Whether you’re a seasoned crocheter or just starting, these squares can be a fun and rewarding project. With various stitches and color options, you can create unique and beautiful patterns, like the dainty daisy granny square or the sunburst granny square. Join our social media and Facebook group communities to share your creations and find inspiration from fellow crocheters. Don’t forget to explore affiliate links for special offers and crochet supplies. So, grab your yarn and hook, follow our step-by-step guide, and let your imagination run wild as you crochet these lovely flower granny squares. Happy crocheting!
To Find All My Crochet Jewel Patterns, Click Here

Click Here for My Ravelry Patterns


Crochet Hats for Beginners Book For Sale – Click Here

Crochet For Beginners Book for Sale – Click Here


You May Also Like
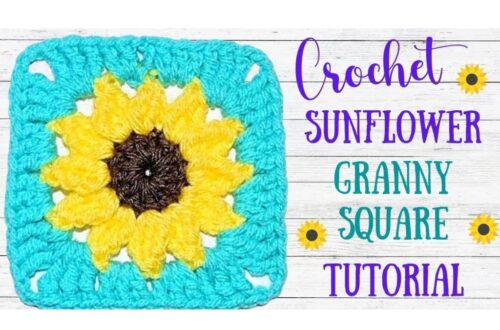
Crochet Sunflower Granny Square: A Delightful Summer Accessory

How to Crochet a Flower Granny Square Pattern