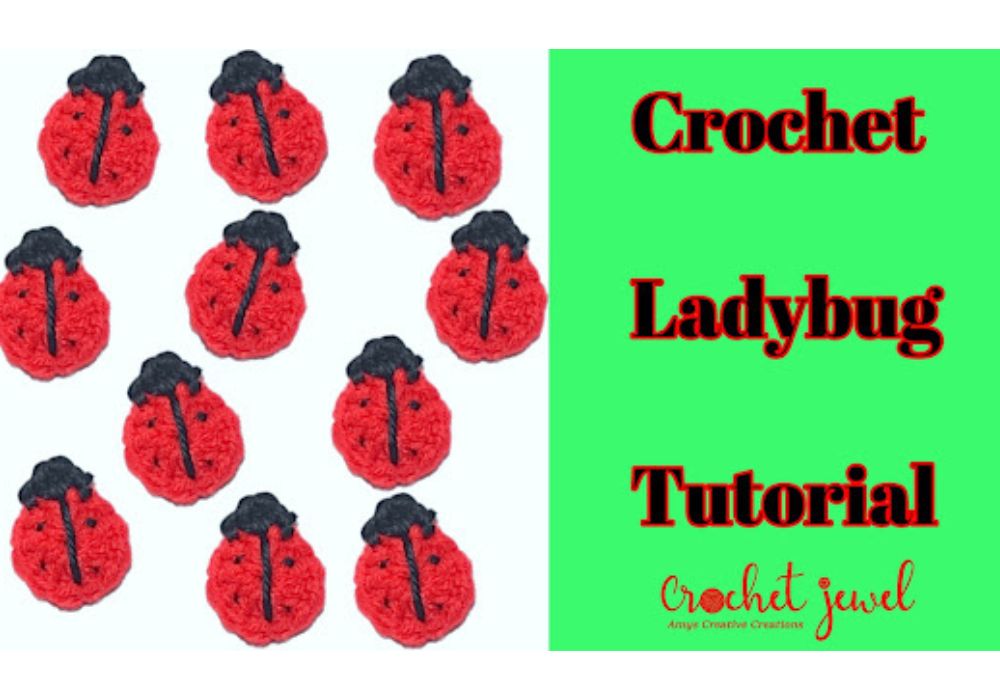
Crochet a Cute Little Ladybug Pattern: Step-by-Step Tutorial
How to Crochet a Ladybug
Are you ready to embark on a delightful crochet adventure and create your very own adorable ladybug? This step-by-step tutorial will show you “How to Crochet a Ladybug” with a free pattern perfect for all skill levels, whether you’re a beginner crocheter or a seasoned pro. This creative project is an excellent choice for gift-giving and a charming addition to your amigurumi collection. You’ll need some basic materials like red yarn, a mm crochet hook, and black buttons to make this cute ladybug come to life. So, let’s get started on this fun and colorful crochet journey!
You’ll find affiliate links within this post. If you decide to purchase through these links, I may earn a modest commission at no extra cost. Additionally, please review my privacy policy for more details.
✨ We hope you enjoyed these photos! If so, please consider sharing them on Pinterest by clicking the Pin Button on each image. Your support helps us connect with more people and spread creativity. Thank you so much! 💖
To begin your ladybug crochet adventure, you’ll need some essential materials. Grab your favorite red yarn, a mm crochet hook, a tapestry needle, and the free crochet pattern we’ll provide. The ladybug’s body starts with a magic ring and is worked in basic crochet stitches, including double crochet (dc), and slip stitch (sl st). Detailed instructions guide you through every step of this amigurumi ladybug pattern.
To bring your ladybug to life, add mm safety eyes and black buttons for the eyes and spots. Use a long piece of black yarn to create the distinctive black spots on the ladybug’s red body. Be sure to follow the pattern instructions carefully for the best results.
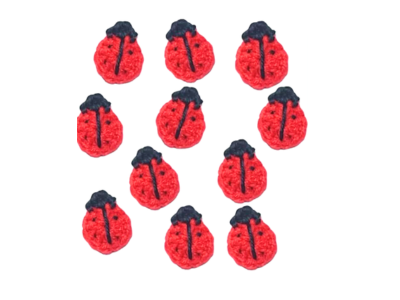
I created these cute ladybugs with medium worsted red and black yarn and an F hook.
If you want to learn how to crochet, this crochet a Ladybug tutorial is the perfect place to start! This easy tutorial will teach you the basics of crochet step-by-step so you can start crocheting today!
Although crochet may initially seem complicated, this tutorial will make learning crochet easy and fun. In just a few short hours, you’ll be crocheting your very own beautiful ladybugs! So what are you waiting for? Start learning to crochet today!
How to Watch Videos in Slow Motion — if the video is too fast — Click Here!
How to Crochet For Beginners Playlist — Click Here
Abbreviations:
dc=double crochet
sl st=slip stitch
Click the Links for Your Materials
All Colors of Yarn Click Here
- Crochet hook
- Tapestry needle
- Stitch marker
Rnd 1: F hook, With Red yarn, In the Magic Circle, work 11 dc in the circle, and close the ring with your tail. sl st on top of the dc. Fasten off and weave in your ends.
Rnd 2: sl st anywhere with black yarn, in Rnd 1, then work 3hdc in the next stitch, sl st into the next stitch. Weave in your ends.
Then, sew black yarn in a line across the red body. Then, sew in little dots all over the body; the video will show you this step.
Fasten off and Weave in your ends. I hope you enjoyed this free ladybug crochet pattern!
Print the entry at the top of the page to print the pattern
For beginners, we recommend checking out video tutorials for extra guidance. Like this ladybug, Amigurumi patterns often work in the round, so using a stitch marker can help you keep track of your rounds. Don’t forget to create an invisible join for a seamless finish, and weave in any loose ends using a yarn needle.
Crocheting a ladybug is a creative project and a fantastic way to make great gifts for family members or friends. The ladybug’s bright colors and adorable design make it a perfect choice for special occasions or just for adding a touch of cuteness to your collection.
This amigurumi ladybug pattern is a beautiful addition to any crochet enthusiast’s repertoire. Share your finished ladybug on social media, and spread some ladybug season cheer! We hope you have much fun crafting this little garden critter from the free crochet pattern, and good luck with your crochet adventure.
To Find All My Crochet Jewel Patterns, Click Here
Click Here for My Ravelry Patterns
Crochet Hats for Beginners Book For Sale — Click Here
Crochet For Beginners Book for Sale — Click Here


