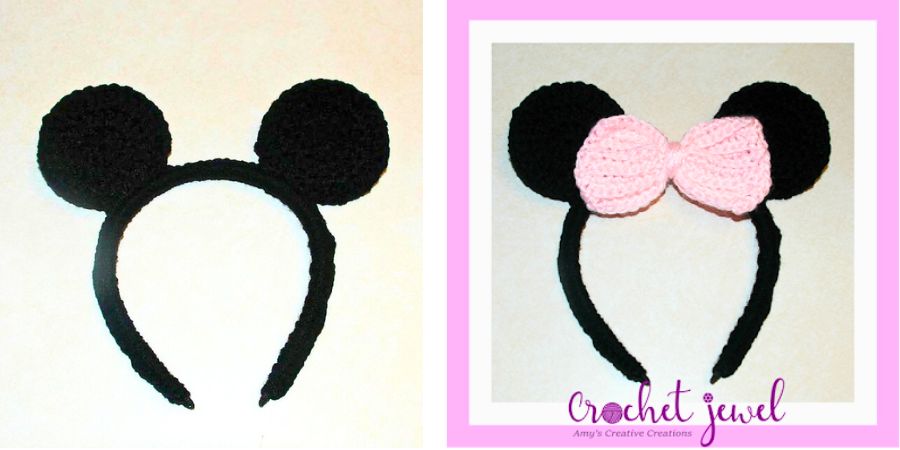
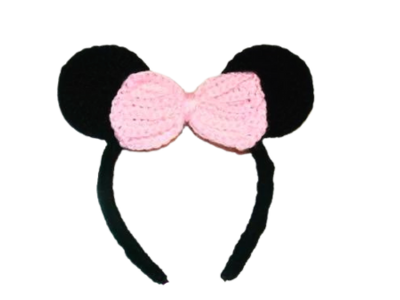
Crochet Easy Mouse Ears Headband: Step-by-Step Guide
How to Crochet Mouse Ears Headband
Crocheting a mouse ears headband is a fun and creative way to make stylish and cozy accessories. In this tutorial, we will guide you through the process using basic crochet stitches, ensuring it’s a quick and easy project perfect for all skill levels. Whether making it for yourself or as an ideal gift, our free crochet headband pattern with video tutorial will help you create the perfect accessory to keep your head warm during cold weather. We’ve included some affiliate links for your convenience, which may earn us a small commission at no extra cost to you.
You’ll find affiliate links within this post. If you decide to purchase through these links, I may earn a modest commission at no extra cost. Additionally, please review my privacy policy for more details.
✨ We hope you enjoyed these photos! If so, please consider sharing them on Pinterest by clicking the Pin Button on each image. Your support helps us connect with more people and spread creativity. Thank you so much! 💖
To get started with your crochet mouse ears headband, you’ll need the following materials:
– Yarn: You can use any yarn you choose, but cotton yarn works excellent for headbands.
– Hook: A recommended hook size for this project is typically a G and F crochet hook.
– Headband
– Tapestry needle: You’ll need this for weaving in loose ends and attaching any additional elements.
Supplies:
Click the Links for Your Materials
sl st=slip stitch
sc=single crochet
dc=double crochet
ch=chain
**Special Note: if you feel the headband doesn’t stay on your child’s head, you could just sc halfway down on both sides and leave the half bottom unworked. I noticed on my daughter’s head it slipped around some, but it still stayed on her head. So you could omit 20 sc on both sides after reading this pattern.
Chain 20, work sc in the 2nd chain from the hook and each sc across, -19 sc
Print the entry at the top of the page to print the pattern!
In addition to the practicality of creating your crochet headband patterns, the beauty of this project lies in the simplicity of the basic crochet stitches, making it suitable for crafters of all skill levels. Combining single crochet (sc), slip stitch (sl st), and double crochet stitches, all used in our free crochet headband pattern, ensures that even beginners can whip up these fantastic ear warmers. The video tutorial and written pattern provide a great way to grasp these easy stitches. With quick projects like this, you’ll quickly have a cozy headband ready, perfect for cold weather or gifting to loved ones. It’s an ideal accessory for staying warm and stylish.
Moreover, you can share your crocheted headbands on social media or YouTube. In that case, you can include affiliate links in your posts and potentially earn a small commission while spreading your love for this great project. Whether you prefer using worsted weight yarn or bulky yarn, the variety of options and colors allows you to create crocheted headbands that suit your style and preferences. Whether it’s a solid color or incorporating leftover yarn, there are great reasons to embark on this project. These headbands make perfect gifts for baby showers, friends, or family. So grab your crochet hook and start on a beautiful, fun headband that’s the ideal accessory for any kid’s occasion.
**Step 6: Finishing Touches**
Weave in loose ends with a tapestry needle and ensure your headband looks neat and cozy.
Crocheting a mouse ears headband is a great way to stay warm in style, and it’s also a perfect accessory for craft fairs or as a gift for baby showers. This easy and quick pattern can be customized in various sizes, from baby to adult. Whether using leftover yarn or trying new colors, this project allows creativity and experimentation. Plus, it’s an excellent addition to your collection of crocheted headbands. Don’t forget to share your creations on social media or your YouTube channel, and feel free to use our written pattern as a guideline for personal use. Stay warm and stylish with your handmade crochet headband!
To Find All My Crochet Jewel Patterns, Click Here

Click Here for My Ravelry Patterns


Crochet Hats for Beginners Book For Sale – Click Here


You May Also Like

How to Crochet a Shell Stitch Headband – Step-by-Step Guide
How to Crochet an Easy Tiara Headband Pattern