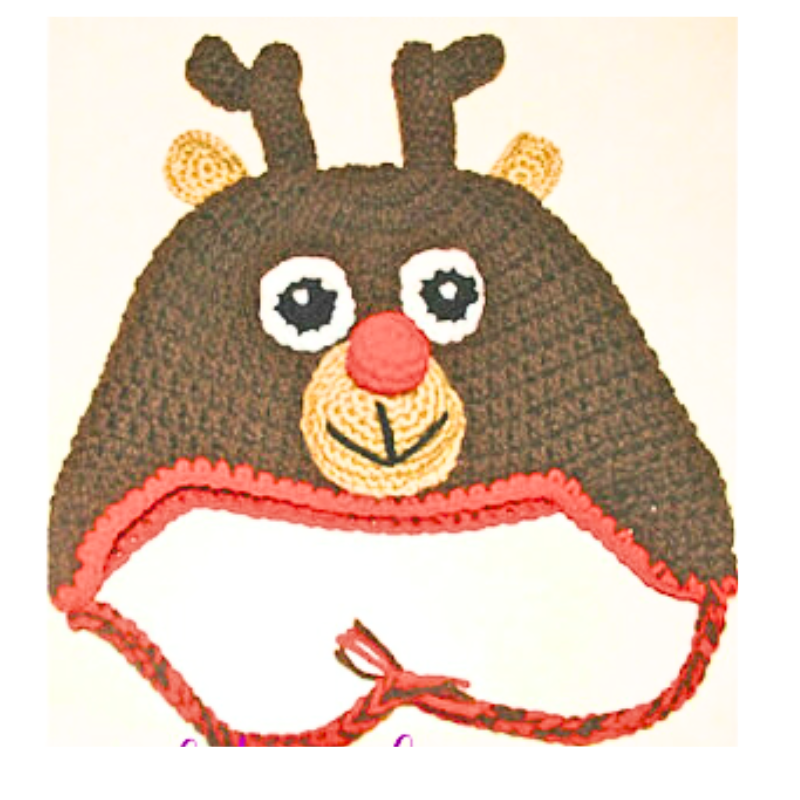
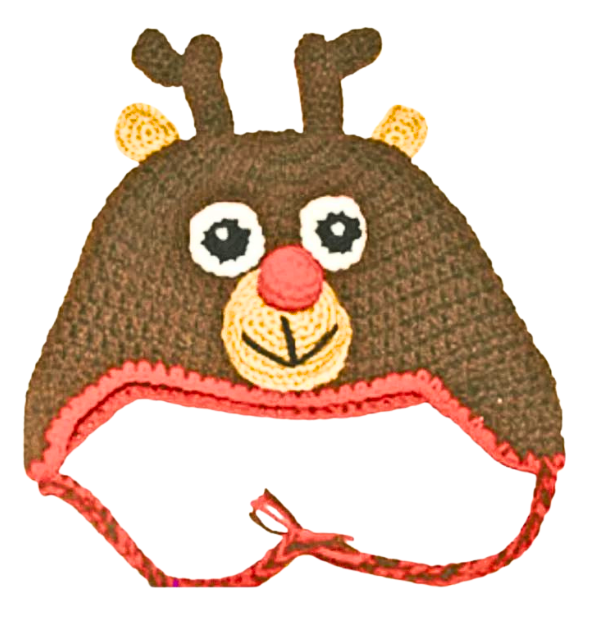
How to Crochet a Fun Reindeer Ear Flap Hat Pattern
How to Crochet a Reindeer Ear Flap Hat
Crocheting a reindeer ear flap hat is a delightful and festive project for the winter season. In this easy crochet hat pattern, we will explore basic crochet stitches such as single crochet, double crochet, and slip stitch, along with techniques like working in the back loop and creating a foundation chain. Whether you’re a seasoned crocheter or a beginner, this free crochet pattern is designed for various skill levels. It is a perfect project for creating a unique and cozy accessory for the cold weather.
For this crochet adventure, gather your favorite worsted weight yarn and a suitable hook (mm size). The pattern begins with a foundation row and guides you through shaping the hat, marking stitches with a stitch marker, and incorporating techniques like the slip stitch to join rounds seamlessly. As you progress, you’ll encounter details like adding ear flaps and creating a faux fur pom-pom for a touch of whimsy. Watch for helpful tips, including video tutorials for visual guidance, ensuring that even new crocheters can follow along easily.
You’ll find affiliate links within this post. If you decide to purchase through these links, I may earn a modest commission at no extra cost. Additionally, please review my privacy policy for more details.
✨ We hope you enjoyed these photos! If so, please consider sharing them on Pinterest by clicking the Pin Button on each image. Your support helps us connect with more people and spread creativity. Thank you so much! 💖
Supplies:
Click the Links for Your Materials
– Crochet hook
– Tapestry needle
– Stitch marker
H hook
Red heart brown, light brown, white, black, and red yarn
Stuffing
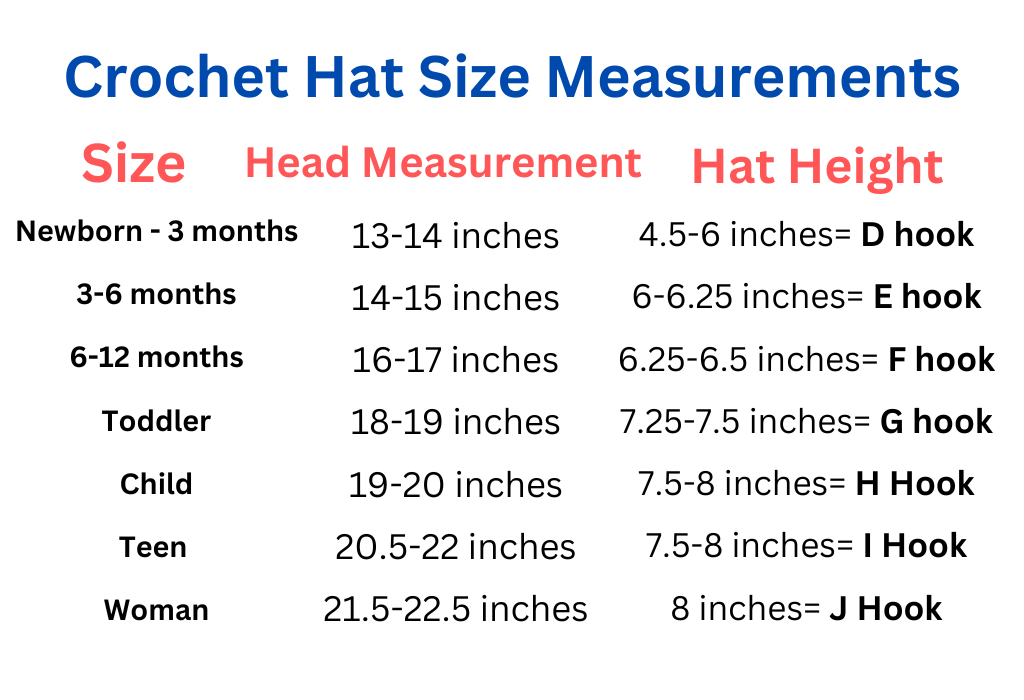
Abbreviations: ch=chain sl st=slip stitch sc=single crochet dc=double crochet dc2tog=double crochet 2 together rnd=round hdc=half double crochetHat for a 4-year-old child or adjust the size with a different hook size.
How to Watch Videos in Slow Motion – if the video is too fast!
Instructions: H hook, Brown yarn for the hat
Sc around the edge of the hat with red yarn.
EARS (make 2) -using light brown G hook
Rnd 1. Ch 2, 8 sc in 2nd ch (8 sc)
Rnd 2. Work 2 sc in each sc around (16 sc)
Rnd 3. *sc in next sc, 2sc in next sc, repeat from * around, (24 sc) Leave a long tail for sewing. Place the ears right next to the antlers on the outside on top of the hat.
Eyes: G hook, Make 2, white and black yarn
With Black yarn, ch 2 Work 5 sc in the 2nd chain from the hook, sl st. work 2sc in each stitch around, sl st. (10 sc)
With White yarn, *sc in the next ch space, 2sc in the next ch space, *repeat around. sl st.
Next round, sl st. turn, sc in the next 5 chain spaces, sl st. this will be the top of the eye, like an eye brow.
In the center of the eye, sew with a yarn needle with white yarn a few times to make the center of the eye (pupil). Attach the eyes about 1 inch apart in the center to top part of the hat above the nose/muzzle.
ANTLERS (make 2) Brown yarn I hook (if you want larger antlers use a larger hook)
Rnd 1: ch 2, Work 8 sc in first ch. Place marker in first stitch for beg of round; move marker up as each rnd is completed.
Rnd 2: Sc in each st around. Rep Rnd 2 until piece measures 2 inches long, stuffing as you go. Fasten off.
ANTLER BRANCHES (make 2) Make same as Antlers, working until piece measures 1 in. long. or you can make 4, and do one branch on each side of the long branch.
Nose: Red yarn, G hook
ch 2.
1st rnd: 6 sc in 2nd ch from hook. Join with sl st to first sc. -6sc
2nd rnd: Ch 1. 2 sc in each sc around. Join with sl st to first sc. -12 sc.
3rd rnd: Ch 1. 1 sc in each sc around. Join with sl st to first sc. Stuff Nose lightly. -12 sc
4th rnd: Ch 1. (Sc2tog) 6 times. Join with sl st to first sc. Fasten off, Attach the nose to the center of the muzzle. Smile: Use a sewing needle with black yarn and sew in a straight line below the nose and two lines on each straight line to create a smiling mouth.
Muzzle: G hook, Light brown yarn
ch 2, sc from the 2nd chain from the hook 6 times, sl st -6 sc
rnd 1. sc in the same stitch, 2sc in each stitch around, use a marker to keep track of your rounds -12 sc
rnd 2. *sc in the next stitch, 2sc in the next stitch, *repeat, -18 sc
rnd 3. *sc in the next 2 stitches, 2sc in the next stitch, *repeat, -24 sc
rnd 4. *sc in the next 3 stitches, 2sc in the next stitch, *repeat, -30 sc
rnd 5. *sc in the next 4 stitches, 2sc in the next stitch, *repeat, -36 sc
rnd 6. *sc in the next 5 stitches, 2sc in the next stitch, *repeat. fasten off. -42 sc
Print the Entry on the top of the page to print the pattern!
Experiment with different yarn weights, from bulky to super bulky, to customize the hat’s thickness and warmth according to your preference. The pattern also includes instructions for creating a slouchy or snug fit, catering to different head sizes. Learn how to adjust the hat height and use a variety of basic stitches to achieve the perfect fit. Feel free to explore the world of crochet beanie patterns and discover how the same design can be adapted to make slouchy hats, messy bun hats, or even chunky beanies.
As you work through the rows and rounds, you’ll encounter the versatility of crochet, allowing you to switch colors, experiment with different yarn textures, and add personal touches like yarn pom-poms. Don’t forget to check the crochet hat size chart to ensure the finished product matches your desired dimensions. This easy project is not only a great way to keep warm during the winter but also an opportunity to create handmade gifts for friends and family.
In conclusion, crocheting a reindeer ear flap hat is a rewarding and enjoyable experience for crocheters of all levels. Whether creating it for yourself or as a thoughtful gift, the combination of basic stitches, different yarn weights, and customizable features make this free crochet pattern a versatile and fun project. So, grab your yarn, hook, and stitch marker, and embark on a journey of happy crocheting!
To Find All My Crochet Jewel Patterns, Click Here

Click Here for My Ravelry Patterns


Crochet Hats for Beginners Book For Sale – Click Here

Crochet For Beginners Book for Sale – Click Here


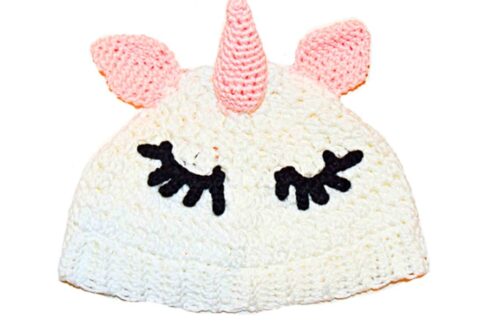
You May Also Like
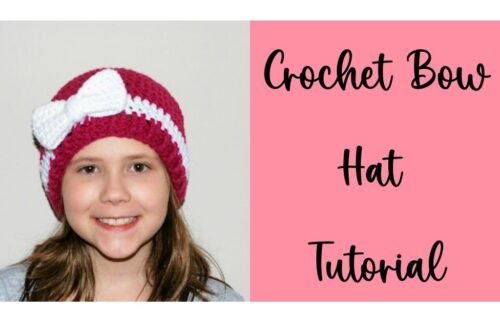
Crafting a Cute Bow Hat – Step-by-Step Crochet Tutorial

Learn How to Crochet a Witch’s Hat with Our Enchanting Tutorial