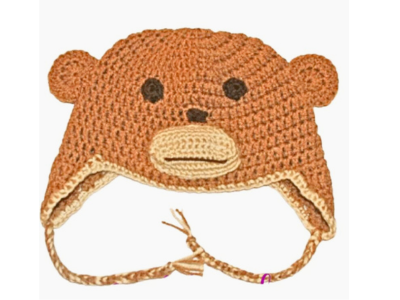
How to Crochet a Monkey Child Ear flap Hat Pattern
How to Crochet a Monkey Hat
Welcome to our crochet corner, where imagination and yarn intertwine to create adorable and functional masterpieces. Today, we’re diving into the whimsical world of animal-inspired crochet with a project that’s as playful as it is practical – the Crochet Monkey Hat.
Imagine your little one adorned in a cozy hat with adorable monkey ears and a delightful face that brings smiles wherever they go. This crochet creation is not just a hat; it’s a character, a companion, and a symbol of creativity and love.
This post contains affiliate links. If you purchase through these links, I may earn a modest commission at no extra cost. Please review my privacy policy for more details.
✨ We hope you enjoyed these photos! If so, please consider sharing them on Pinterest by clicking the Pin Button on each image. Your support helps us connect with more people and spread creativity. Thank you so much! 💖
Click the Links for Your Materials
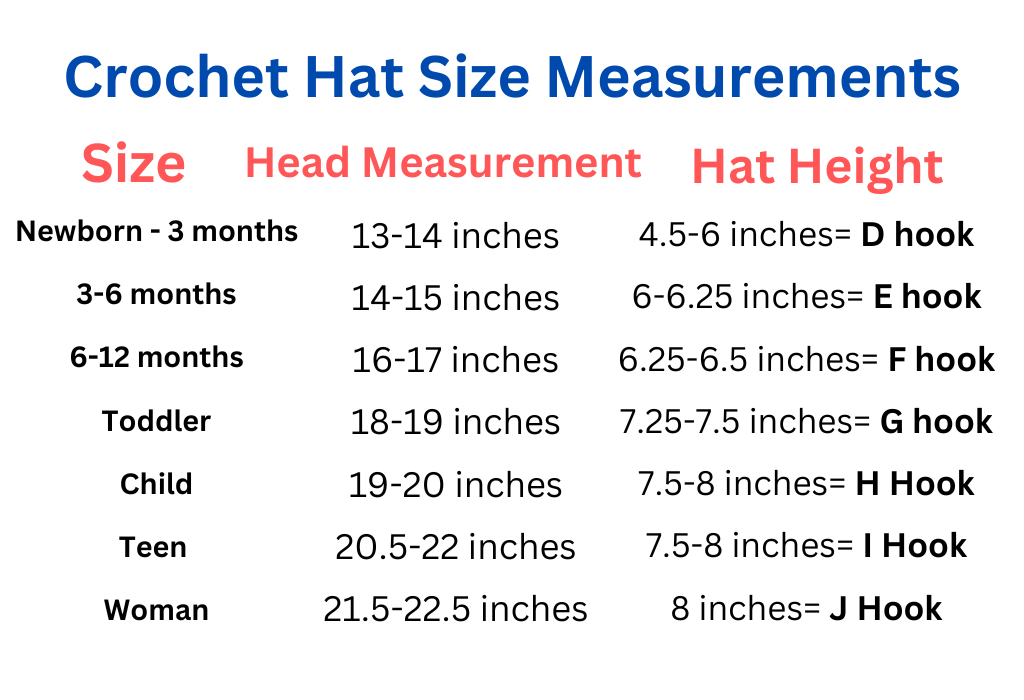
I Hook,
G Hook,
Ear flaps: If you would like to add ear flaps
Row 5. ch 2. dc2tog twice, dc in last st. cut yarn and pull through -3
round 4. 2 sc in next 2 sts, sc in each stitch across, 2sc in the last 2 sts.
round 5. sc in each stitch across.
round 6. sc in each sc across one side and the other side around the whole piece three times, sl st in final st and fasten off. Fill it with stuffing when you sew it on under the nose at the bottom of the hat.
Make 2
Row 2: Ch2, dc into same st. 2 dc into each st across (16dc) fasten off. sl st. Attach the ears on the side of the hat. Attach the ears about 6 rows down on each side of the hat.
Print the Entry on the top of the page to print the pattern!
As you progress to the top of the hat, mastering the slip stitch becomes crucial for achieving the desired shape. The long tail and free crochet pattern guide you through the process, making it an ideal project for beginners and experienced crocheters. Including a video tutorial further enhances the learning experience, providing a visual guide to accompany the written instructions.
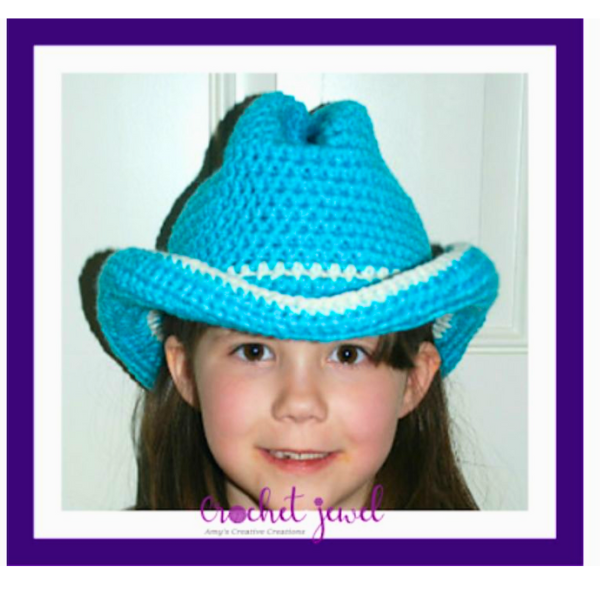
Click here for the Cowgirl Hat Pattern
Crafting crochet hats is an enjoyable and rewarding endeavor, especially when armed with an easy crochet hat pattern that incorporates essential stitches like the back loop, single crochet, and slip stitch. The long tail and free crochet pattern provide the foundation for a stylish accessory as you work your way to the top of the hat. This versatile project accommodates various skill levels, offering free crochet hat patterns to suit beginners and seasoned crocheters. Enhancing the learning experience, a video tutorial guides you through the process, complemented by using a stitch marker for precision. Whether using worsted weight yarn for a classic look or opting for bulky weight yarn to combat the chill of the winter season, the ability to experiment with different yarn weights makes this pattern adaptable to diverse climates. Don’t forget the charming details like faux fur pom poms or yarn pom poms, adding a touch of whimsy to your finished hat. With the right combination of basic stitches, a carefully chosen hook size, and your favorite yarns, this project is an easy one, a great gift, and a perfect fit for the happy crocheter. So, dive into this crochet hat pattern, share your progress on social media or in a crochet Facebook group, and revel in the joy of creating a finished hat that’s both stylish and functional.
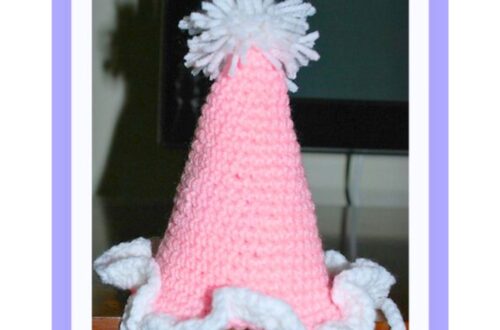
Experimenting with different yarn weights allows you to customize the hat for various reasons. Whether you choose bulky weight yarn for the winter season or lighter options for milder weather, the versatility of this pattern makes it a go-to for creating personalized gifts. Additionally, incorporating faux fur pom poms or yarn pom poms adds a whimsy to the finished product, making it even more appealing to children.
In conclusion, crocheting a Monkey Child Ear Flap Hat is not only a delightful and easy project but also a rewarding one. The combination of basic crochet stitches, a well-crafted pattern, and the freedom to experiment with different yarn weights make this hat a versatile and enjoyable endeavor for crocheters of all skill levels. Whether creating a cozy accessory for a little one or exploring the world of crochet for the first time, this pattern will undoubtedly result in a finished hat that brings joy and warmth. So, gather your favorite yarns, pick up your crochet hook, and embark on a journey of happy crocheting with this perfect and playful hat pattern.
To Find All My Crochet Jewel Patterns, Click Here

Click Here for My Ravelry Patterns


Crochet Hats for Beginners Book For Sale – Click Here

Crochet For Beginners Book for Sale – Click Here


You May Also Like
Create Your Own Cozy Pom Pom Hat: Easy Crochet Pattern Tutorial

Create a Stylish Two-Tone Crochet Hat in One Step