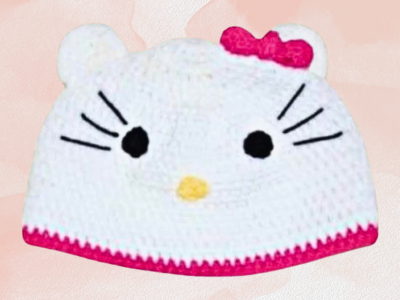
How to Crochet a Cute Hello Kitty Hat
How to Crochet a Kitty Hat
Crocheting hats are a delightful and creative way to keep warm during winter while showcasing your unique style. Whether you’re a seasoned crocheter or a beginner, this guide will introduce you to crafting. It focuses on an easy crochet hat pattern featuring the beloved Hello Kitty character. This comprehensive tutorial covers essential techniques, stitches, and tips to help you create a perfect and adorable Hello Kitty hat.
You’ll find affiliate links within this post. If you decide to purchase through these links, I may earn a modest commission at no extra cost. Additionally, please review my privacy policy for more details.
✨ We hope you enjoyed these photos! If so, please consider sharing them on Pinterest by clicking the Pin Button on each image. Your support helps us connect with more people and spread creativity. Thank you so much! 💖
To begin your crochet adventure, choose your favorite yarn—perhaps a worsted weight or bulky yarn for added warmth. Consider using different colors to customize your hat and make it truly one-of-a-kind. The basic stitches for this project include single crochet, double crochet, and slip stitch (sl st).
As you progress, utilize a stitch marker to keep track of your rounds and ensure a consistent pattern.
How to Crochet For Beginners Playlist – Click Here
Supplies:
Click the Links for Your Materials
– Crochet hook
– Tapestry needle
– Stitch marker
J and G hook
Red heart white, yellow, black, and pink yarn
Abbreviations:
ch=chain
dc=double crochet
sc=single crochet
sl st=slip stitch
Instructions: J hook white yarn for the body
black yarn, G hook,
rnd 1. chain 2, Work 10sc in the 2nd chain from the hook. Join sl st.
Bow: Pink yarn G hook
row 1. ch 12, sc in the 2nd chain from the hook and each stitch to the end,ch 1, turn
rows 2-4. *sc in each chain across working in the back loops only, ch 1 turn, * repeat sc in all stitches around the border of the bow. take yarn and wrap it around the center about 8-10 times or so to make the center of the bow and secure and weave in the ends
Whiskers: Use three black pieces on yarn on each side of the face of the kitty. Each Whisker measures 1 1/2 inches. Sew them on individually and tie them on inside the hat. Place the whisker next to the eyes, about 1/2 inch away on both sides.
Nose: G hook, Yellow yarn, leave a long tail to sew onto the hat
rnd 1. chain 2, Work 10 sc in the 2nd chain from the hook. join sl st.
Ears
Sew the ears on top of the hat about 2 inches apart.
Print the Entry on the top of the page to print the pattern!
The hat’s height and size can be easily adjusted based on your preference and head size. Experiment with different yarn weights, such as chunky or super bulky yarn, to achieve the perfect fit for your Hello Kitty creation. Don’t forget to incorporate a faux fur pom-pom or a yarn pom-pom for that extra charm.

Click Here for the Kitty Hat Pattern
Pay special attention to the back loop technique as you progress through your easy crochet hat pattern. This method adds a subtle texture and contributes to the overall visual appeal of your crochet hats. Working in the back loop creates a distinctive ribbed effect, giving your hat a touch of sophistication. It’s a small detail that makes a significant difference, turning a simple project into a stylish accessory for the winter season.
In addition to the essential crochet stitches like single crochet and slip stitch, experiment with more advanced techniques like the half double crochet and double crochet stitches to add variety and depth to your crocheted beanies. When combined with the back loop method, these stitches create a beautiful and intricate pattern. Their versatility allows you to craft a range of hat styles, from a classic beanie to a trendy slouchy hat or even a messy bun hat for those on-the-go days.
Embrace the winter season by crafting cozy accessories with bulky weight or super bulky yarn, ensuring warmth without compromising style. Whether you’re a seasoned crocheter or a beginner, the free crochet hat patterns and video tutorials will guide you through the process. Share your finished projects on social media, where our vibrant community celebrates the joy of creating and exchanging handmade gifts. As you crochet each stitch and reach the end of the row, relish the satisfaction of completing a perfect fit for the head size of your choice. Happy crocheting, and may your hat-making journey be as enjoyable as the stylish accessories you create!
For those new to crocheting, a video tutorial is available to guide you through each step of the process. Explore a variety of free crochet hat patterns and discover how easy it is to create beautiful and practical accessories. Whether you’re making a slouchy beanie, a messy bun hat, or a classic beanie, there’s a pattern suited for every style and skill level.
Feel free to join our vibrant social media community, where you can share your progress, ask questions, and connect with fellow crochet enthusiasts. We also provide a handy crochet hat size chart to ensure your finished project fits perfectly.
Embark on this easy crochet hat pattern journey with Hello Kitty as your charming companion. Crocheting offers a fulfilling and enjoyable experience, making it an excellent project for beginners and experienced crafters. Happy crocheting, and may your finished Hello Kitty hat be a cozy and stylish addition to your winter wardrobe!
To Find All My Crochet Jewel Patterns, Click Here

Click Here for My Ravelry Patterns


Crochet Hats for Beginners Book For Sale – Click Here

Crochet For Beginners Book for Sale – Click Here


You May Also Like
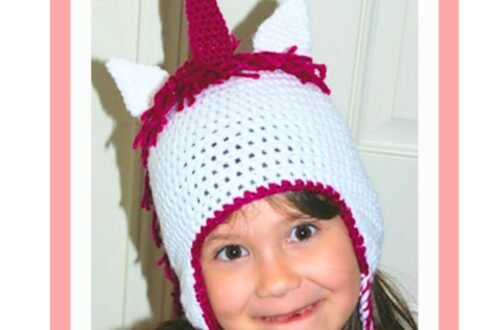
Crafting Enchantment: Crochet Your Own Magical Unicorn Hat
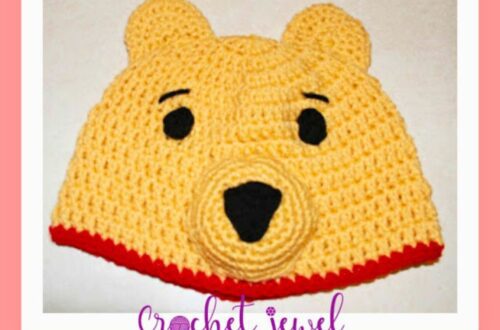
How to Crochet a Stylish Winnie the Pooh Inspired Hat Pattern