How to Crochet a Fun Mouse Ears Child Ear flap Hat Pattern
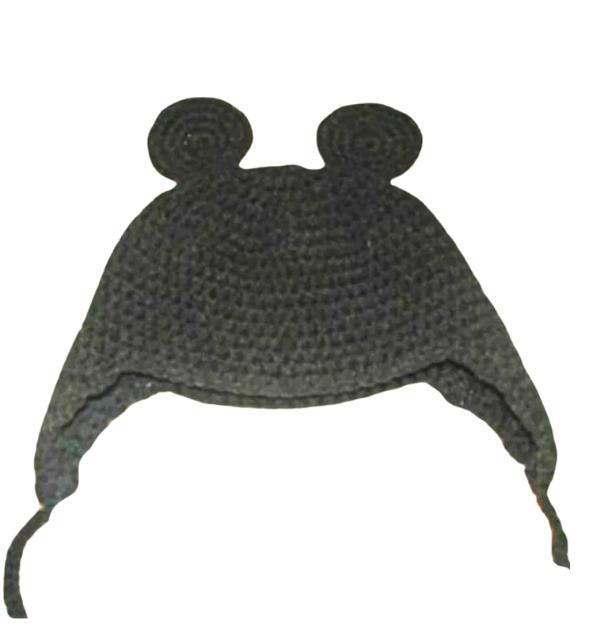
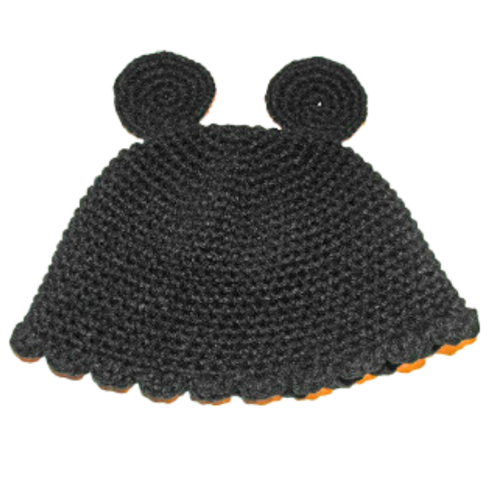
How to Crochet Mouse Ears Earflap Hat
Crocheting adorable accessories like the Mouse Ears Child Ear Flap Hat can be a delightful and rewarding experience. This guide’ll explore an easy crochet hat pattern incorporating essential techniques like back loop stitches, single crochet, and slip stitches (sl st). This free crochet pattern suits various skill levels, making it a perfect project for beginners and seasoned crocheters. Whether crafting for your little one or seeking a charming gift idea, this mouse ears hat tutorial offers a fun way to express creativity.
To begin this project, you’ll need some basic supplies, including worsted-weight yarn, a crochet hook (specified as an mm hook), and a tapestry needle for finishing touches. The pattern employs common stitches like single crochet and slip stitch, with the added twist of working in the back loop for a unique texture.
✨ We hope you enjoyed these photos! If so, please consider sharing them on Pinterest by clicking the Pin Button on each image. Your support helps us connect with more people and spread creativity. Thank you so much! 💖
You’ll find affiliate links within this post. If you decide to purchase through these links, I may earn a modest commission at no extra cost. Additionally, please review my privacy policy for more details.
Start by creating a foundation row and then progress through the pattern, using a stitch marker to keep track of your work. Don’t forget to repeat rows as necessary to achieve the desired height. For those who prefer visual guidance, a helpful video tutorial is available. Feel free to customize the hat by experimenting with different yarn weights or incorporating faux fur pom poms for a playful touch.
In crocheting this delightful Mouse Ears Child Ear Flap Hat, pay special attention to the back loop stitches, which contribute to the hat’s unique texture. The repetitive nature of the single crochet and slip stitch sequences, totaling 18 slip stitches, creates a rhythmic flow as you work to the top of the hat. This easy crochet hat pattern is versatile, allowing you to experiment with different color combinations or add a touch of whimsy with a yarn pom or faux fur accessory.
Consider sharing your finished masterpiece on social media or within crochet enthusiast communities. The crochet hat size chart ensures you can adapt the pattern for different age groups, from the most miniature heads to adults, making it a versatile and cherished item. Whether gifting it to a loved one or keeping it for yourself, the Mouse Ears Child Ear Flap Hat is more than a simple accessory – it’s a testament to the joy of happy crocheting and the satisfaction of completing the perfect crochet hat pattern.
The sizing considerations are covered, ensuring that the hat fits snugly while allowing for variations in head size. A crochet hat size chart is provided to guide you through creating the perfect fit for different age groups, including a child’s head size.
Toddler hat with an 18-inch head: Use a larger hook for a more giant head or a smaller hook for a smaller head
Click the Links for Your Materials
Instructions: Black yarn, I hook ch 5, sl st, to form a ring.
rnd 1. ch 2 (count as one hdc), do 9 hdc in the ring, sl st. (10 hdc)
rnd 2. ch 2, do 2hdc in each stitch around, continue around, without a slip stitch (start to use a marker) (20 hdc)
rnd 3. *do hdc in the next stitch, 2hdc in the next stitch, *repeat around, continue around, no slip stitch or chain, (I would use a marker so you can keep track of your increased rounds) (30 hdc)
rnd 4. *do hdc in the next 2 stitches, 2hdc in the next stitch, *repeat around, continue around. (40 hdc)
rnd 5. *do hdc in the next 3 stitches, 2hdc in the next stitch, *repeat around, continue around. (50 hdc)
rnd 6. *do hdc in the next 4 stitches, 2 hdc in the next stitch, *repeat around, continue around. (60 hdc)
rnd 7. *do hdc in each stitch around,*repeat until you hat measures 7 inches long., sl st., continue on for the first earflap Ears: Make 2 Ears, G hook, Black yarn
rnd 1. chain 3, join with sl st. to create a ring
rnd 2. 10 sc into the ring, sl st. join
rnd 3. *2sc in the next st, *Repeat to finish around (20 st.)
rnd 4. *1 sc in the next st, 2sc in the next st. *Repeat, sl st. rnd 5. *1 sc in the next 2 stitches, 2sc in the next st, *Repeat, sl st. Fasten the ears on top of the hat.
ch 2. hdc2tog, hdc in the next 3, hdc2tog. hdc in the last st., turn -6 sts
ch 2. hdc2tog, hdc in next 1, hdc2tog. hdc in the last st., turn. -4sts
ch 2. hdc in each stitch across, pull through and fasten off. -4 sts
Trim: use black yarn, sc around the hat and ear flaps
Ears:: Make 2, G hook, Black, white, ch 2
rnd 1: work 5 single crochet in the 2nd chain from the hook, sl st. -5 sc
rnd 2: work 2sc in each stitch around, (10sc) sl st.
rnd 3: *work 1 sc in the next stitch, 2sc in next stitch, *repeat from* around, sl st. -15 sc
rnd 4: *work 1 sc in the next 2 stitches, 2sc in the next stitch, *repeat from *around, sl st. -20 sc
rnd 5: *work 1 sc in the next 3 stitches, 2sc in the next stitch, *repeat from *around, sl st. -25 sc
rnd 6: work 1 sc in the next 4 stitches, 2sc in the next stitch, *repeat from *around, sl st. fasten off. weave in the ends. -30 sc
Place the ears 2 inches apart on top of the hat.
Click Here for More Crochet Hat Patterns
Experimenting with various yarn colors adds a personal touch to your crocheted creation. Whether crafting for the winter season or creating a stylish accessory for any time of the year, this pattern caters to your preferences. Additionally, it’s an excellent opportunity to use up your favorite yarns, making the project enjoyable and a fantastic stash-busting endeavor.
Click Here for the Minnie Mouse Hat Pattern
A video tutorial is available for those seeking guidance beyond written instructions, making the learning process even more accessible. Utilize the provided stitch marker to keep track of your progress, ensuring a seamless transition between rows. Whether you’re a seasoned crocheter or a beginner, this pattern offers an excellent opportunity to hone your skills and create a charming accessory that suits the winter season or any occasion.
As you complete the final rows of your Mouse Ears Child Ear Flap Hat, revel in the satisfaction of crafting a perfect fit for the intended head size. Including various crochet techniques, from basic stitches to the artful use of the back loop, adds depth and character to your creation. This project is not just about creating another hat; it explores textures, colors, and the joy of handmade craftsmanship.
In conclusion, crocheting a Mouse Ears Child Ear Flap Hat is a fulfilling and accessible project for crocheters of all levels. This free crochet hat pattern combines simplicity with creativity, allowing one to explore different stitches and yarn weights. By following the tutorial and customizing the hat to your liking, you’ll have a charming accessory that makes for a great gift or a delightful addition to your crocheted hat collection. Happy crocheting!
To Find All My Crochet Jewel Patterns, Click Here

Click Here for My Ravelry Patterns


Crochet Hats for Beginners Book For Sale – Click Here

Crochet For Beginners Book for Sale – Click Here


You May Also Like
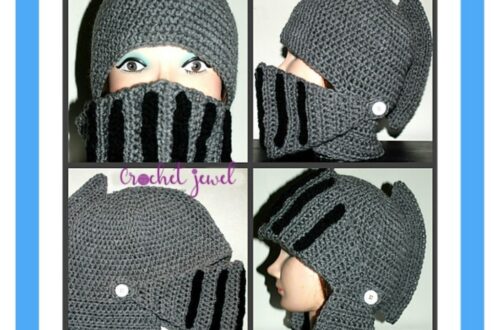
Learn to Crochet a Men’s and Boy Knight Hat: Step-by-Step Guide
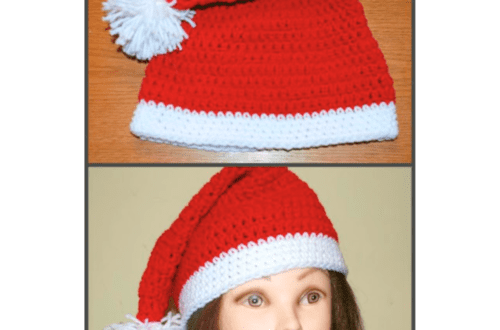
How to Crochet a Gorgeous Santa Hat Pattern