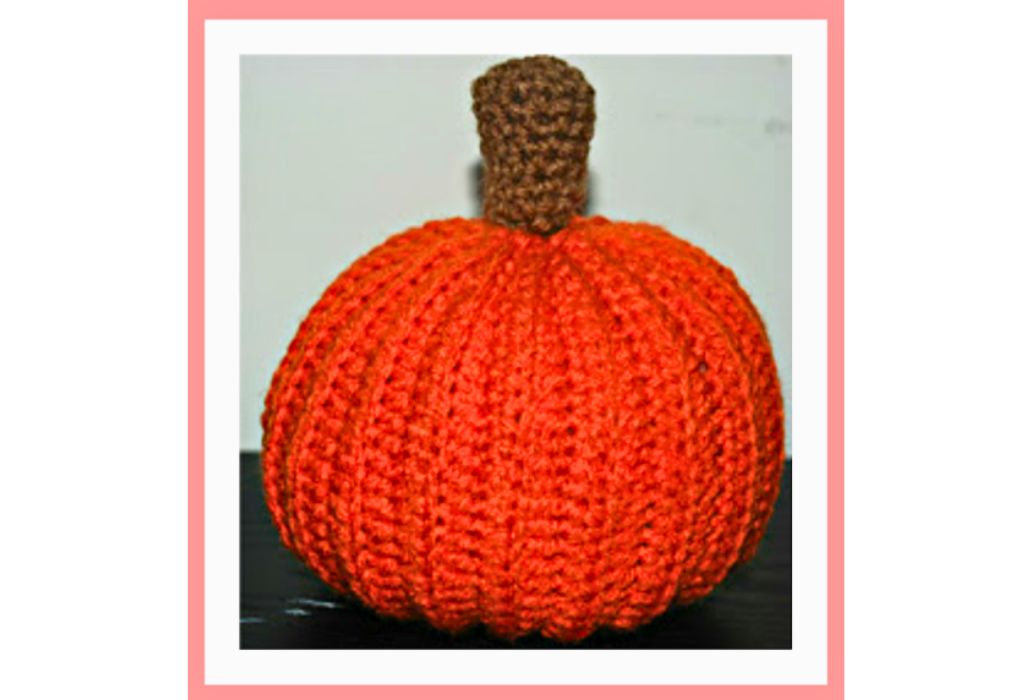
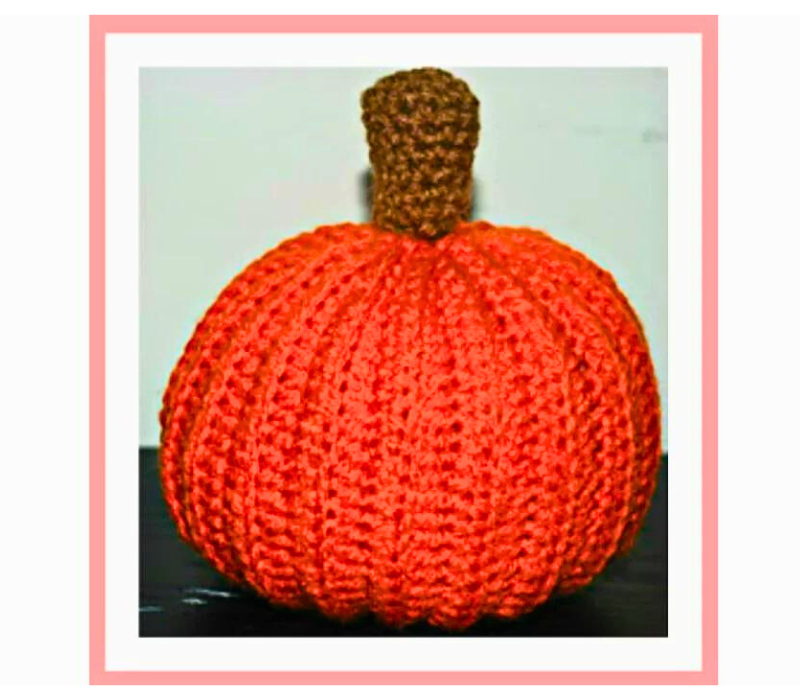
Crochet an Easy Pumpkin Pattern: Step-by-Step Tutorial
Crochet an Easy Pumpkin
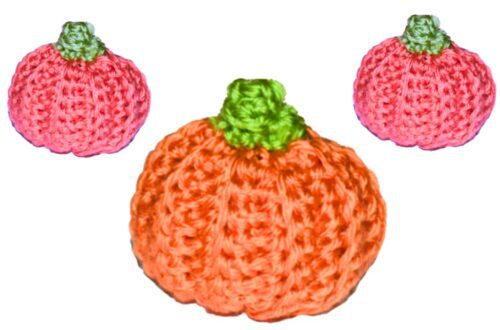
Creating crocheted pumpkins is fun and festive to add autumn charm to your home decor. Whether you’re a seasoned crocheter or just starting, this easy crochet pumpkin pattern is perfect for all skill levels. In this tutorial, we’ll guide you through the steps to make cute crochet pumpkins in different sizes, from small to large. You can use these adorable pumpkins as decorations. So, grab your favorite orange and green yarn, and let’s start!
You’ll find affiliate links within this post. If you decide to purchase through these links, I may earn a modest commission at no extra cost. Additionally, please review my privacy policy for more details.
✨ We hope you enjoyed these photos! If so, please consider sharing them on Pinterest by clicking the Pin Button on each image. Your support helps us connect with more people and spread creativity. Thank you so much! 💖
You’ll need basic crochet skills, such as the slip stitch (sl st) and single crochet (sc) stitches. We’ll use different yarn weights, including worsted, bulky, and super bulky yarn, to create pumpkins of various sizes. You can also experiment with varying yarn colors for a unique twist on crocheted pumpkin designs.
The pattern starts with a magic ring, which will form the base of your pumpkin. Then, work in rounds and use the back loop of your stitches to create a nice texture. As you crochet, be sure to repeat rows to build the cylinder shape of your pumpkin. Adjust the stitch count to make smaller or larger pumpkins to suit your preferences.
The pumpkin stem is created at the top of your pumpkin using a different yarn color, typically green. You can use a cinnamon stick as the stem for a cute finishing touch, securing it with a whip stitch.
Supplies:
Click the Links for Your Materials
– Crochet hook
– Tapestry needle
– Stitch marker
H hook
Impeccable orange and brown yarn
Yarn needle
Stuffing
Abbreviations:
ch=chain
sl st=slip stitch
sc=single crochet
dc=double crochet
hdc=half double crochet
sc2tog=single crochet 2 together decrease
Body of the pumpkin
H hook, and orange yarn
row 1. ch 27, sc in the 2nd ch from the hook, sc in the next 4 chains, hdc in the next 16 chains, sc in the next 5 chains, turn. -26 sts.
rows 2-40. working in the back loops only, ch 1, sc in the next 5 sts, hdc in the next 16 sts, sc in the next 5 sts, turn. -26 sts.
At the end of row 40, leave a foot 18-inch long length of yarn. Fasten off
Bottom and top of the Pumpkin: Make 2
H hook, Orange yarn, and Make a circle to cover the top and bottom.
ch 2, work 5 sc in the 2nd chain from the hook, sl st. – 5 sc
Work 2 sc in each stitch around, sl st -10 sc
Take the long length of yarn from the body of the pumpkin and, weave the yarn through the ends in and out across the bottom edge, and pull it together tight; you will have a small hole at the button, you will sew the small bottom circle to the bottom of the pumpkin.
Then, sew the side edges together. Stuff the pumpkin with stuffing or yarn until it’s complete. Make sure the edge of the back loop is facing outward.
Then, weave the ends of the top with a long piece of yarn and pull it together tight. You will have another small hole at the top of the pumpkin and sew the small top circle to close the top.
Stem:
H hook, Brown yarn
rnd 1. ch 2, work 5 sc in the 2nd chain from the hook, sl st. – 5 sc
rnd 2. Work 2 sc in each stitch around, sl st -10 sc
rnds 3-8. Sc in each sc around, sl st *Repeat 6 times
rnd 9. sc2tog decrease 4 times; stuff the stem with yarn or stuffing and then secure with a sl st to close the stem. Sew the stem at the top of the pumpkin.
How to Crochet For Beginners Playlist – Click Here
If you’re a visual learner, plenty of video and photo tutorials are available on various social media platforms and YouTube channels so that you can follow along easily.
Print the entry at the top of the page to print the pattern!
Click Here for Crochet Holiday Patterns
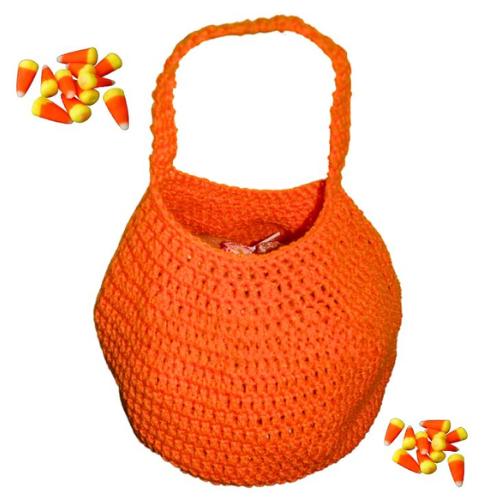
Click Here for the Crochet Pumpkin Bag Pattern
When creating these charming crocheted pumpkins, don’t forget to leave a long tail after each slip stitch (sl st) or single crochet (sc) to ensure you have enough yarn for weaving in ends and securing the pumpkin’s shape. You can easily find a free crochet pattern for adorable pumpkins in different sizes, from more minor to larger ones. The top of the pumpkin can be customized using a cinnamon stick as a stem, which you’ll attach with a whip stitch using a tapestry or yarn needle. Experiment with various yarn weights, from worsted to super bulky yarn, and explore different ways to achieve the perfect pumpkin shape. Share your creations on social media or your YouTube channel to inspire fellow crochet enthusiasts. Whether you are a beginner crocheter or a seasoned pro, these adorable pumpkins are a great way to showcase your skills and create cute little pumpkin masterpieces.
Crocheting pumpkins are a great way to enter the fall spirit and add a handmade charm to your home. You can make adorable pumpkins in different sizes, experiment with various yarn weights, and get creative with your designs. Whether you’re making these for yourself or to sell in your Etsy shop, they’re sure to bring a smile to your face and those who see them. Don’t forget to check for affiliate links in the pattern, and have fun creating your crocheted pumpkin decorations!
Crochet Pumpkin tutorial: This easy tutorial teaches you how to crochet a pumpkin in just a few steps
Get ready for the Fall by making this cute Pumpkin! This pumpkin pattern is perfect for the fall holidays and Halloween! Whether a beginner or an experienced crocheter, this tutorial will help you master this project effortlessly.
To Find All My Crochet Jewel Patterns, Click Here

Click Here for My Ravelry Patterns


Crochet Hats for Beginners Book For Sale – Click Here

Crochet For Beginners Book for Sale – Click Here


You May Also Like
Crochet a Fun Mini Pumpkin: Step-by-Step Tutorial