Step-by-Step Guide: Creating Magical Trees with the Puff Stitch
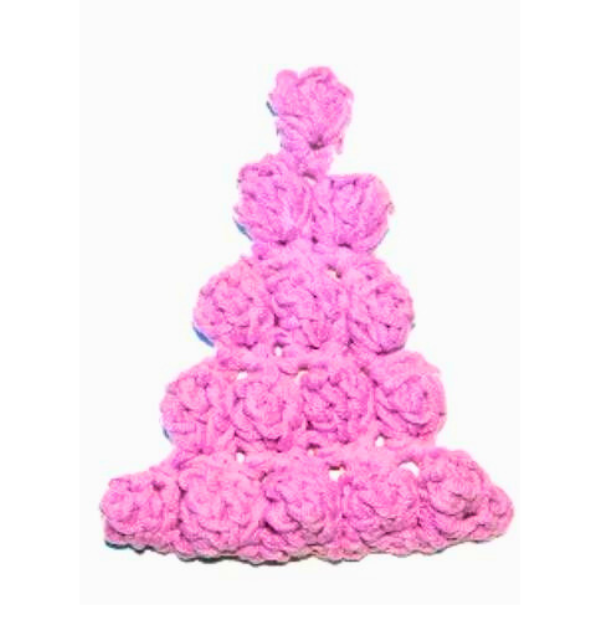
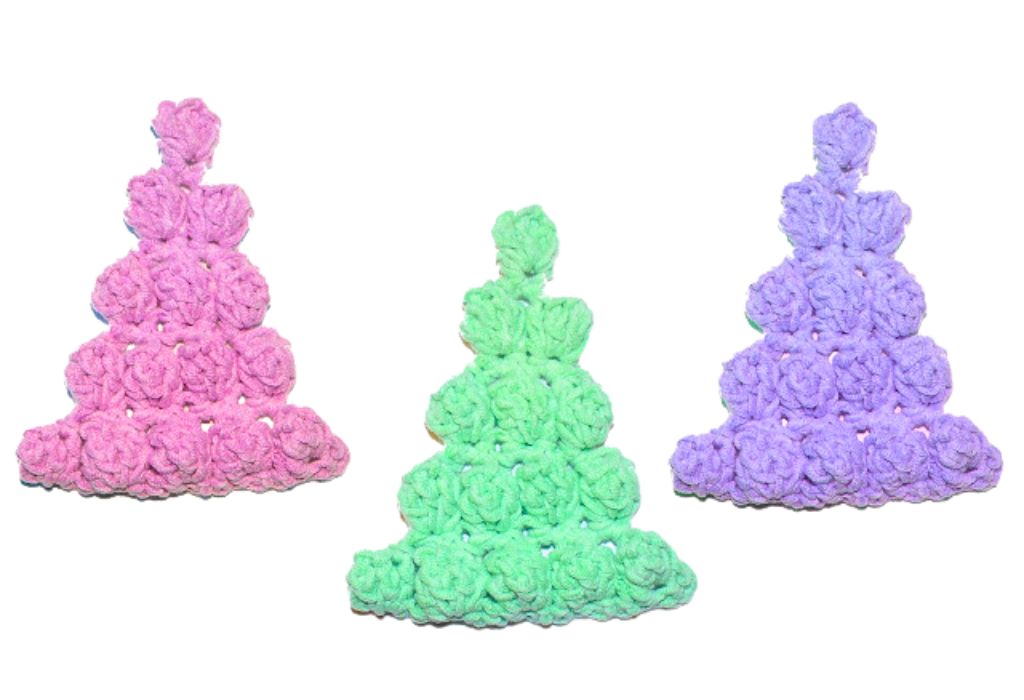
How to Crochet a Puff Stitch Tree
Crocheting your Christmas tree ornaments is a fantastic way to add a personal touch to your holiday decor. In this free crochet pattern, we’ll guide you through creating delightful puff stitch trees using basic stitches like single and double crochet. These little trees can be customized in different sizes and colors, making them a perfect scrap yarn project for the festive season. Whether you’re an experienced crocheter or a beginner, these step-by-step instructions and a video tutorial on our YouTube channel will ensure you have much fun crafting these unique ornaments.
This post contains affiliate links. If you purchase through these links, I may earn a modest commission at no extra cost. Please review my privacy policy for more details.
✨ We hope you enjoyed these photos! If so, please consider sharing them on Pinterest by clicking the Pin Button on each image. Your support helps us connect with more people and spread creativity. Thank you so much! 💖
**Materials You’ll Need:**
- Green worsted-weight yarn
- h hook
- Stitch marker
- Yarn needle
- Scissors
- Foam cones or wooden rounds (for flat crochet trees)
Get ready for the holidays by making this cute crochet Christmas tree pattern. I created this with a h hook and cotton yarn, but you can use any yarn and hook size. I uploaded a video if you need more help. In this How to Crochet Puff Stitch Tree Tutorial, we’ll learn how to make a super-easy crochet tree!
This crochet tree is a great way to add a bit of fun and interest to your crochet projects. It’s also a great way to teach beginners how to crochet. So check out this tutorial and learn how to make a crochet puff stitch tree!
How to Watch Videos in Slow Motion — if the video is too fast — Click Here!
Click the Links for Your Materials
*ch 2, skip two stitches, work 5 dc in the next stitch for a puff stitch, draw up your loop and take your hook in the first dc, and draw the loop through the first dc. *Repeat three more times, for total of 5 puff stitches, one last stitch will be unworked
Print the Entry on the top of the page to print the pattern!
Create a foundation chain by chaining the desired number of stitches for the size you want.
Work in continuous rounds in US terms, turning your work to the right side as needed.
Single crochet in the first chain to form the first stitch.
Work puff stitches, using double crochets, to add volume to your tree.
Continue working in a spiral, adding puff stitches and color changes.
Create chain spaces to form the tree base and make it stable.
Finish off by slip stitching to the last stitch of the row.
Add crochet ornaments, tiny stars, or Christmas baubles to your tree.
Consider crocheting tiny bean stitches to mimic a pinecone texture for a rustic touch.
These crochet puff stitch trees are easy to make and versatile. You can use them as festive Christmas tree ornaments or bauble covers, making them a unique addition to your holiday decor. Whether you hang them from a tree or use them to adorn gifts, they will become your favorite holiday decoration. You can find the free pattern and yarn recommendations in our Etsy shop, and don’t forget to check out our video tutorial for a visual guide. Enjoy creating your crochet Christmas tree patterns, and look forward to decorating your home with these charming little trees year after year.
Remember to have fun, experiment with colors, and share your creations with us. These crocheted pieces are perfect for a scrap yarn project and a delightful addition to your holiday festivities.
Click Here For More Christmas Patterns
Click Here for a Crochet Stocking Patterns
To Find All My Crochet Jewel Patterns, Click Here
Click Here for My Ravelry Patterns
Crochet Hats for Beginners Book For Sale — Click Here
Crochet For Beginners Book for Sale — Click Here


