How to Crochet an Adorable Giraffe Hat Pattern
How to Crochet a Giraffe Hat
Welcome to the world of crochet hats, where creativity meets warmth and style! In this crochet journey, we will explore the art of crafting a delightful Giraffe Hat. Whether you’re a seasoned crocheter or just starting, this easy crochet hat pattern promises a fun and rewarding project. With basic stitches like single crochet, slip stitch, and back loop, you’ll soon be on your way to creating a whimsical accessory perfect for the winter season.
You’ll find affiliate links within this post. If you decide to purchase through these links, I may earn a modest commission at no extra cost. Additionally, please review my privacy policy for more details.
Begin by selecting your favorite worsted-weight yarn, ensuring a cozy and comfortable fit. This free crochet hat pattern is suitable for various skill levels, making it an ideal project for beginners and seasoned crafters. Utilize a stitch marker to keep track as you seamlessly repeat rows and shape the hat from the foundation chain to the top. Including a video tutorial ensures that every step, from the initial slip stitch to the final stitch marker placement, is crystal clear.
✨ We hope you enjoyed these photos! If so, please consider sharing them on Pinterest by clicking the Pin Button on each image. Your support helps us connect with more people and spread creativity. Thank you so much! 💖
How to Watch Videos in Slow Motion — if the video is too fast!
Supplies:
Click the Links for Your Materials
All Colors of Yarn Click Here
- Crochet hook
- Tapestry needle
- Stitch marker
yellow, brown, light brown yarn
I Hook, G Hook, H Hook, Yarn needle
Abbreviations: dc=double crochet sc=single crochet sl st=slip stitch ch=chain, hdc=half double crochet, hdc2tog=half double crochet together sc2tog=single crochet 2 together (there are excellent YouTube videos for these stitches)
Half Double Crochet Hat
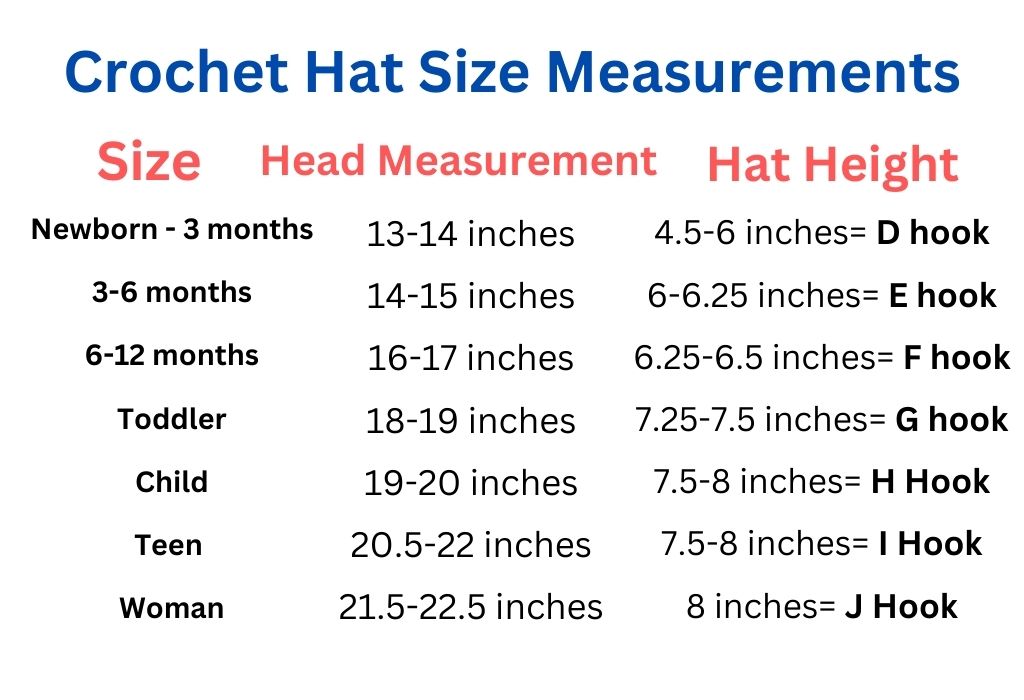
Instructions: Use the hook that is best for your hat size, as shown in the photo above. ch 4, sl st, to form a ring.
rnd 1. ch 2 (count as one hdc), work 9 hdc in the ring, sl st. (10 hdc)
rnd 2. ch 2 (counts as one hdc), hdc in the same stitch as the ch2, then work 2hdc in each stitch around, Slip Stitch (start to use a marker) (20 hdc)
rnd 3. *work hdc in the next stitch, 2hdc in the next stitch, *repeat around, continue around, no slip stitch or chain, (I would use a marker so you can keep track of your increased rounds) (30 hdc)
rnd 4. *work hdc in the next 2 stitches, 2hdc in the next stitch, *repeat around, continue around. (40 hdc)
rnd 5. *work hdc in the next 3 stitches, 2hdc in the next stitch, *repeat around, continue around. (50 hdc)
rnd 6. *work hdc in the next 4 stitches, 2 hdc in the next stitch, *repeat around, continue around. (60 hdc)
rnd 7. *work hdc in each stitch around,*repeat until you hat measures 6.5 inches long, (will be longer for a bigger size head, see above for sizes)
Ear flaps:
Make 2
H hook , use yellow yarn
For the first ear flap, continue from your hat. 2nd flap, fold hat in half and sl st in hdc directly across from the last hdc from the other ear flap. Follow the directions below for both ear flaps.
Row 7. ch 2. hdc2tog, hdc in the next 3, hdc2tog. hdc in the last st., turn ‑6 sts
Row 8. ch 2. hdc2tog, hdc in next 1, hdc2tog. hdc in the last st., turn. ‑4sts
Row 9. ch 2. hdc in each stitch across, pull through and fasten off. ‑4 stsThe braid from the center of the ear flap at the bottom, attach two colors of yarn, yellow and brown yarn, with a sl st in the center of the bottom of the ear flap and with an I hook, chain 30, and sl st it off and cut yarn.Trim: half double crochet in each stitch around with dark brown yarn, sl st. Fasten off. Weave in the ends.
Antlers:
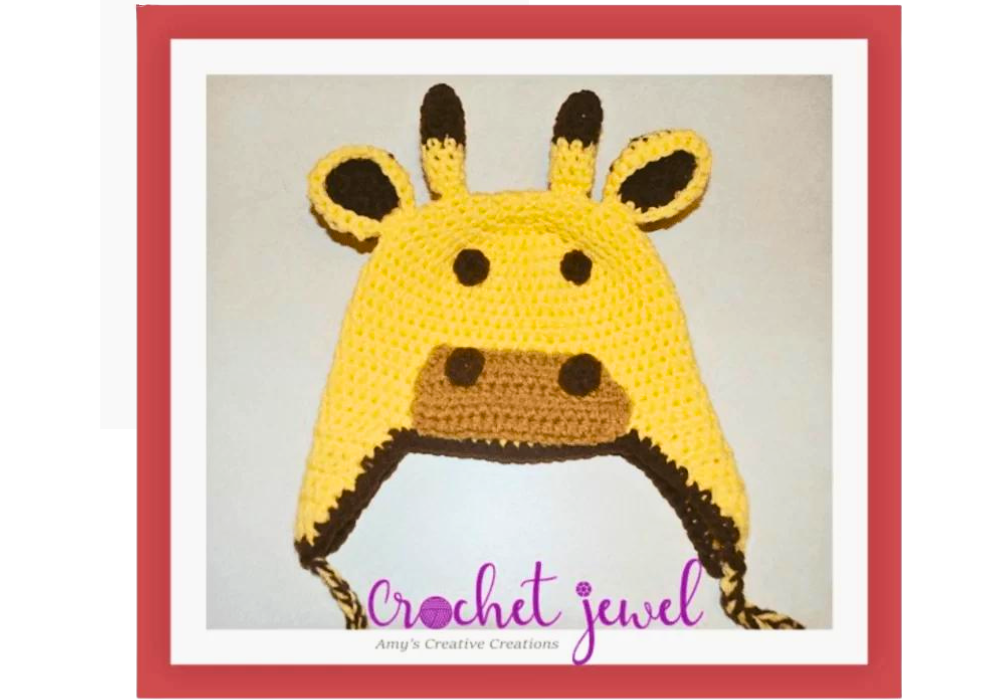
Make 2, I hook (if you want a smaller antler, use an H hook) yellow and brown yarn.
Start with Dark brown yarn ch 2, sc in the second chain from the hook, work 5 more sc in the double chain from the hook, sc around for each round until your antler reaches 1 inch.
Then switch to yellow yarn with a slip stitch and do the same as above until it reaches 1 inch, fasten off. Stuff the antlers with stuffing or yarn. Attach the antlers on top of the hat, about 2 inches apart.
Ears: Make 2,
I hook, yellow and brown yarn,
chain 7,
Row 1. with brown yarn, Sc in 2nd ch from hook and in each ch across – 6 sc. Turn each row.
Rows 2–4. Ch 1, sc in each sc.
Row 5. Ch 1, (sc2tog) sc in the next two stitches (sc2tog)- 4sc
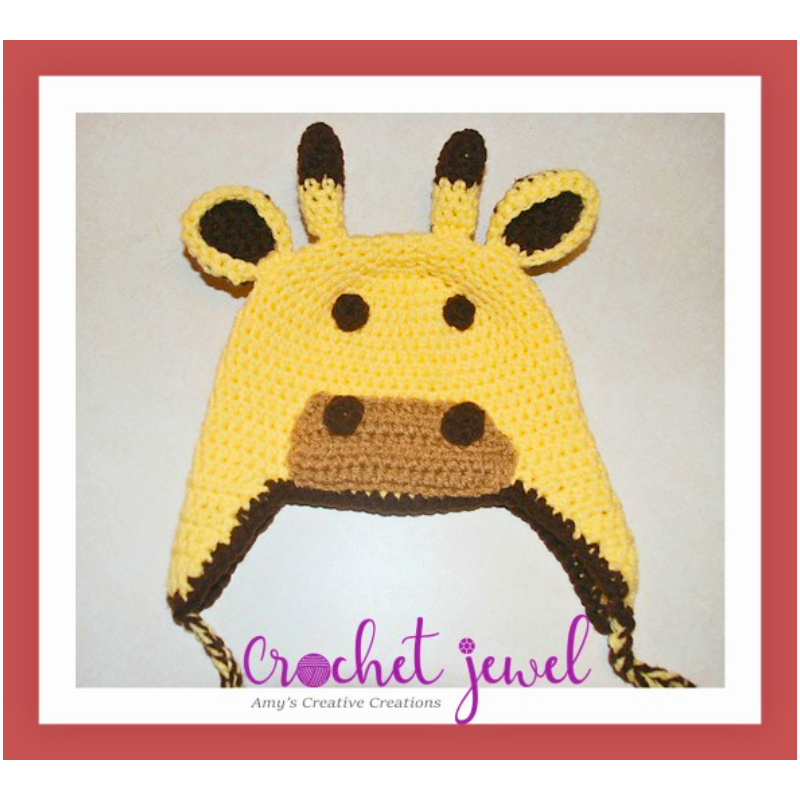
Row 6. Ch 1, sc2tog twice ‑2sc. row 7 (2sctog) ‑1sc. Fasten off. Then add yellow yarn, sc around the brown ear twice, then fasten off. Attach the ears on the outside of the antlers as seen in the picture above.
Muzzle:
H hook
ch 18 , hdc (half double crochet) in the 2nd chain from the hook and across. turn ‑17 sts
fasten off.
Eyes: Make 2, G hook, dark brown yarn, chain 2, sc in 2nd chain from the hook, work 5 more sc in the second chain from the hook, slip stitch, fasten off, place the eyes about 2 inches apart above the muzzle.
Click Here for More Crochet Hat Patterns
Experiment with different yarn weights, from bulky to super bulky, to create unique variations like slouchy hats, messy bun hats, or chunky beanies. Adjust the hat height according to your preferences and explore the possibilities of adding faux fur pom poms or yarn pom poms for that extra flair. The Giraffe Hat is not just an easy project; it’s a canvas for your imagination.
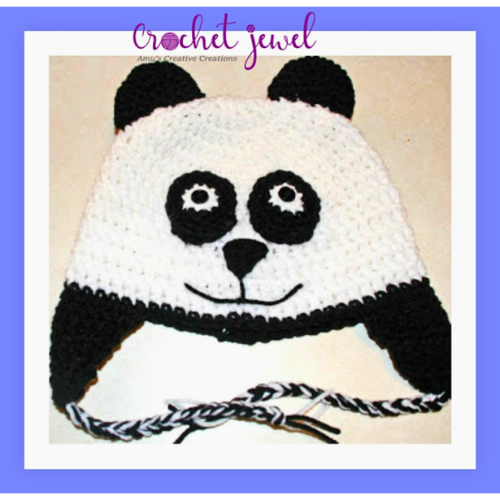
Click Here for the Panda Hat Pattern
Don’t forget to join our social media community, where fellow crocheters share their creations, offer tips, and discuss the latest trends in hat-making. This pattern, accompanied by a crochet hat size chart, ensures a perfect fit for adults of all head sizes, from small to medium. And, for those who love a challenge, there’s an option to create a slouchy or snug-fitting beanie — the choice is yours!
Crafting crochet hats is a delightful and versatile activity for makers of all skill levels. This easy crochet hat pattern, designed with various basic crochet stitches like single crochet, half double crochet, and slip stitch in the back loop, ensures a stylish yet achievable project. The video tutorial guides beginners through each step, from the foundation row to the top of the hat. Worsted weight yarn provides the ideal balance between warmth and flexibility, while a stitch marker helps maintain the rhythm of the repeat rows. This free crochet pattern, perfect for winter, allows for customization based on head size and personal style, whether a slouchy hat with a faux fur pom or a classic beanie with a yarn pom pom. Join our social media community to share your finished hats, making them great gifts and inspiring others in the crochet world.
In conclusion, crochet hats are more than just accessories; they are a statement of creativity and a source of warmth in the cold weather. Whether you’re a new crocheter or a seasoned pro, this Giraffe Hat pattern offers the perfect blend of simplicity and style. Grab your yarn, crochet hook, and a cup of your favorite hot beverage — it’s time to embark on a journey of happy crocheting! And don’t forget to share your finished hats on social media; they make great gifts and inspire others in the crochet community. Happy crafting!
To Find All My Crochet Jewel Patterns, Click Here
Click Here for My Ravelry Patterns


