Crochet Garfield Inspired Hat: A Fun and Easy Project
How to Crochet a Garfield Hat
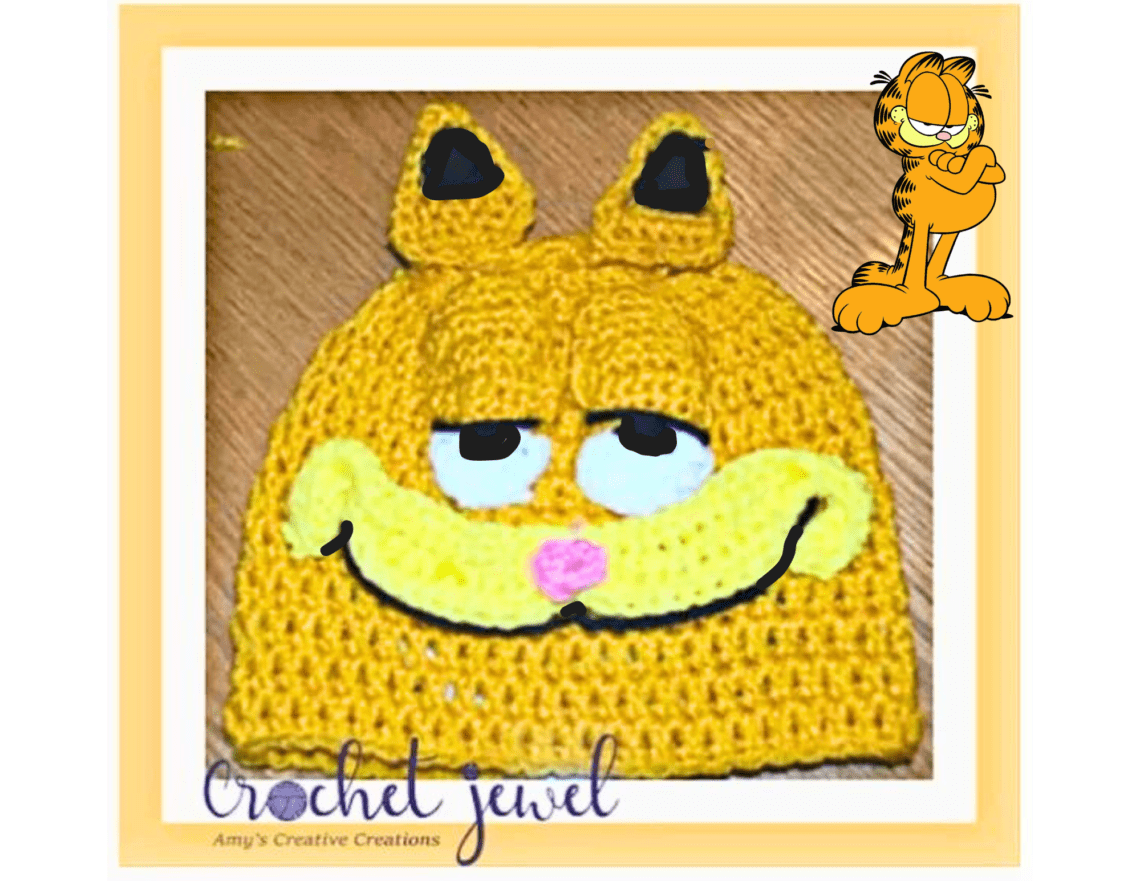
Are you a fan of the iconic lasagna-loving cat Garfield? If you’ve ever dreamed of bringing a touch of his charm into your wardrobe, you’re in luck! Today, we’re thrilled to introduce our latest crochet creation: the Garfield Hat! Whether you’re crafting for yourself, a friend, or a little one who adores this classic character, our easy-to-follow pattern will have you stitching up a smile in no time. So, grab your hooks and get ready to crochet your Garfield-inspired hat that’s as cozy as cute!
In this guide, we’ll explore how to crochet a Garfield hat step by step, from selecting the perfect yarn colors to mastering the essential stitches and techniques needed to create this adorable accessory. Whether you’re a seasoned crocheter or a beginner looking for a fun and rewarding project, this pattern is designed to be accessible and enjoyable for crafters of all skill levels.
Crocheting a Garfield that allows you to combine your love for crochet with your fondness for the mischievous and lovable cartoon character. With his signature orange fur, black stripes, and cheeky expression, Garfield is a timeless favorite that brings joy to fans of all ages.
This post contains affiliate links. If you purchase through these links, I may earn a modest commission at no extra cost. Please review my privacy policy for more details.
Click the Social Icons to Stay Connected
![]()
![]()
![]()
![]()

✨ We hope you enjoyed these photos! If so, please consider sharing them on Pinterest by clicking the Pin Button on each image. Your support helps us connect with more people and spread creativity. Thank you so much! 💖

To create the perfect Garfield hat, you’ll need to choose the suitable yarn. For this pattern, we recommend using worsted weight yarn for a cozy yet manageable feel or bulky weight yarn if you prefer a chunkier look. You can even use super bulky yarn for a warm and quick project. Feel free to experiment with different yarn weights to achieve your desired texture.
Crochet Hook Size:
The size H crochet hook is perfect for this project. It provides the right balance between a tight stitch and a comfortable feel. It’s a great size for both beginners and experienced crocheters.
How to Watch Videos in Slow Motion – if the video is too fast – Click Here!

Click the Links for Your Materials
– Crochet hook
– Tapestry needle
– Stitch marker
– Polyfill stuffing
sc2tog=single crochet 2 together
hdc2tog=half double crochet 2 together
sc2tog=single crochet 2 together
hdc2tog=half double crochet 2 together
Sc around the edge of the hat with white yarn
Eyes:
White and Orange yarn
H and G hook
Start with Orange yarn with H hook, Make 2
Row 1. chain 10, sc in the 2nd chain form the hook and each stitch across, (9sts)
Rows 2-3. *ch 1, sc in each stitch across, turn *Repeat, (9sts)
Row 4. ch 1, 2sctog decrease, sc in each stitch across, 2sctog, turn, (7sts)
Rows 5-6. *ch 1, sc in each stitch across, turn, *Repeat, (7sts)
Row 7. ch 1, 2sctog decrease, sc in each stitch across, 2sctog, turn (5sts) fasten off, when you are ready to sew this part of the eye to the hat, stuff it lightly with yarn.The Bottom of the eye, White yarn, with a G hook, Make 2
ch 2, work 7dc in the 2nd chain from the hook. ch 1, turn, (7dc)
Round 2. work 2dc in the first dc, dc in each stitch around, 2dc in the last dc, (9dc) fasten off. Take the beginning chain of the orange lid of the eye, and the beginning chain of the white part of the eye and slip stitch with orange yarn, and continue by sewing those two parts of the eyes together.
Then with black yarn sew a black pupil by making a 3 small black lines in the center of the white part of the eye, about 1/2 inch. Then sew a black line across the eye separating the orange part from the white part of the eye, seen above in the picture. Place the eyes right below the ears. about 1/2 inch apart.Ears: Make 2
H hook, Orange yarn
Row 1. chain 9, sc in the 2nd chain from the hook and each stitch across, (8sc), turn
Row 2. ch 1, sc in each stitch across, turn (8sc)
Row 3. ch 1, 2sctog decrease, sc in each stitch across, 2sctog decrease, (6sc), turn
Rows 4-5. *ch 1, sc in each stitch across, (6sc), turn *Repeat
Row 6. ch 1, 2sctog decrease, sc in each stitch across, 2sctog decrease, (4sc), turn
Row 7. ch 1, 2sctog decrease, sc in each stitch across, 2sctog decrease, (2sc), turn
Row 8. single crochet around the entire edge of each ear, fasten off.With black yarn, sew some horizontal lines across the top part of the ears, about 5 times, not to tight, make it a little loose. fasten off. Place the ears above the eyes and very close to the eye, not on top of the hat, actually about 1 or so below the top.
Rows 2-3. *slip stitch in the next 10 hdc, hdc in the next 20 hdc, slip stitch in the next 10 hdc, turn *Repeat (40 stitches) With yarn, tie the center of the mouth together, and place the nose on the center. Sew the mouth below the eyes, bring up the center of the mouth close to the eyes, and scrunch of the sides of the mouth by sewing them together and sewing the sides upward to the eyes. like in the picture. With black yarn, sew in a black line at the bottom of the smile. Sew the yellow mouth below the eyes, and make the sides curl upward.
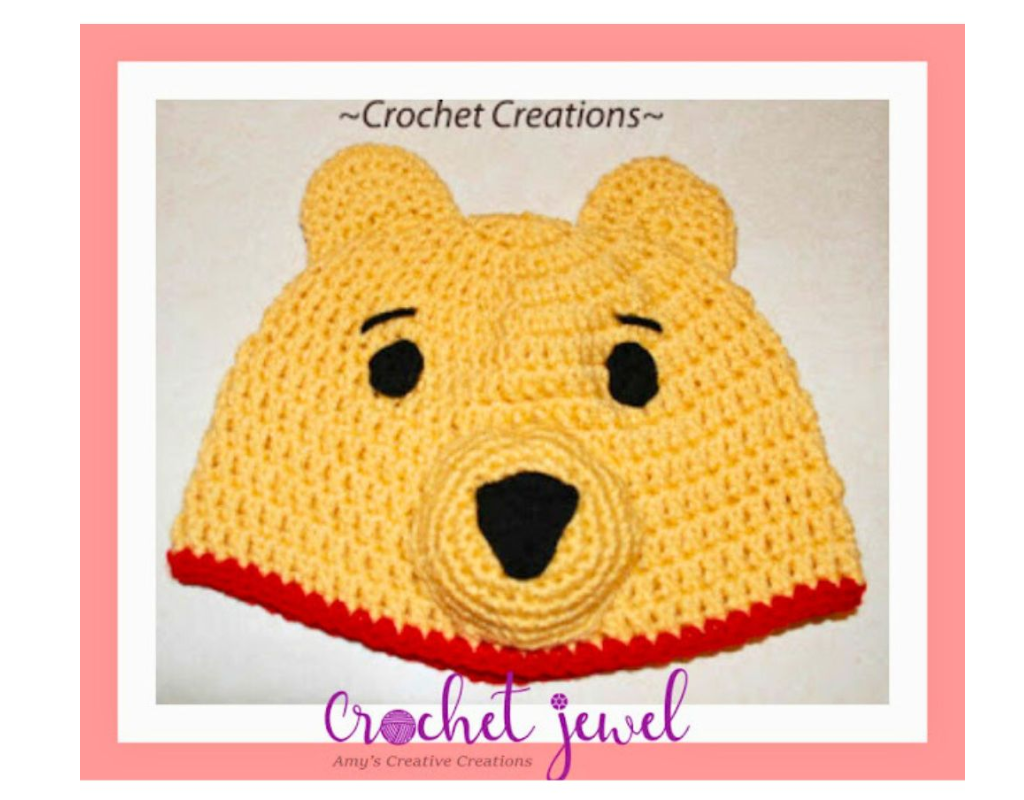
Click Here for the Crochet Winnie the Pooh Pattern
Basic Crochet Stitches:
This pattern uses basic crochet stitches, including single crochet (sc), slip stitch (sl st), and double crochet (dc). These stitches are easy to learn and create a lovely texture for your Garfield hat.
Hat Height and Size:
The pattern is designed for an adult medium head size, but it can easily be adjusted for different head sizes. The hat height can be customized to your liking, whether you prefer a slouchy beanie or a snug-fitting beanie hat. We’ll provide a crochet hat size chart to help you achieve the perfect fit.
Faux Fur Pom Pom:
Add a faux fur pom to your Garfield hat for an extra style. It’s a great way to personalize and make your creation stand out.
Video Tutorial:
If you’re a visual learner, plenty of video tutorials are available on social media and in crochet groups. These can be a helpful resource to complement the written instructions.
In conclusion, crocheting a Garfield hat is a great project during the cold weather. It’s an easy crochet hat pattern that even new crocheters can enjoy. By choosing your favorite yarn and hook size and adjusting the hat height, you can create the perfect hat for yourself or as a thoughtful gift for someone special. Don’t forget to share your finished hat on social media and in crochet groups – it’s a great way to connect with other crocheters and showcase your skills. Happy crocheting, and may your Garfield hat keep you warm and stylish all winter long!

I absolutely love Amazon for its unbeatable Crochet deals and amazing selection!—click here to discover your next great deal!
Amazon Prime: Unlock fast, free shipping, exclusive Prime Video shows, and more with Amazon Prime! Click here to start your 30-day free trial today!
Audible Plus: Access thousands of audiobooks and podcasts with Audible Plus! Click here for Audible Plus on Amazon!
Kindle: Discover millions of books with Kindle—read anywhere, anytime! Click here to buy on Amazon!
Amazon Prime Video: Enjoy unlimited streaming of top movies and TV shows with Amazon Prime Video! Click here to start watching!
Amazon Music: Stream millions of songs and playlists with Amazon Music! Click here to start listening!
To Find All My Crochet Jewel Patterns, Click Here

Click Here for My Ravelry Patterns


Crochet Hats for Beginners Book For Sale – Click Here

Crochet For Beginners Book for Sale – Click Here


2 Comments
Lorna
Why does it say pattern is for adult medium size hat but instructions are for a 4 year old?I don’t see any size adjustments for adult size? Please let me know
Amy Lehman
There is a photo in this post for the hook size for the age. I did it for a 4 year old, but you just need to adjust the hook size for the size you need, which is in the photo.