How to Crochet a Fun Horse Ear flap Hat Pattern
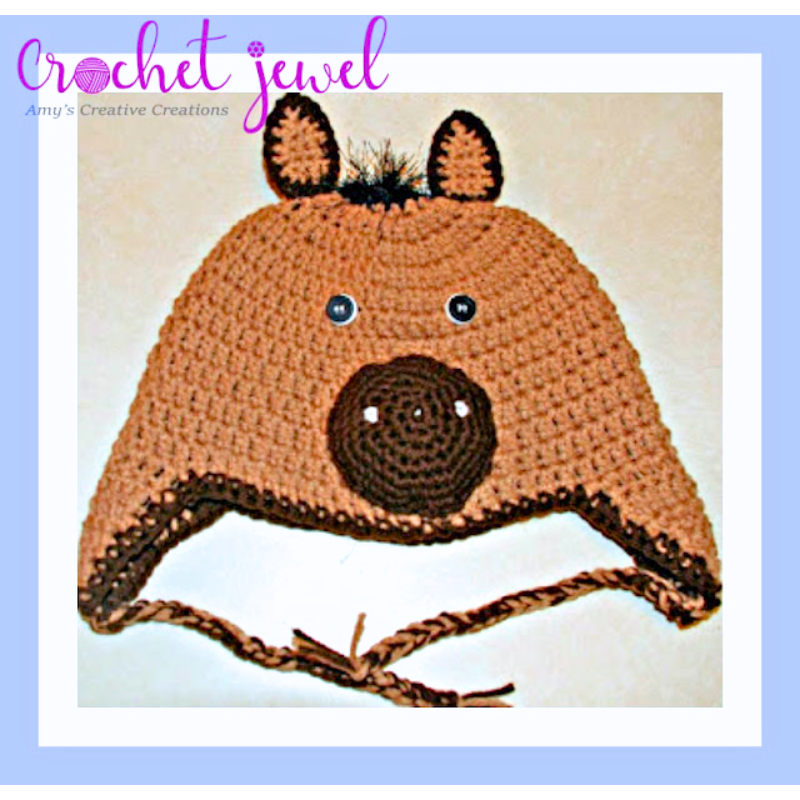
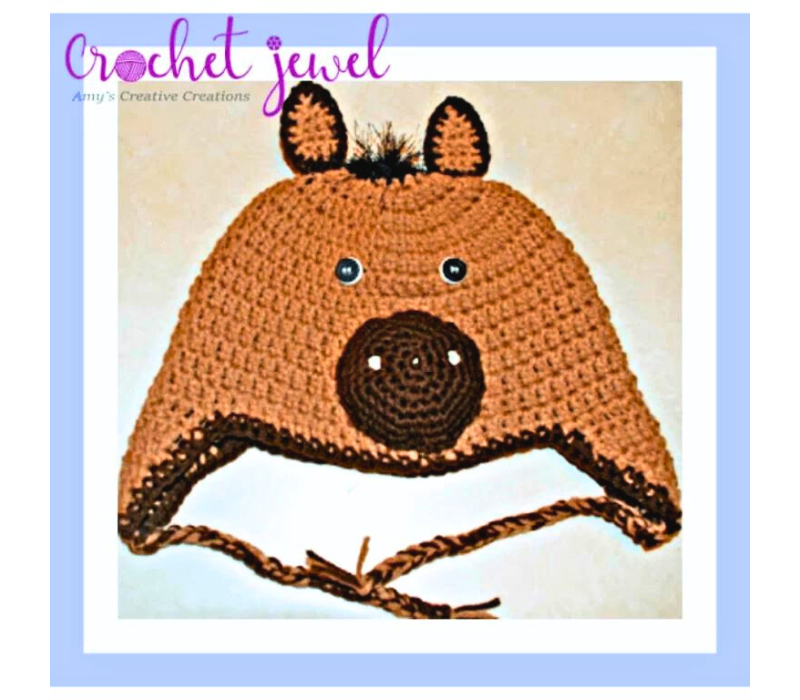
How to Crochet a Fun Horse Earflap Hat
Crocheting a horse ear flap hat is a delightful and rewarding project combining creativity and functionality. In this tutorial, we will guide you through creating a cozy and stylish hat for the winter season. Whether you’re an experienced crocheter or a beginner looking for an easy project, this pattern offers versatility and a touch of equestrian charm.
This easy crochet hat pattern employs basic stitches, making it accessible to crocheters of various skill levels. The back loop and single crochet techniques enhance the hat’s texture, providing a unique and visually appealing design. The slip stitch (sl st) and half double crochet stitches contribute to the hat’s structure and warmth.
You’ll find affiliate links within this post. If you decide to purchase through these links, I may earn a modest commission at no extra cost. Additionally, please review my privacy policy for more details.
✨ We hope you enjoyed these photos! If so, please consider sharing them on Pinterest by clicking the Pin Button on each image. Your support helps us connect with more people and spread creativity. Thank you so much! 💖
To begin, create a foundation row with a long tail, ensuring a comfortable fit for the head size. The worsted-weight yarn adds substance to the hat, making it suitable for cold weather. Incorporating a stitch marker helps keep track of repeats and maintains uniformity throughout the project. A video tutorial is also available to guide you through each step, making the process even more accessible for new crocheters.
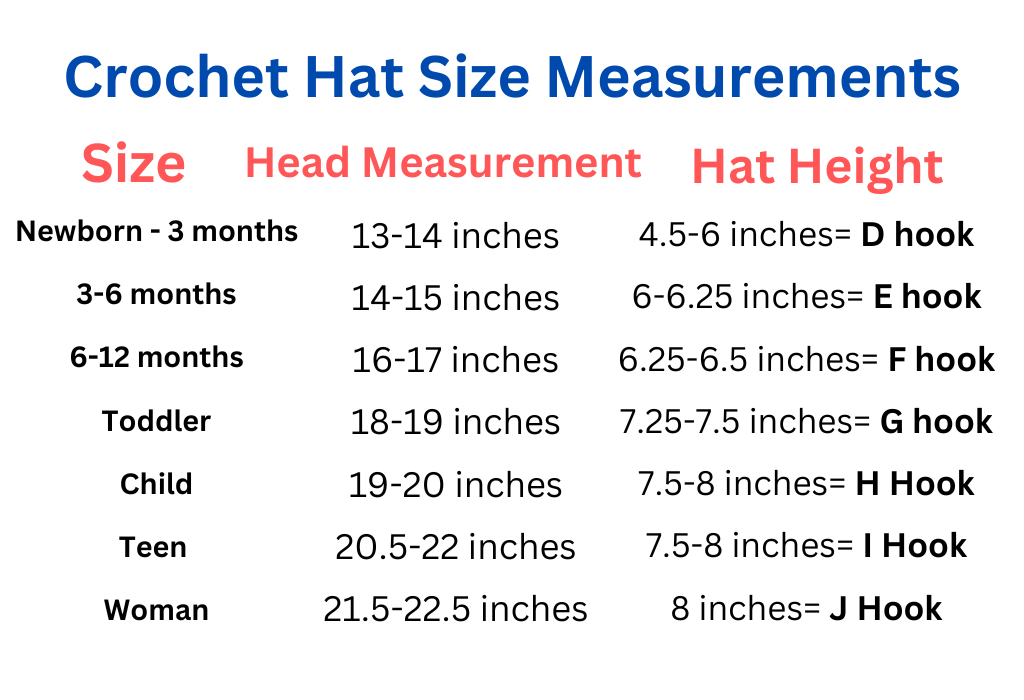
I made this for a 5-year-old; see the above sizes.
dc=double crochet sc=single crochet sl st=slip stitch ch=chain, sc2tog=single crochet 2 together, I made this for my 4-year-old, measures 19-20 inches around and length= 7 inches long.
Click the Links for Your Materials
– Crochet hook
– Tapestry needle
– Stitch marker
Brown yarn
H hook,
ch 2, sc from the 2nd chain from the hook 6 times, sl st -6 sc
rnd 1. sc in the same stitch, 2sc in each stitch around, use a marker to keep track of your rounds -12 sc
rnd 2. *sc in the next stitch, 2sc in the next stitch, *repeat, -18 sc
rnd 3. *sc in the next 2 stitches, 2sc in the next stitch, *repeat, -24 sc
rnd 4. *sc in the next 3 stitches, 2sc in the next stitch, *repeat, -30 sc
rnd 5. *sc in the next 4 stitches, 2sc in the next stitch, *repeat, fasten off -36 sc
Click Here for More Crochet Hat Patterns
Experiment with different yarn weights, such as bulky or super bulky, to customize the hat for specific preferences. Add a faux fur pom pom or a yarn pom pom for a playful touch. The versatility of this pattern extends to creating variations like slouchy hats or messy bun hats, making it an ideal choice for crocheters seeking different styles.
Click Here for the Penguin Hat Pattern
For those interested in social media sharing or joining a crochet community, the pattern encourages participation and sharing of finished projects. Whether it’s a gift for a loved one or a personal accessory, this horse ear flap hat is a great project that can be easily adapted to suit individual tastes.
In conclusion, this free crochet pattern provides not only a practical accessory for the winter season but also an enjoyable and customizable project for crochet enthusiasts. Embrace the joy of crocheting and create a horse ear flap hat that combines style, warmth, and your unique creative flair. Happy crocheting!
To Find All My Crochet Jewel Patterns, Click Here

Click Here for My Ravelry Patterns


Crochet Hats for Beginners Book For Sale – Click Here

Crochet For Beginners Book for Sale – Click Here


You May Also Like
How to Crochet an Adorable Elmo Inspired Hat: Free Pattern and Tutorial
How to Crochet a Gorgeous Santa Hat Pattern