Crochet a Fun Angry Bird Inspired Hat: Step-by-Step Guide
How to Crochet an Angry Bird Hat
Creating a crochet Angry Bird hat can be fun and exciting for crocheters of all skill levels. In this guide, we will walk you through making this adorable hat using basic crochet stitches such as single, slip, and more. Whether you’re a beginner or an experienced crocheter, you can easily craft this hat for winter. We’ve included a free pattern and even a video tutorial to help you along the way.
This post contains affiliate links. If you purchase through these links, I may earn a modest commission at no extra cost. Please review my privacy policy for more details.
To get started on this easy crochet hat pattern, you’ll need some basic materials such as worsted weight yarn in the colors of your choice, a size H crochet hook, and a tapestry needle. You can also add a fun faux fur pom pom for extra flair.
✨ We hope you enjoyed these photos! If so, please consider sharing them on Pinterest by clicking the Pin Button on each image. Your support helps us connect with more people and spread creativity. Thank you so much! 💖

Supplies:
Click the Links for Your Materials
– Crochet hook
– Tapestry needle
– Stitch marker
H hook
Red, white, black, and orange Red Heart yarn
Begin by creating a foundation chain and working in the back loop of each stitch to give your hat a unique texture. Throughout the project, use a stitch marker to keep track of your rounds and ensure a perfect fit.
Instructions: h hook, Red and brown yarn for the body. Start with Red yarn,
rnd 1: Work 11 dc in a Magic Circle, sl st on top of the chain 3. -11 dc
rnds 6-desired length (lengths are listed above), Ch 3, (Counts as first Dc), dc in each dc around, sl st to join. -55 dc, Repeat this until your hat reaches 7 inches or for your desired size and length. Fasten off, (if this is a smaller size the length will be shorter; look above for sizes and what hook to use.)
(if this is a smaller size the length will be shorter; look above for sizes and what hook to use.)
Trim, Hdc twice around with brown yarn.
rnd 3. *work 1 sc in the next stitch, 2sc in the next stitch, *repeat. (15 sts)
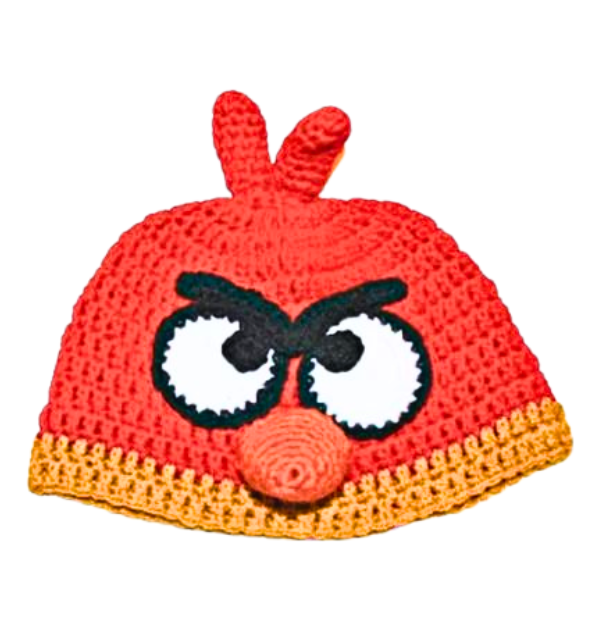
Place the pupils in the corner of the eyes, going inward, so it looks angry, as seen in the picture above.
Attach the two headpieces on top of the hat side by side, but have one piece slightly in front of the other.
Print the entry at the top of the page to print the pattern!
Click Here for More Crochet Hat Patterns
With our free crochet hat pattern, you can customize the hat according to your head size. It’s a great project for making cozy winter wear and can even be adjusted to create slouchy or messy bun hats, perfect for cold weather. Feel free to experiment with different yarn weights and colors to make your hat.
Don’t forget to check our crochet hat size chart for reference and gauge swatch to achieve the perfect fit. For those new to crocheting, this project is ideal for building your skills and confidence.
In the world of crochet hats, finding the perfect pattern to match your skill level is a breeze, whether you’re a beginner or a seasoned crocheter. The secret to success lies in using basic crochet stitches like single crochet and slip stitch, with the option to add more advanced techniques like half double crochet and double crochet stitches for a unique touch. While creating your hat, make sure to mark your stitches with a stitch marker, and don’t forget to work in the back loop for a fantastic textured effect. With a free crochet pattern and video tutorials readily available, crafting the perfect crochet hat is easy and enjoyable. Whether it’s a slouchy hat, a cozy beanie, or even a messy bun hat, you can tailor it to your taste, ensuring a snug fit during winter. Using different yarn weights, colors, and faux fur pom poms, you can also make your project stand out. It’s not just a practical endeavor; crocheting hats can be a great project for friends and family to tackle and make great gifts. So grab your favorite yarns and start on an easy crochet hat pattern that suits your style and skill level. Happy crocheting!
In conclusion, crocheting an Angry Bird hat is creative and rewarding. With our detailed instructions, free crochet pattern, and video tutorial, you can make a hat that keeps you warm during winter and creates a unique and personalized fashion statement. Whether you’re an experienced crocheter or just starting, this easy crochet hat pattern is an excellent choice for a fun and practical project. So, grab your favorite yarns and crochet hook, and stitch your way to a crocheted beanie that will turn heads and keep you cozy all season long. Happy crocheting!
To Find All My Crochet Jewel Patterns, Click Here

Click Here for My Ravelry Patterns


Crochet Hats for Beginners Book For Sale – Click Here

Crochet For Beginners Book for Sale – Click Here


You May Also Like
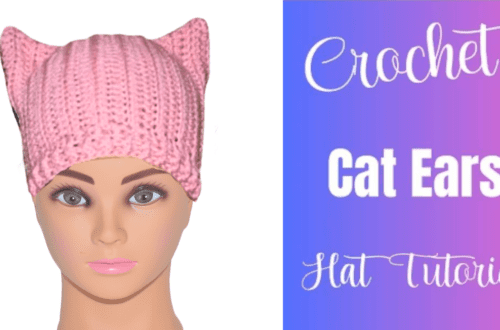
Crochet a Kitty Hat with Cat Ears: A Step-by-Step Guide
Crochet a Cute Fox Hat: Step-by-Step Guide